Quick Answer: Yes, chives will grow in water — and they’re one of the easiest herbs to start this way. A simple glass of water on a sunny windowsill works for short-term propagation, while a proper hydroponic setup delivers continuous harvests for months. Either way, roots typically appear within 7–14 days, and the plants regrow every time you cut them.
If you’ve ever wondered whether chives grow in water, the answer is a confident yes. Allium schoenoprasum naturally thrives in moist, nutrient-rich conditions, which makes the transition to water-based growing surprisingly smooth. Whether you’re dropping a store-bought bunch into a glass on your counter or running a Kratky jar under a grow light, chives are forgiving, fast, and rewarding.
Will Chives Grow in Water? Two Approaches Worth Knowing
Water Propagation vs. Full Hydroponic Growing
These are genuinely different methods, and it’s worth knowing which one you’re signing up for before you start.
Water propagation is the windowsill approach. Place chive cuttings or a store-bought bunch in a glass of plain water, set it near a sunny window, and roots develop within a week or two. It’s free, it works, and it’s a great entry point. The limitation is that plain water contains no nutrients, so growth stalls after the plant exhausts whatever reserves it brought with it.
Full hydroponic growing replaces soil with a balanced nutrient solution. Systems like Kratky or Deep Water Culture (DWC) keep chive roots in that solution continuously, supporting productive harvests for months — sometimes years — without ever touching a bag of potting mix.
Why Chives Work So Well in Water
Chives are perennial plants that naturally prefer consistently moist soil. They’re light feeders compared to fruiting crops, so they don’t demand precision equipment or aggressive nutrient schedules. Their real advantage is the cut-and-come-again growth habit: harvest the leaves, and the plant responds by pushing back denser and more productive than before. In a full hydroponic setup, first harvest typically comes 3–4 weeks after transplant.
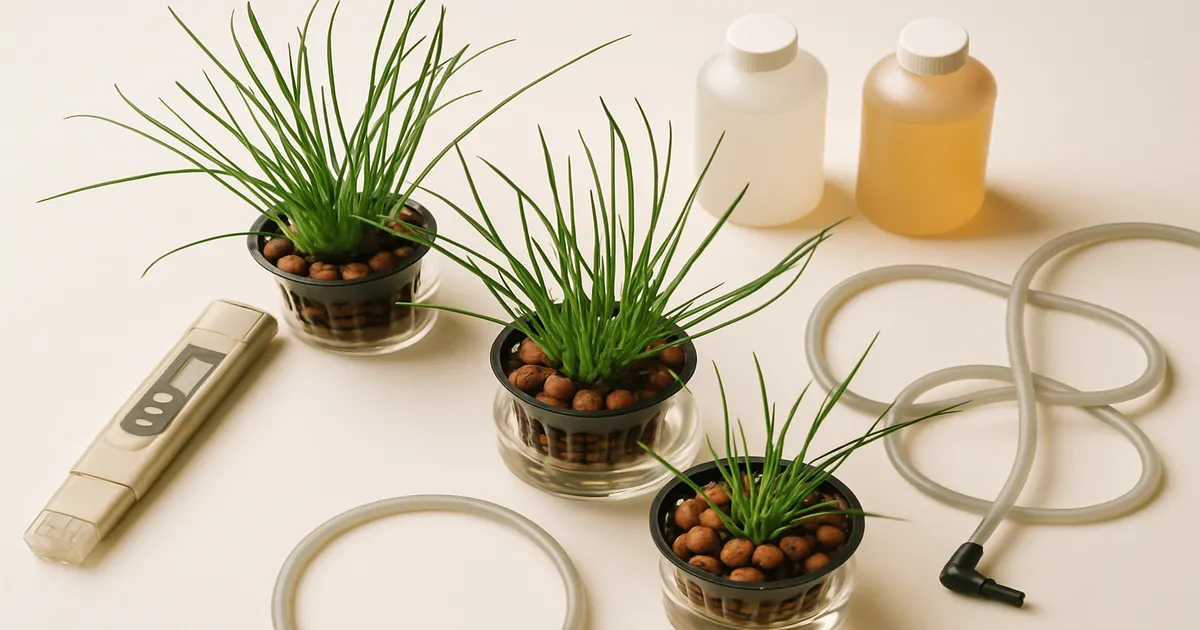
Best Systems for Growing Chives in Water
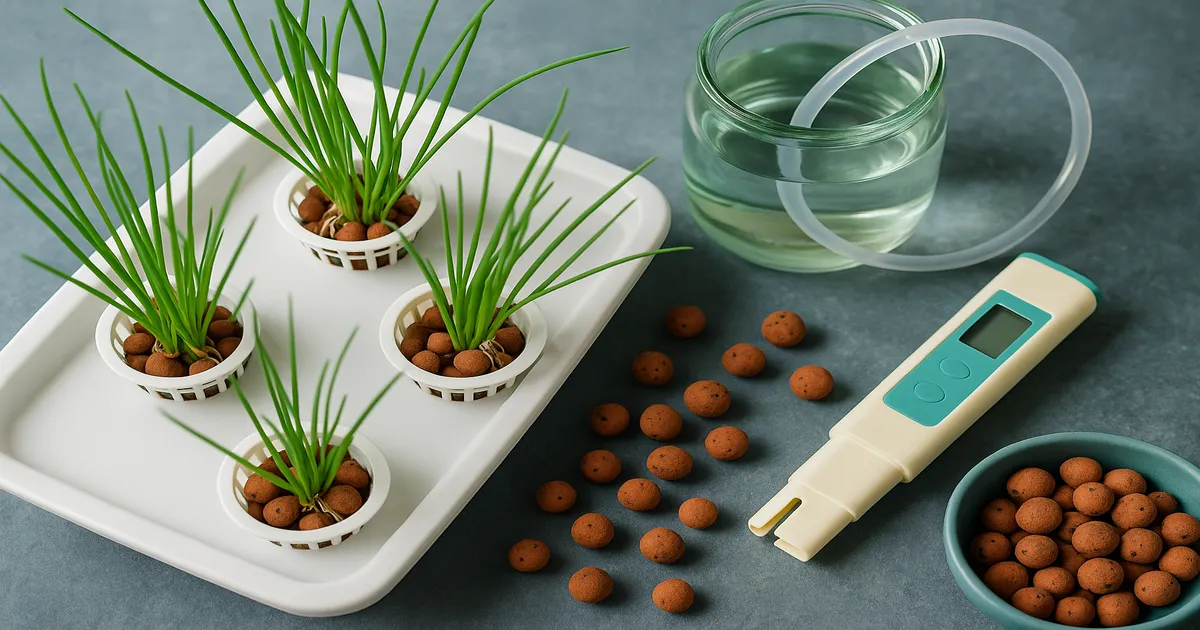
Kratky Method: Best Passive Option for Beginners
The Kratky method is as simple as hydroponics gets. Fill a reservoir with nutrient solution, suspend a net pot above it, and let the roots grow down into the liquid as the water level drops. No pump, no timer, no electricity required. For chives specifically, this passive approach is nearly perfect — they’re light feeders, they don’t need aggressive oxygenation, and the whole setup fits on a shelf or countertop.
A 1-gallon opaque container with a 2-inch net pot works well for a small cluster of chives. Use hydroton (clay pebbles) or rockwool as your growing medium, set pH to 6.0–6.5, and you’re ready to go.
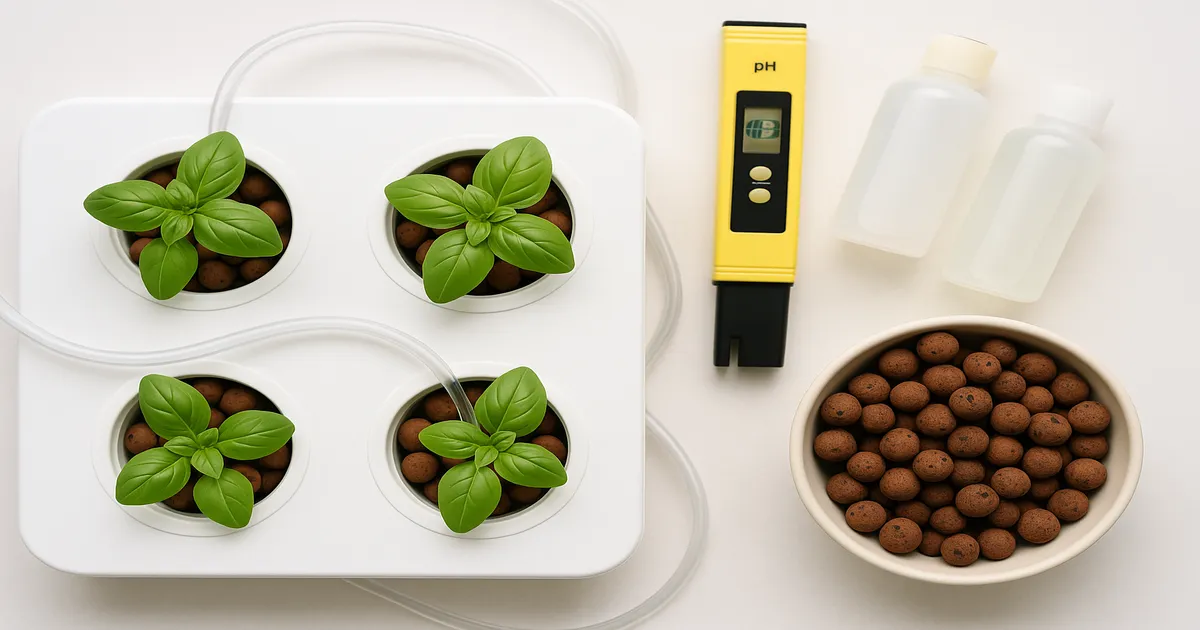
Deep Water Culture (DWC): Fastest Growth at Home
DWC adds an air pump and airstone to keep the nutrient solution oxygenated. That extra dissolved oxygen accelerates root development and speeds up growth noticeably compared to Kratky. If you want the most productive chive harvest from a home setup, DWC is worth the small added complexity. A standard 5-gallon bucket setup with a quality air pump handles a generous planting of chives with room to spare.
NFT and Ebb & Flow for Larger Setups
Nutrient Film Technique (NFT) runs a thin film of nutrient solution continuously through a channel; ebb & flow periodically floods and drains a grow tray. Both scale well if you want to grow multiple herb varieties or larger quantities. They require pumps, timers, and more infrastructure — better suited to growers who’ve already dialed in a smaller system and are ready to expand.
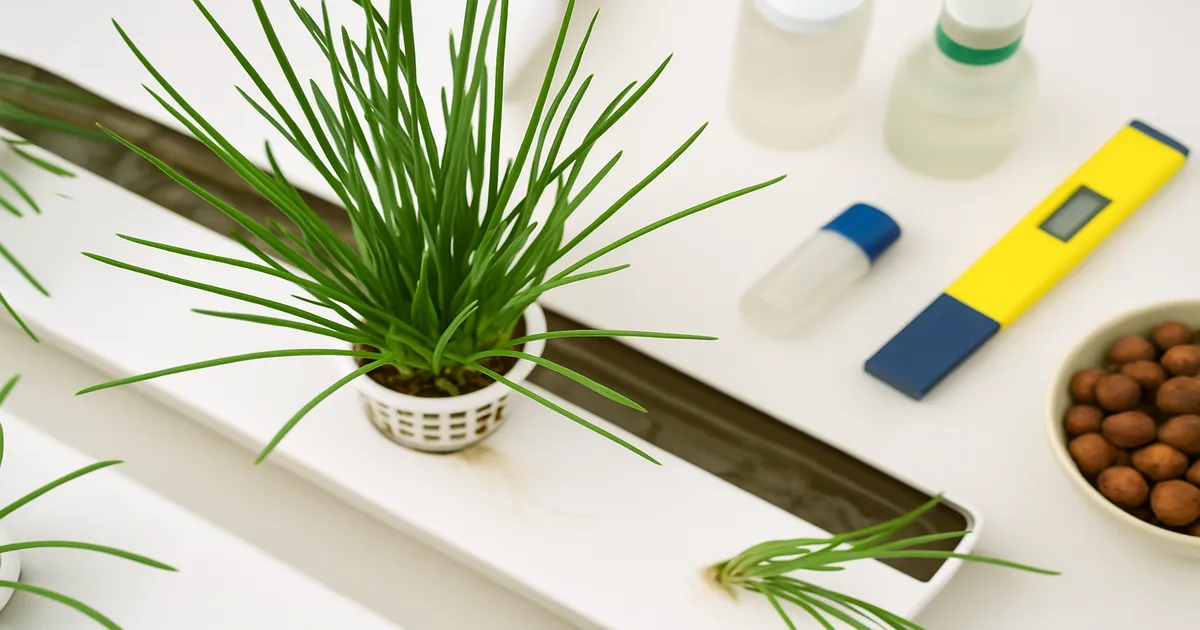
Mason Jar / Glass Method: The Windowsill Shortcut
This isn’t technically hydroponics, but it works well as a short-term solution. Place store-bought chives (roots intact) or fresh cuttings in a jar with 1–2 inches of water at the base, change the water every 2–3 days, and you’ll see new growth within a week. Adding a half-strength liquid nutrient after the first week extends the productive life of the plant considerably.
System Comparison
| System | Suitability | Skill Level | Cost | Best For |
|---|---|---|---|---|
| Kratky | ⭐⭐⭐⭐⭐ | Beginner | $ | Low-maintenance home growing |
| DWC | ⭐⭐⭐⭐⭐ | Beginner–Intermediate | $$ | Fastest home production |
| NFT | ⭐⭐⭐⭐ | Intermediate | $$$ | Multiple plants, scaling up |
| Ebb & Flow | ⭐⭐⭐⭐ | Intermediate | $$$ | Larger setups |
| Wick System | ⭐⭐⭐ | Beginner | $ | Ultra-simple, slower growth |
| Mason Jar | ⭐⭐⭐⭐ | Complete Beginner | Free | Short-term propagation |
| Aeroponics | ⭐⭐⭐ | Advanced | $$$$ | Overkill for home chives |
How to Grow Chives in Water: Step-by-Step Setup
Choosing Your Starting Material
You have three options, and all of them work:
- Seeds — slowest route (4–6 weeks to transplant size), but gives you full control over variety
- Transplants — fastest path to harvest; start seedlings in rockwool cubes or net pots with hydroton
- Store-bought chives — genuinely the easiest starting point; grab a bunch from the grocery store with roots still attached and you’re ready immediately
Setting Up a Kratky or DWC System
- Choose a container — a 1-gallon opaque bucket or mason jar for Kratky; a 5-gallon bucket for DWC
- Cut a 2-inch net pot hole in the lid
- Fill net pots with hydroton or rockwool and place your transplant or cutting inside
- Fill the reservoir with nutrient solution to just below the bottom of the net pot — roots will grow down to find the water
- For DWC, connect your air pump and airstone before filling
- Set pH to 6.0–6.5 and EC to 0.7–1.1 (350–560 PPM) for seedlings; raise to 1.6–2.2 EC (800–1,120 PPM) once plants are actively growing
- Place under a grow light or in a south-facing window
The Windowsill Glass Method (No Equipment Needed)
- Trim the base of a store-bought chive bunch by about ½ inch to expose fresh tissue
- Place in a glass with 1–2 inches of water covering the base
- Set on a bright, south-facing windowsill
- Change the water every 2–3 days to prevent bacterial buildup
- Once roots reach 1–2 inches, transfer to a Kratky setup for longer-term growing
Best Varieties for Water Growing
For common chives (Allium schoenoprasum), three varieties perform particularly well in water-based systems:
- ‘Fine Leaf’ — compact, mild, beginner-friendly
- ‘Staro’ — the commercial standard; uniform growth and high yield
- ‘Profusion’ — heavy producer, slow to bolt, excellent regrowth response
Garlic chives (Allium tuberosum) are also worth considering. They have broader, flat leaves and a stronger garlic flavor, and they adapt to hydroponic systems just as readily as common chives.
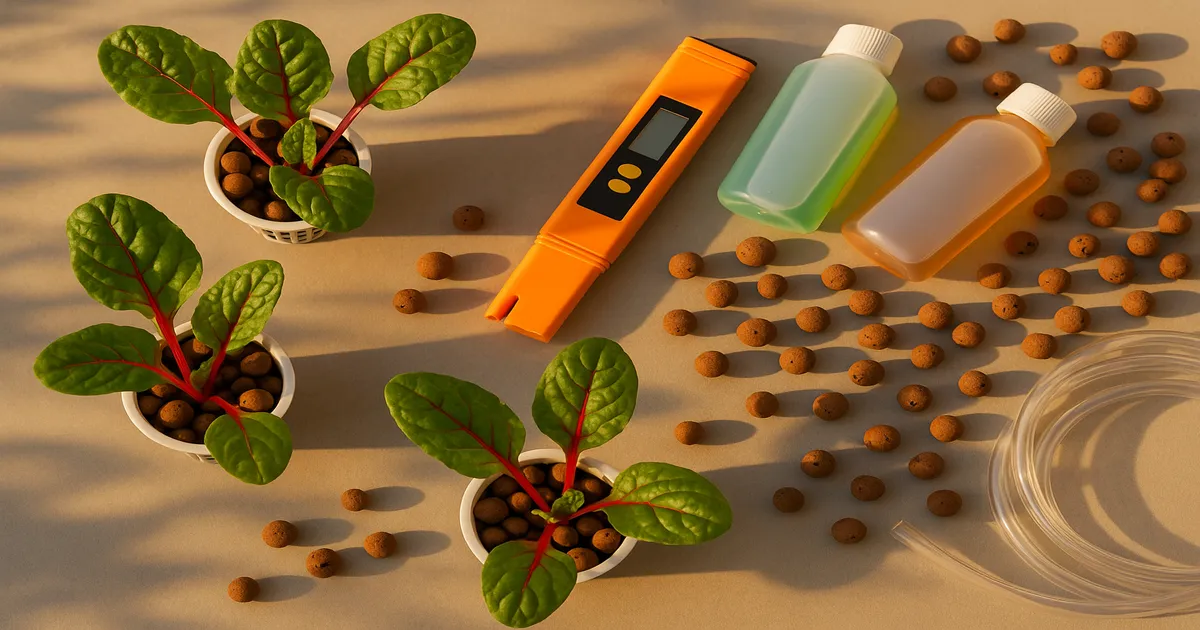
Nutrients, pH, and EC for Chives in Water
Do You Need Nutrients?
Plain water works for the first week or two of propagation. After that, the plant has used up its stored reserves and growth will stall. For sustained production, a nutrient solution isn’t optional — it’s the whole point of hydroponic growing.
PPM and EC by Growth Stage
| Growth Stage | PPM | EC |
|---|---|---|
| Seedling / Early Propagation | 350–560 | 0.7–1.1 |
| Vegetative / Active Growth | 800–1,120 | 1.6–2.2 |
| Mature / High-Yield Production | 1,120–1,400 | 2.2–2.8 |
| Plain Water Propagation | 0–100 | 0.0–0.2 |
Don’t push past 1,600 PPM (3.2 EC). That’s where salt stress and tip burn start appearing on chives.
What Nutrients Matter Most
Nitrogen is the primary driver of leafy growth. A slightly elevated N ratio — around 3:1:2 N-P-K — delivers the best blade production. Aim for 50–60% nitrate-nitrogen, with the remainder as ammoniacal nitrogen for balanced uptake.
Sulfur is uniquely important for the Allium family. It’s a direct precursor to the flavor compounds — allicin and alliin — that give chives their taste and aroma. Maintain sulfur at 30–60 PPM and you’ll notice the difference in flavor intensity. Calcium (150–200 PPM) and magnesium (40–60 PPM) round out the picture, supporting cell wall integrity and chlorophyll production respectively.
Recommended Nutrient Recipes
General Hydroponics Flora Series (beginner-friendly 3-part system):
- FloraGro: 5 mL/gallon
- FloraMicro: 4 mL/gallon
- FloraBloom: 2 mL/gallon
- Target: 900–1,100 PPM (1.8–2.2 EC) at pH 6.0–6.3
Master Blend DIY Recipe (per gallon of RO/distilled water):
- Master Blend 4-18-38: 6 g
- Calcium Nitrate: 4 g
- Epsom Salt (MgSO₄): 2 g
- Target: 800–1,000 PPM (1.6–2.0 EC)
The Epsom salt adds sulfur directly, which is particularly beneficial for chive flavor development.
Simple Starter Solution (Kratky or windowsill): Half-strength liquid fertilizer at 2.5 mL/gallon, targeting 400–600 PPM (0.8–1.2 EC). Fox Farm Grow Big works well here — low-maintenance and forgiving for beginners.
pH Management
Keep pH between 6.0–6.5. Below 5.8, manganese and zinc can accumulate to toxic levels while calcium and magnesium become harder to absorb. Above 6.8, iron and other micronutrients lock out, causing deficiency symptoms even when nutrients are present.
Use a reliable digital pH meter and calibrate it weekly with pH 4.0 and 7.0 buffer solutions. The Apera PH20 and Bluelab pH Pen are both solid choices. Check pH daily for the first two weeks of a new system, then every 2–3 days once things stabilize. For EC, the Apera EC20 covers everything a home grower needs.
When adjusting, add pH Up (potassium hydroxide) or pH Down (phosphoric acid) in small increments — 0.5–1 mL per gallon at a time — then wait 15–30 minutes before rechecking. Target the middle of your range (around pH 6.2) to give yourself room for natural drift.
As plants drink, the solution concentrates and EC climbs. Always top off a dropping reservoir with plain pH-adjusted water, not fresh nutrient solution. Full reservoir changes should happen every 7–14 days in DWC and every 14–21 days in Kratky. Keep reservoir temperature between 65–72°F (18–22°C) — warmer water holds less dissolved oxygen and favors root pathogens.
Lighting for Chives Growing in Water
How Much Light Do Chives Need?
Chives are a vegetative crop, so blue-spectrum light (400–500 nm) is their primary driver — it promotes compact, dense blade growth. Red spectrum (620–700 nm) supports overall photosynthesis. Full-spectrum white LEDs in the 3000K–4000K range cover both well and tend to produce better herb flavor than narrow-band “blurple” fixtures.
| Growth Stage | PPFD (μmol/m²/s) | DLI (mol/m²/day) |
|---|---|---|
| Seedling | 100–200 | 8–12 |
| Vegetative / Active Growth | 200–400 | 14–20 |
| High-Production | 400–600 | 18–25 |
For most home growers, a DLI of 14–17 mol/m²/day hits the sweet spot. Run lights for 16–18 hours per day — chives are long-day plants, and extended photoperiods suppress bolting while maximizing leaf production. Avoid 24-hour continuous light; it stresses the plant and can reduce flavor intensity.
Grow Light Options
- Spider Farmer SF-1000: Full-spectrum quantum board LED; covers a 2×2 ft area efficiently; excellent for small herb setups; ~$100–$130
- Mars Hydro TS-600: Budget full-spectrum LED; good for 1–2 ft² of chives; ~$50–$70
- T5 HO Fluorescent (4-tube, 4-ft): Reliable, low-heat, 5000–6500K; hang 12–18 inches above plants; ~$40–$80
- IKEA VÄXER: Designed for herbs; plug-and-play; ideal for windowsill Kratky setups; ~$30–$50
A south-facing window can deliver 200–800 PPFD on a clear day — enough for basic propagation and modest growth. For serious production, supplemental lighting is strongly recommended, especially in winter when natural DLI can drop well below 10 mol/m²/day.
Harvesting Chives Grown in Water
In a full hydroponic system, chives are ready for first harvest 3–4 weeks after transplant. Cut leaves to about 2 inches above the base, leaving enough blade intact for the plant to continue photosynthesizing. Use clean scissors — ragged cuts invite disease.
Harvesting stimulates regrowth. Cut to the right height and the plant responds with denser, more vigorous new growth. Cut too low and you risk stressing the plant and slowing recovery. Harvest individual clumps on a rotating schedule rather than cutting everything at once — this keeps production continuous and prevents the system from going through a full rest period.
In a Kratky or DWC setup with good lighting and a balanced nutrient solution, you can expect a harvest every 3–4 weeks indefinitely. Chives are perennials; there’s no natural end date to a well-maintained hydroponic planting.
FAQ: Growing Chives in Water
Can chives grow in just water without any nutrients? For the first one to two weeks, yes — cuttings or store-bought bunches will survive and even show some new growth on stored reserves. After that, growth stalls without added nutrients. For anything beyond short-term propagation, a dilute nutrient solution is essential.
How long does it take for chives to root in water? Roots typically appear within 7–14 days in plain water at room temperature. In a warm environment (70–75°F) with good light, you may see roots in as few as 5 days. Transferring to a nutrient solution once roots reach 1–2 inches speeds up subsequent growth significantly.
Do chives grown in water taste the same as soil-grown chives? Yes — and in some cases better. Hydroponic chives grown with a sulfur-rich nutrient solution (30–60 PPM sulfate-sulfur) often have more intense flavor than soil-grown equivalents, because sulfur availability directly influences the allicin compounds responsible for the characteristic onion-garlic taste.
How often should I change the water when growing chives in a glass? Every 2–3 days for plain water propagation. This prevents bacterial and algal buildup that can rot the base of the plant. In a Kratky or DWC system with a proper nutrient solution, full reservoir changes are needed every 7–21 days depending on the system.
Can I grow garlic chives the same way as common chives in water? Yes. Garlic chives (Allium tuberosum) adapt to hydroponic and water propagation just as readily as common chives. They prefer the same pH range (6.0–6.5) and nutrient levels, though they grow slightly more slowly and produce broader, flat leaves with a stronger garlic flavor.