Quick Answer: Growing chives hydroponically is one of the easiest herb projects you can take on. They’re ready to harvest 3–4 weeks faster than soil-grown plants, thrive in simple NFT or Kratky setups, and keep producing for 12+ months with regular cutting. Aim for pH 6.0–6.5, 800–1,200 PPM (1.6–2.4 EC), and 16 hours of light daily, and you’ll have more chives than you know what to do with.
Learning how to grow chives hydroponically is one of the best entry points into soil-free gardening. Chives are forgiving, compact, and practically beg to be cut regularly — which is exactly what you want from a hydroponic herb. Whether you’re setting up a mason jar on your kitchen counter or a multi-channel NFT system in a grow tent, this guide covers everything from system selection to harvest and troubleshooting.
Quick Reference: Key Parameters
| Parameter | Target Range |
|---|---|
| pH | 6.0–6.5 |
| EC / PPM (active growth) | 1.6–2.4 EC / 800–1,200 PPM |
| PPFD (active growth) | 200–400 µmol/m²/s |
| Photoperiod | 16 hrs on / 8 hrs off |
| Temperature | 60–75°F (15–24°C) |
| Humidity | 50–70% RH |
Chives have shallow, fibrous roots and low nutrient demands — two traits that make them exceptionally well-suited to hydroponics. They don’t need deep reservoirs, they won’t overwhelm a basic nutrient solution, and their compact footprint means you can pack a lot of plants into a small space.
Choosing the Best Hydroponic System for Chives
NFT (Nutrient Film Technique): The Top Choice
NFT systems run a thin, continuous film of nutrient solution along the bottom of shallow channels. Chives’ fibrous roots sit perfectly in that environment — they get constant moisture and oxygen without sitting in standing water, which keeps them healthy and fast-growing. For a small home setup, a 4–6 channel system with 2-inch net pots is plenty. At commercial scale, NFT uses less water than almost any other system type and scales up cleanly.
Kratky Method: Best for Absolute Beginners
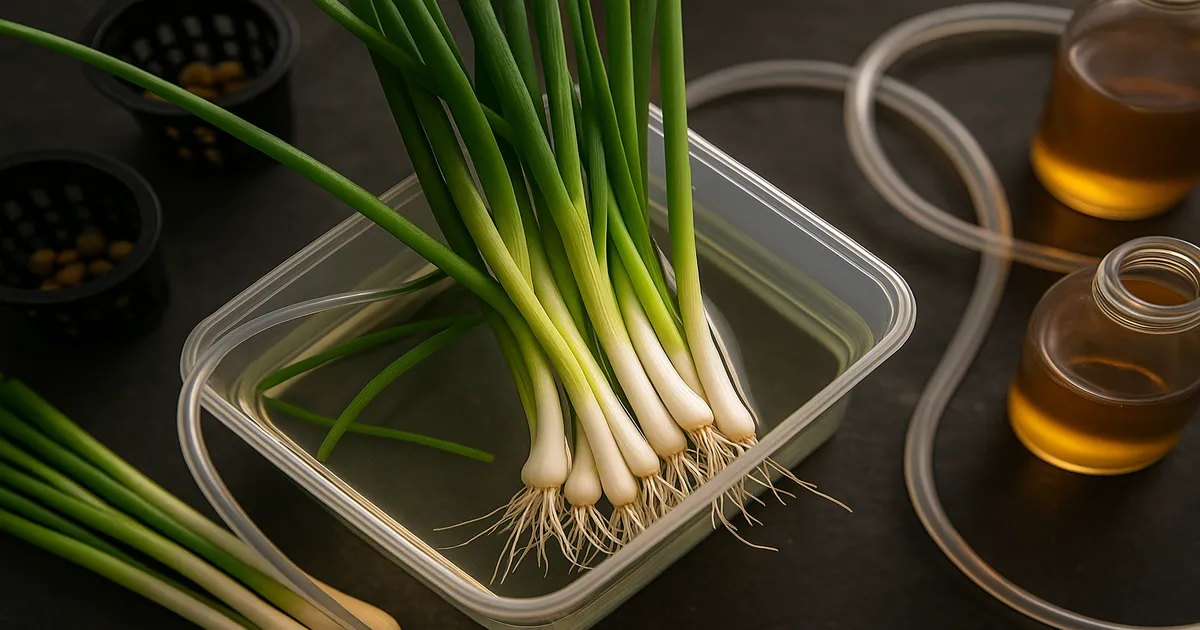
The Kratky method is passive DWC — no pump, no timer, no electricity required. Fill an opaque reservoir (a mason jar, a tote bin, or any light-blocking container), mix your nutrient solution, drop in net pots, and let the plants grow. As roots extend downward and the solution level drops, an air gap forms naturally above the waterline, giving roots the oxygen they need.
For chives specifically, a 4-site Kratky tote under a basic LED strip is one of the most beginner-friendly setups in all of hydroponics. Top off with plain pH-adjusted water between changes, and do a full solution change every 2–3 weeks.
DWC, Ebb & Flow, and Other Options
DWC (Deep Water Culture) grows chives fast and is still beginner-friendly, but you’ll need an air stone and pump to keep roots oxygenated. It’s a small added step but very manageable.
Ebb & Flow floods a tray on a timer and drains back to the reservoir. It pairs well with rockwool cubes or hydroton and is a solid mid-level choice if you want to grow a wider variety of herbs alongside your chives.
Wicking systems are the cheapest option — a wick pulls solution up from a reservoir — but growth is noticeably slower. Fine for a windowsill experiment, not ideal if you want consistent harvests.
System Comparison
| System | Suitability | Cost | Complexity |
|---|---|---|---|
| NFT | ⭐⭐⭐⭐⭐ Excellent | Medium | Medium |
| Kratky | ⭐⭐⭐⭐ Very Good | Low | Very Low |
| DWC | ⭐⭐⭐⭐ Very Good | Low–Medium | Low–Medium |
| Ebb & Flow | ⭐⭐⭐⭐ Very Good | Medium | Medium |
| Wicking | ⭐⭐⭐ Good | Very Low | Very Low |
| Aeroponics | ⭐⭐⭐ Good | High | High |
If floor space is tight, vertical tower systems are worth considering. Tower Garden-style NFT setups let you grow 20–30 chive plants in the footprint of a single pot. Chives’ shallow roots make them one of the best crops for vertical growing — unlike tomatoes or peppers, they won’t strain a tower system’s nutrient delivery.
How to Grow Chives Hydroponically: Step-by-Step Setup
Equipment You’ll Need
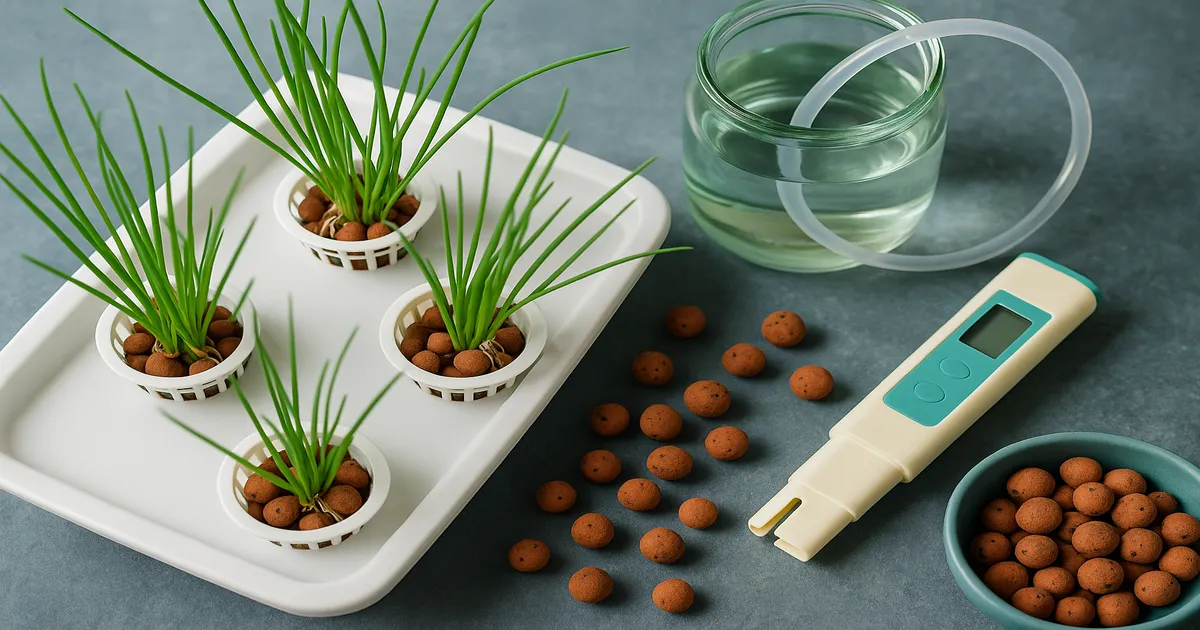
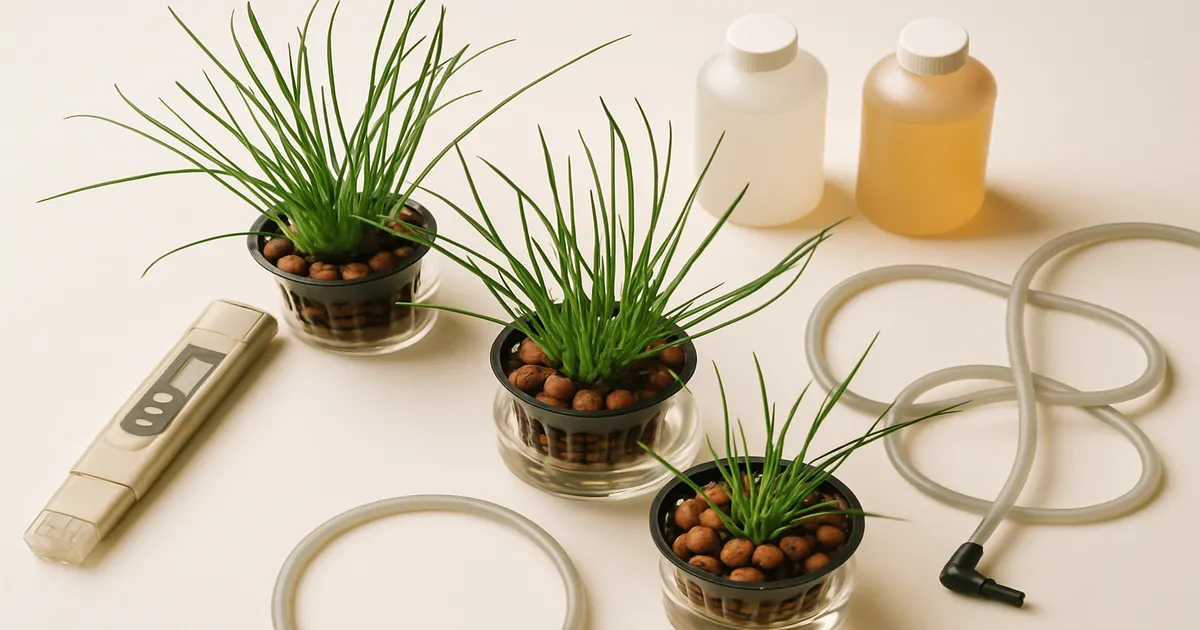
- Net pots (2-inch for NFT or Kratky; 3-inch for DWC)
- Growing medium: rockwool cubes, hydroton (expanded clay), or coco coir
- Reservoir or NFT channels
- Air pump and air stone (DWC only)
- Timer (for pump or lights)
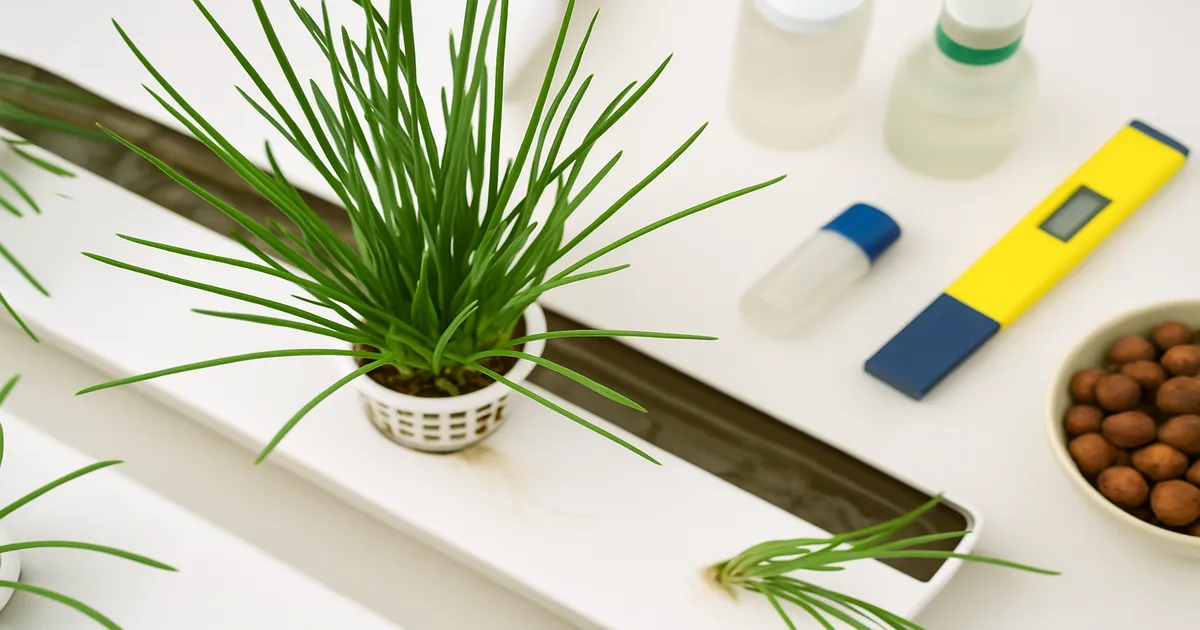
- Digital pH pen
- EC/TDS meter
- pH Up and pH Down solutions
- Nutrient solution (see recipes below)
- LED grow light (Spider Farmer SF-1000)
Starting from Seed vs. Transplanting Divisions
From seed: Soak chive seeds in room-temperature water for 8–12 hours before planting — this softens the seed coat and speeds germination. Press 3–5 seeds into a moistened rockwool cube or coco coir plug, cover lightly, and keep in a warm spot (65–75°F / 18–24°C). Germination takes 10–14 days. Start seedlings at a low nutrient concentration of 350–500 PPM (0.7–1.0 EC); they don’t need much at this stage.
From divisions: If you have an established chive plant — or can grab a pot from a grocery store — dividing the clump and transplanting directly into your system cuts weeks off your timeline. Rinse all soil from the roots thoroughly before placing them in your growing medium.
Growing Medium and Planting Density
Rockwool is the most popular choice for NFT and Ebb & Flow — it holds moisture well and is easy to work with. Pre-soak rockwool in pH 5.5 water for at least an hour before use to neutralise its naturally alkaline pH. Hydroton drains faster and is reusable, making it a great fit for DWC and Kratky. Coco coir is an organic-friendly option that buffers pH naturally.
For high-density production, plant 3–5 chive seedlings per 2-inch net pot and space pots 4–6 inches apart in NFT channels. Chives grow upright and don’t shade each other the way bushy herbs do, so you can pack them in without much penalty.
Nutrient Requirements for Hydroponic Chives
What Chives Actually Need
Nitrogen drives leafy green growth and chlorophyll production — essentially everything you’re growing chives for. Target 150–200 PPM of nitrogen during active growth, potassium at a similar level (150–200 PPM), and phosphorus more modestly at 40–60 PPM.
Chives are light feeders. Staying in the 800–1,200 PPM (1.6–2.4 EC) range during peak growth is plenty. Pushing beyond 1,400 PPM (2.8 EC) causes tip burn and salt stress without any yield benefit.
For secondary nutrients, aim for calcium at 100–150 PPM and magnesium at 30–50 PPM. Sulfur (30–60 PPM) is worth noting specifically for chives — it contributes directly to the thiosulfinate compounds responsible for their characteristic flavour. Most sulfate-based fertilisers supply adequate sulfur automatically. Keep a close eye on iron (2–4 PPM); deficiency causes new growth to yellow first and is often triggered by pH drifting above 6.5 rather than an actual shortage in the solution.
Nutrient Solution Recipes
General Hydroponics Flora Series (3-part):
- FloraMicro: 4 mL/gallon — add this to water first
- FloraGro: 5 mL/gallon
- FloraBloom: 2 mL/gallon
- Result: ~900–1,100 PPM (1.8–2.2 EC)
GH MaxiGro (1-part powder — easiest option):
- 7–10 grams per gallon
- Result: ~800–1,100 PPM (1.6–2.2 EC)
Masterblend 4-18-38 (cost-effective for larger grows):
- Calcium Nitrate: 2.4 g/gallon — dissolve first, alone
- Masterblend 4-18-38: 2.4 g/gallon
- Epsom Salt (MgSO₄): 1.2 g/gallon
- Result: ~800–1,000 PPM (1.6–2.0 EC)
Always mix in the order listed. Adding calcium nitrate and Masterblend together without water in between causes precipitation and locks out nutrients.
Organic option: Botanicare Pure Blend Pro Grow at 15–20 mL/gallon gives approximately 800–1,000 PPM (1.6–2.0 EC) and works well in Kratky or DWC. Organic nutrients require more frequent pH monitoring in recirculating systems because microbial activity shifts pH less predictably than synthetic formulas.
Water Source Notes
- Tap water: Measure baseline PPM before adding nutrients — many municipal supplies run 100–300 PPM. Subtract that from your target.
- RO water: Starts near 0 PPM, ideal for precision, but always add Cal-Mag (5 mL/gallon) before your base nutrients to replace stripped calcium and magnesium.
- Well water: Test for calcium, magnesium, and iron. High iron can lock out other micronutrients if pH isn’t carefully managed.
pH and EC Management
The sweet spot for hydroponic chives is pH 6.0–6.5. Below 5.8, iron and calcium become less available even if they’re present in the solution. Above 6.8, phosphorus and most micronutrients begin locking out.
A reliable digital pH pen makes monitoring much easier — calibrate weekly using pH 4.0 and 7.0 buffer solutions, and store the probe tip in storage solution between uses. Adjust pH incrementally: 1 mL of pH Up or pH Down per 5 gallons, wait 15–30 minutes, then retest. Never add large amounts at once.
Reading EC changes tells you what your plants are doing. When EC rises, plants are drinking more water than nutrients — top off with plain pH-adjusted water. When EC falls, they’re consuming nutrients faster than water — add fresh solution at full strength. If EC climbs above 1,400 PPM (2.8 EC), do a 50% reservoir change rather than just topping off.
Reservoir change schedule:
- Active systems (NFT, DWC): Full change every 7–14 days
- Passive systems (Kratky): Full change every 2–3 weeks, or sooner if plants show deficiency signs
Keeping EC above 600 PPM (1.2 EC) provides natural pH buffering. Very dilute solutions swing wildly in pH and are much harder to manage.
Lighting for Hydroponic Chives
Chives are a vegetative crop and respond best to blue-dominant spectrum (400–500 nm), which promotes compact, dense leaf growth. Full-spectrum white LEDs in the 3000K–5000K range are the most practical choice for home growers. Avoid heavily red-dominant setups — you’ll get leggy, stretched plants that look pale and produce less flavour.
PPFD targets by growth stage:
| Growth Stage | PPFD Target |
|---|---|
| Seedling | 100–200 µmol/m²/s |
| Vegetative / Active Growth | 200–400 µmol/m²/s |
| Maximum Productive | 400–600 µmol/m²/s |
Aim for a DLI of 12–17 mol/m²/day. At 300 µmol/m²/s for 16 hours, that works out to 17.3 mol/m²/day — right in the ideal range. Chives don’t benefit much beyond 600 µmol/m²/s and may show bleaching or tip burn if pushed harder.
16 hours on / 8 hours off is the optimal photoperiod for maximum leaf production. You can drop to 14 hours with a modest reduction in growth rate. Going beyond 18 hours adds electricity cost without meaningful yield gains.
One thing to know: chives are long-day plants, so extended photoperiods will eventually trigger flowering. If you want edible purple blooms for garnish, that’s a feature. If you want maximum leaf yield, trim flower stalks as soon as they appear.
Recommended lights:
- Barrina T5 LED strips — ideal for shelf and rack setups, very low heat
- Spider Farmer SF-1000 — 100W, covers ~2×2 ft, excellent value for a dedicated herb setup
- Spider Farmer SF-2000 — 200W, covers 2×4 ft, great for multiple NFT channels
Harvesting and Ongoing Care
When and How to Harvest
Your first harvest is typically ready 3–4 weeks after transplanting, or 6–8 weeks from seed. Cut when leaves reach 6 inches tall, using clean scissors, and cut to about 2 inches above the net pot. Don’t cut below that point — you’ll damage the growing base and slow regrowth significantly.
Cut-and-Come-Again Production
This is where hydroponic chives really shine. After each harvest, allow 2–3 weeks of regrowth before cutting again. A healthy plant will keep producing for 12 months or more on this cycle. Harvest no more than one-third of the plant at a time for the fastest bounce-back — the more leaf area you leave, the quicker it recovers.
Pest and Disease Prevention
Hydroponic environments reduce many common pest pressures, but they don’t eliminate them entirely.
- Fungus gnats: Attracted to moist growing media. Use yellow sticky traps and ensure the media surface dries slightly between cycles.
- Aphids and thrips: Inspect leaves regularly. Treat with insecticidal soap or neem oil at first sign.
- Root rot: The main disease risk, caused by poor aeration, warm water temperatures, or inadequate circulation. In DWC systems, adding beneficial bacteria to the reservoir actively protects roots from pythium.
Good air circulation, opaque reservoirs (to block algae growth), and clean equipment between plantings will prevent most problems before they start.
Troubleshooting Common Problems When Growing Chives Hydroponically
| Symptom | Likely Cause | Fix |
|---|---|---|
| Yellowing older leaves | Nitrogen deficiency | Raise PPM to 1,000–1,200; check pH is in range |
| Yellowing new growth | Iron deficiency | Lower pH to 6.0–6.2; check iron levels |
| Tip burn | Salt stress or calcium deficiency | Reduce EC; verify calcium at 100–150 PPM |
| Leggy, pale growth | Insufficient light | Increase PPFD or move light closer |
| Slow growth overall | Temperature too high or low | Keep at 60–75°F; check root zone temp |
| Brown, slimy roots | Root rot (pythium) | Improve aeration; add beneficial bacteria; lower water temp below 72°F |
| pH swings wildly | Solution too dilute | Keep EC above 600 PPM (1.2 EC) for buffering |
FAQ: How to Grow Chives Hydroponically
How long does it take to grow chives hydroponically? From transplanted divisions, expect your first harvest in 3–4 weeks. From seed, allow 6–8 weeks. After that, chives regrow every 2–3 weeks on a cut-and-come-again cycle and can produce continuously for 12 months or more.
Can I grow chives hydroponically without a grow light? Yes, if you have a bright south-facing window that receives 6+ hours of direct sun. In most indoor situations, though, a basic LED grow light produces far more consistent results — especially in winter when natural light drops off.
What is the best hydroponic system for chives? NFT is the top choice for consistent, high-yield production. For beginners, the Kratky method is hard to beat — it requires no pump, no timer, and minimal maintenance while still producing excellent results.
Do hydroponic chives taste the same as soil-grown? Yes, and often better. Ensuring adequate sulfur in your nutrient solution (which most complete fertilisers provide) maintains the characteristic onion-like flavour. Some growers report slightly more intense flavour from hydroponics due to optimised nutrient delivery.
How often should I change the nutrient solution for chives? Every 7–14 days for active systems like NFT and DWC. Every 2–3 weeks for passive Kratky setups. Between changes, top off with plain pH-adjusted water to maintain the solution level.