Quick Answer: Hydroponics is the practice of growing plants without soil, delivering nutrients directly to roots through a water-based solution. Plants grow 30–50% faster than in soil, use up to 90% less water, and can thrive indoors year-round. You can start a simple setup for as little as $20.
If you’ve ever searched what is hydroponics for beginners, here’s the short answer: it’s gardening without dirt. The word comes from the Greek hydro (water) and ponos (labor) — essentially, making water do the work that soil normally does. Instead of roots hunting through dirt for nutrients, you deliver everything a plant needs directly to its roots in a carefully balanced solution.
Home growers have been catching on fast. Falling LED prices, affordable starter kits, and a renewed interest in food self-sufficiency have made hydroponics genuinely accessible — no greenhouse, no farm, no prior experience required. This guide covers everything you need to get started, from choosing a system to managing pH and picking the right light.
What Is Hydroponics? The Beginner’s Definition
How It Works
In hydroponics, plants grow in an inert medium — rockwool, perlite, clay pebbles, or similar materials — that supports the roots physically but contributes zero nutrients. All nutrition comes from a precisely mixed water solution that bathes or flows past the roots. That’s really it.
How It Differs from Soil Gardening
In soil, plants spend significant energy growing extensive root systems just to find water and nutrients. Remove that search, and the plant redirects that energy into leaves, stems, and fruit. The result is growth 30–50% faster than soil-grown equivalents, often with higher yields in less space.
Soil also acts as a natural buffer — it holds nutrients and moderates pH on its own. In hydroponics, you are that buffer. That’s a bit more responsibility, but also far more control.
Key Benefits at a Glance
- Up to 90% less water — recirculating systems reuse runoff instead of letting it drain away
- Year-round growing — no seasons, no weather, no waiting
- Faster growth and higher yields — nutrients go straight to the roots
- No weeds, fewer soil-borne pests
- Scalable — from a $20 mason jar to a fully automated grow room
The 7 Main Types of Hydroponic Systems
Deep Water Culture (DWC) — Best for Beginners
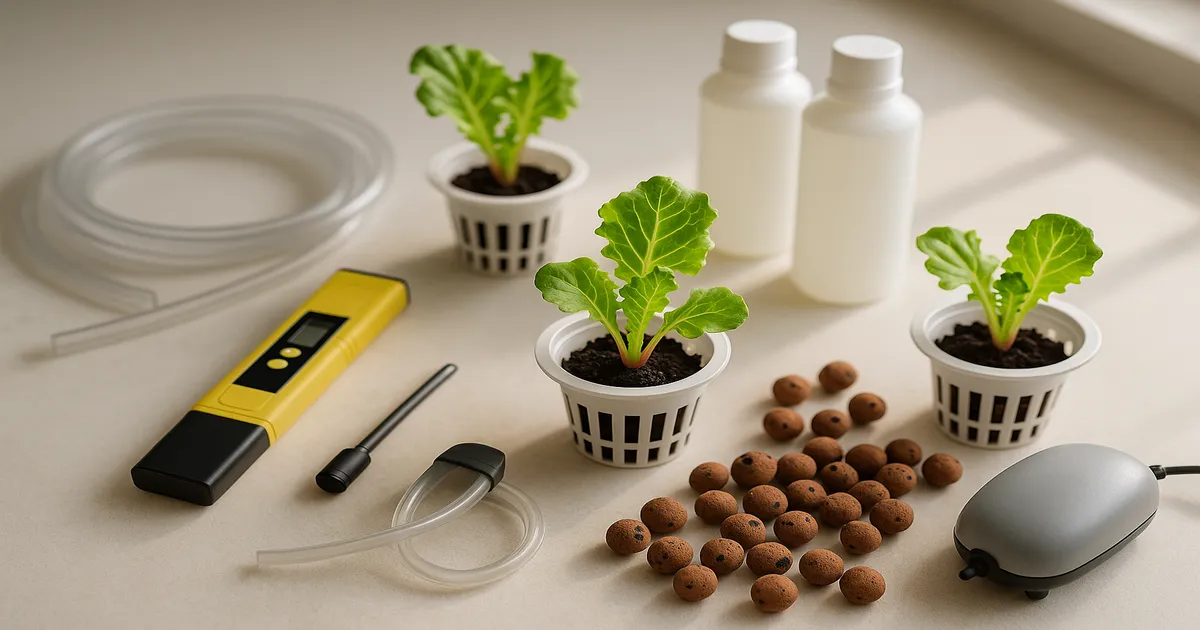
Plants sit in net pots above a reservoir of nutrient solution, with roots dangling directly into the water. An air pump and air stone keep the solution oxygenated. It’s simple, inexpensive, and forgiving — which is why it’s the most popular beginner system. A reliable air pump like the Vivosun 317 GPH keeps roots healthy in a standard 5-gallon DWC bucket.
Kratky Method — No Pump, No Electricity
Kratky is a passive version of DWC. Fill a reservoir, set your plants in, and leave a small air gap between the waterline and the net pot. As the plant drinks, the roots follow the dropping water level and the gap provides oxygen naturally. No pump, no timer, no electricity. A mason jar and a net pot lid is all you need.
Wick Systems — The Simplest Passive Setup
Wicks made from cotton rope or felt draw nutrient solution from a reservoir up to the growing medium by capillary action. No moving parts whatsoever. The downside is a limited delivery rate — wick systems work well for small herbs but struggle to keep up with thirstier plants.
Nutrient Film Technique (NFT)
A thin, continuous film of nutrient solution flows along the bottom of sloped channels, washing over bare roots before draining back to the reservoir. NFT is efficient and space-saving, but a pump failure can kill plants within hours. Best tackled after you’ve nailed the basics.
Ebb and Flow (Flood and Drain)
A timer periodically floods a grow tray with nutrient solution, then drains it back to the reservoir. Roots get nutrients during the flood and oxygen during the drain. It’s versatile — you can grow almost anything — but requires more equipment and planning than Kratky or DWC.
Drip Systems — Great for Larger Plants
Nutrient solution drips onto the base of each plant through emitters, then either drains away (run-to-waste) or recirculates. Drip systems handle large, thirsty plants like tomatoes and peppers well and are a favorite for commercial growers.
Aeroponics — Advanced High-Performance Growing
Roots hang in open air and are misted with nutrient solution at timed intervals. Oxygen exposure is maximized and growth rates are exceptional, but clogged nozzles or pump failures cause rapid plant death. This is a system for experienced growers.
Which System Should a Beginner Choose?
| System | Difficulty | Best Crops | Startup Cost |
|---|---|---|---|
| Kratky | ⭐ Easiest | Lettuce, herbs | $20–$40 |
| Wick | ⭐ Easiest | Small herbs | $15–$30 |
| DWC | ⭐ Easy | Lettuce, herbs, cucumbers | $50–$150 |
| NFT | ⭐⭐ Moderate | Lettuce, strawberries | $100–$300 |
| Ebb & Flow | ⭐⭐ Moderate | Most plants | $150–$400 |
| Drip | ⭐⭐⭐ Moderate-Advanced | Tomatoes, peppers | $200–$500 |
| Aeroponics | ⭐⭐⭐⭐ Advanced | High-performance crops | $300+ |
Start with Kratky or DWC. A $20–$50 mason jar Kratky setup — lettuce or basil, a 2-inch net pot, a small bag of clay pebbles, and a basic nutrient solution — is the lowest barrier to entry in all of hydroponics. Grow one successful round and you’ll understand the fundamentals well enough to step up to anything else.
Essential Equipment for Beginners
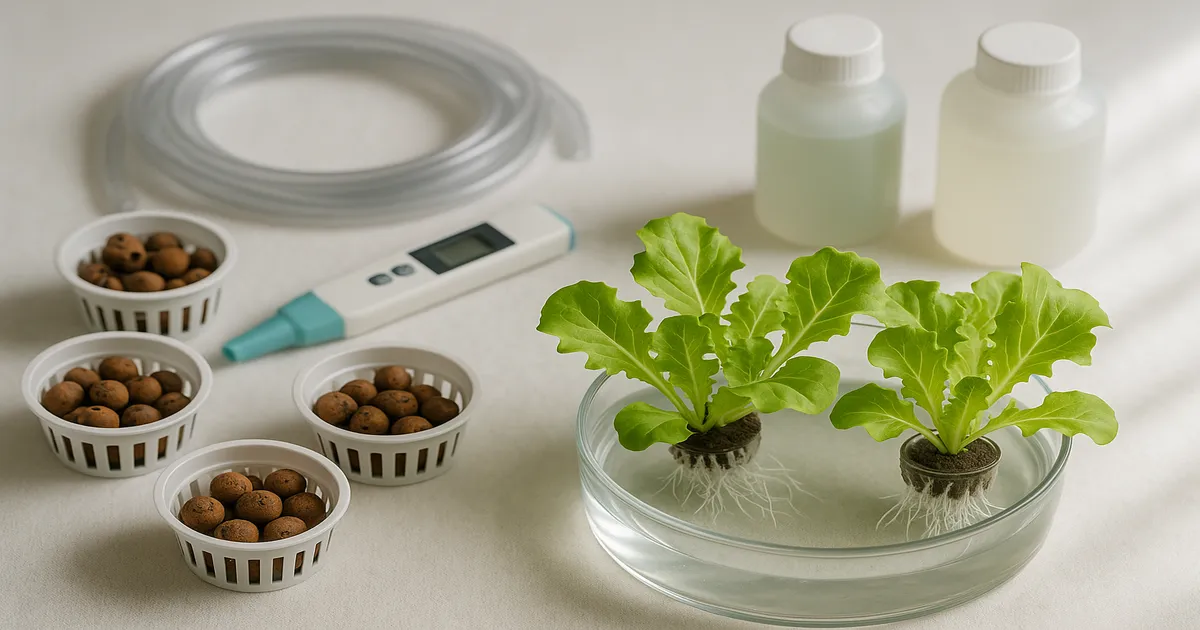
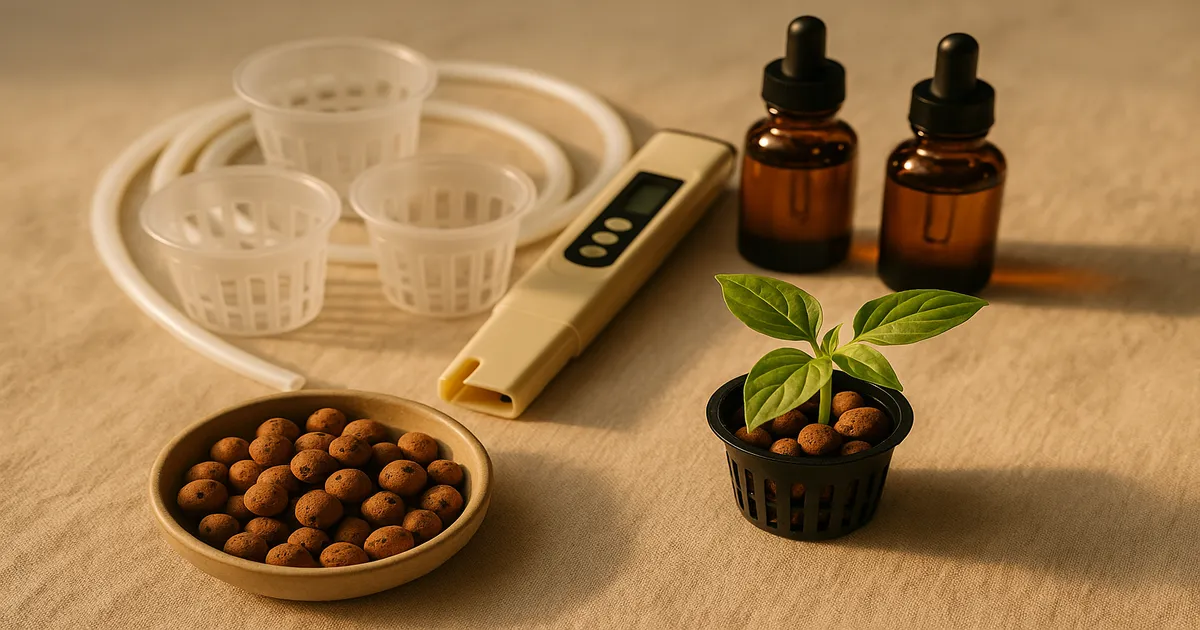
Reservoir, Net Pots, and Growing Media
Your reservoir holds the nutrient solution — a mason jar or opaque storage bin for Kratky, a 5-gallon bucket for DWC. Net pots (small mesh cups) hold your growing medium and suspend the plant above or in the solution. They come in 2-inch sizes for lettuce and herbs, up to 6-inch for larger plants.
Growing media anchor roots and help wick moisture without contributing any nutrients. Clay pebbles (LECA) are reusable and drain well — ideal for DWC and Kratky. Rockwool retains moisture and is excellent for seed starting and NFT. Perlite is lightweight with great aeration and is often mixed with coco coir, which holds moisture well and is made from renewable coconut husks.
pH and EC/TDS Meters — Non-Negotiable Tools
These are not optional. A pH meter tells you whether your plants can actually absorb the nutrients in your solution. An EC/TDS meter tells you how concentrated that solution is. Without both, you’re flying blind.
The Apera PH20 and the Bluelab pH Pen are both reliable and beginner-friendly. For EC, the Apera EC60 gets the job done. Budget around $30–$60 total for a decent pair.
Hydroponic Nutrients: What Your Plants Need
Why Every Nutrient Must Be Supplied
Soil is a living ecosystem that naturally contains many of the minerals plants need. In hydroponics, the growing medium is intentionally inert — so all 17 essential plant nutrients must come from your nutrient solution. Miss one, and your plants will show it.
The Big Three: N-P-K
- Nitrogen (N): Drives leafy, vegetative growth. Demand is highest in early growth stages.
- Phosphorus (P): Fuels root development, flowering, and fruiting. Increase it as plants mature.
- Potassium (K): Supports overall plant health, disease resistance, and fruit quality throughout the grow.
Secondary Macronutrients and Micronutrients
Calcium is critical for cell wall integrity — without enough, lettuce gets tip burn and tomatoes develop blossom end rot. Magnesium sits at the center of every chlorophyll molecule, making it essential for photosynthesis. Sulfur supports enzyme function and contributes to the flavor compounds in herbs like basil and cilantro.
Iron is the most commonly deficient micronutrient in hydroponics, and it’s almost always caused by pH being too high rather than iron actually being absent. Other key micronutrients — manganese, zinc, copper, boron, and molybdenum — are needed in tiny amounts, but their absence causes visible problems fast.
Best Beginner Nutrient Solutions
For simplicity: Dyna-Gro Foliage Pro 9-3-6 is an excellent all-in-one for leafy greens and herbs. Mix 5–10 mL per gallon depending on your target PPM.
For flexibility: The General Hydroponics Flora Series (3-part system) lets you adjust ratios for each growth stage. It’s the most widely used beginner nutrient line for good reason.
For the budget-minded: The Masterblend recipe is hard to beat on cost:
- Masterblend 4-18-38: 2.4 g/gal
- Calcium Nitrate: 2.4 g/gal
- Magnesium Sulfate (Epsom Salt): 1.2 g/gal
This produces approximately 800–1,000 PPM (1.6–2.0 EC) — right in the sweet spot for most vegetables.
PPM and EC Targets by Crop
| Crop / Stage | PPM Range | EC Range |
|---|---|---|
| Seedlings / Clones | 100–250 PPM | 0.2–0.5 EC |
| Lettuce / Leafy greens | 560–840 PPM | 1.1–1.7 EC |
| Herbs (basil, mint) | 700–1,120 PPM | 1.4–2.2 EC |
| Tomatoes — vegetative | 1,050–1,400 PPM | 2.1–2.8 EC |
| Tomatoes — fruiting | 1,400–2,100 PPM | 2.8–4.2 EC |
| Peppers | 1,260–1,540 PPM | 2.5–3.1 EC |
| Cucumbers | 1,190–1,750 PPM | 2.4–3.5 EC |
| Strawberries | 1,260–1,540 PPM | 2.5–3.1 EC |
Always add nutrients to water — never pour water into concentrated nutrients. If you’re using a multi-part system, mix each component separately before adding the next. Combining concentrates directly causes chemical reactions that lock out nutrients before they ever reach your plants.
pH and EC Management: The Heart of Hydroponic Success
Why pH Is the Number One Beginner Mistake
The most common beginner error in hydroponics isn’t choosing the wrong system or the wrong nutrients — it’s ignoring pH. Even a perfectly mixed nutrient solution becomes useless if pH is out of range. Nutrients are present, but the plant physically cannot absorb them. This is called nutrient lockout, and it’s responsible for most of the “mysterious” plant problems beginners encounter.
The Ideal Hydroponic pH Range
The sweet spot is pH 5.8–6.2, where all major nutrients are maximally available. Going above 6.5 locks out iron and causes yellowing leaves. Dropping below 5.5 risks manganese and zinc toxicity. Aim for pH 6.0 as your target — that way, natural drift in either direction keeps you within the safe window.
How to Test and Adjust pH
- Mix your nutrient solution completely before testing
- Dip your calibrated pH meter into the solution and wait for a stable reading
- If pH is too high, add pH Down (phosphoric acid) in 1 mL increments per 5 gallons
- Stir thoroughly, wait 5 minutes, then retest
- If pH is too low, add pH Up (potassium hydroxide) using the same incremental approach
- Record your final pH and check again the following day
Reading EC and Managing Your Reservoir
EC (electrical conductivity) measures how many dissolved minerals are in your water — essentially, how strong your nutrient solution is. A rising EC means your plants are drinking more water than nutrients, so top off with plain pH-adjusted water. A falling EC means they’re consuming nutrients faster than water — top off with a dilute nutrient solution.
For active systems (DWC, NFT, drip), check pH daily and EC every 1–2 days. For passive Kratky setups, every 2–3 days is sufficient. It takes about two minutes once you’re in the habit.
Do a full reservoir change every 7–14 days for active systems. Over time, nutrient salt imbalances accumulate as plants selectively absorb certain elements. Drain completely, rinse, and start fresh. This prevents the gradual drift that causes deficiencies even when your EC looks fine.
Water Quality: Tap, RO, and Well Water
Tap water in many municipalities starts at 200–400 PPM (0.4–0.8 EC), which counts toward your total nutrient load and can throw off your ratios. Let tap water sit uncovered for 24 hours to off-gas chlorine before use. Chloramine — used in some municipal supplies — requires a carbon filter or a vitamin C tablet to neutralize.
For the most control, use reverse osmosis (RO) water, which starts near zero PPM. Home RO units run $50–$200 and are worth it if your tap water is high in minerals. Well water often contains elevated calcium, magnesium, or iron — always test it before use.
Lighting for Hydroponic Beginners
How Much Light Do Plants Actually Need?
PAR (Photosynthetically Active Radiation) is the range of light wavelengths — 400 to 700 nm — that plants use for photosynthesis. PPFD measures how much of that light hits your canopy per second (µmol/m²/s). DLI is the total light dose your plants receive over a full day — PPFD multiplied by hours of light.
You don’t need to memorize the math. Just know that different crops have different light requirements, and your job is to provide enough intensity for enough hours to meet them.
Choosing the Right Spectrum
Blue light (400–500 nm) drives compact vegetative growth and is especially important for seedlings. Red light (600–700 nm) powers photosynthesis and promotes flowering. Full-spectrum white LEDs in the 3000K–5000K range cover both and are the best all-around choice for beginners — one light, every growth stage, no swapping required.
PPFD and Photoperiod Targets by Crop
| Crop | PPFD Target | DLI Target | Photoperiod |
|---|---|---|---|
| Seedlings | 100–200 µmol/m²/s | 8–12 mol/m²/day | 18 hrs |
| Lettuce / Leafy greens | 150–250 µmol/m²/s | 12–17 mol/m²/day | 16–18 hrs |
| Herbs (basil, mint) | 200–400 µmol/m²/s | 14–20 mol/m²/day | 16–18 hrs |
| Tomatoes (vegetative) | 400–600 µmol/m²/s | 20–30 mol/m²/day | 18 hrs |
| Tomatoes (fruiting) | 600–1,000 µmol/m²/s | 25–40 mol/m²/day | 12–16 hrs |
| Peppers / Cucumbers | 400–800 µmol/m²/s | 20–35 mol/m²/day | 16–18 hrs |
Best Grow Lights for Beginners
For a small lettuce or herb setup, a mid-range LED panel in the 100–200W range is plenty. Look for lights that publish actual PPFD maps rather than just wattage claims. The Spider Farmer SF-1000 covers a 2×2 ft footprint efficiently and is a solid first light. The Mars Hydro TS 1000 is another popular option at a similar price point, with good coverage for lettuce, herbs, and small fruiting plants.
If you’re growing in an enclosed space, a grow tent keeps light contained and reflected back at your plants. A 2×2 or 2×4 tent from AC Infinity pairs well with either of the lights above and makes environmental control much easier.
Frequently Asked Questions About Hydroponics for Beginners
Is hydroponics hard for beginners? Not if you start simple. A Kratky mason jar setup requires almost no equipment and very little maintenance. Once you understand pH and nutrient concentration, the rest follows naturally.
How much does it cost to start a hydroponic garden? A basic Kratky setup costs $20–$50. A DWC bucket system with a light runs $100–$200. Full grow tent setups with lighting and environmental controls typically start around $300–$500.
What are the easiest plants to grow hydroponically? Lettuce, basil, spinach, and other leafy greens are the easiest. They grow fast, tolerate a wide pH range, and don’t need high light levels. Start with these before moving on to tomatoes or peppers.
Do I need a grow tent for hydroponics? No, but it helps. A grow tent reflects light back at your plants, contains humidity, and makes it easier to control temperature. If you’re growing indoors, even a small 2×2 tent improves results noticeably.
How often do I need to check my hydroponic system? For active systems like DWC, check pH daily and EC every 1–2 days. Passive Kratky setups need attention every 2–3 days. A full reservoir change every 7–14 days keeps nutrient ratios balanced.