Quick Answer: To set up a hydroponic system for vegetables, choose a system type (DWC or Kratky for beginners), assemble your reservoir, mix a nutrient solution, calibrate pH to 5.8–6.2 and EC to your crop’s growth stage, add lighting, and transplant your seedlings. A basic setup can be running in under two hours and will grow vegetables 30–50% faster than soil while using up to 90% less water.
Getting started with hydroponics feels overwhelming at first — pumps, meters, nutrients, grow lights. But the core process is simpler than it looks. This guide walks you through exactly how to set up a hydroponic system for vegetables, from picking the right system type to dialing in your first nutrient solution. Whether you have a spare closet or a full spare room, you can be growing the same day you start.
Choosing the Right Hydroponic System for Your Vegetables
Not all systems suit all growers, and the wrong choice makes the learning curve steeper than it needs to be.
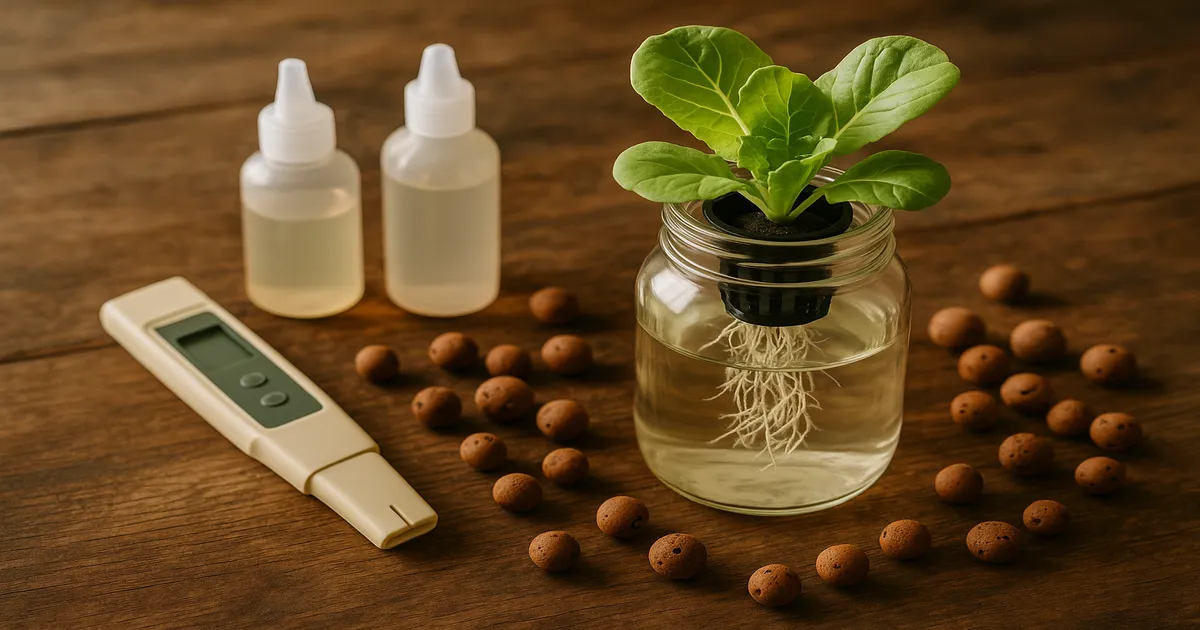
Deep Water Culture (DWC): Best for Beginners
In DWC, plant roots hang directly into an oxygenated nutrient solution. An air pump and air stone keep dissolved oxygen high enough that roots don’t drown. It’s forgiving, affordable, and fast — lettuce can go from seedling to harvest in 30 days. Startup cost: $30–$80.
Kratky Method: Zero-Electricity Passive Growing
Kratky is DWC without the pump. You fill the reservoir, leave an air gap above the waterline, and the plant drinks down the solution as it grows, drawing in oxygen naturally. No electricity, no moving parts, minimal maintenance. Best for lettuce, spinach, basil, and other herbs. It’s the easiest entry point in hydroponics, full stop.
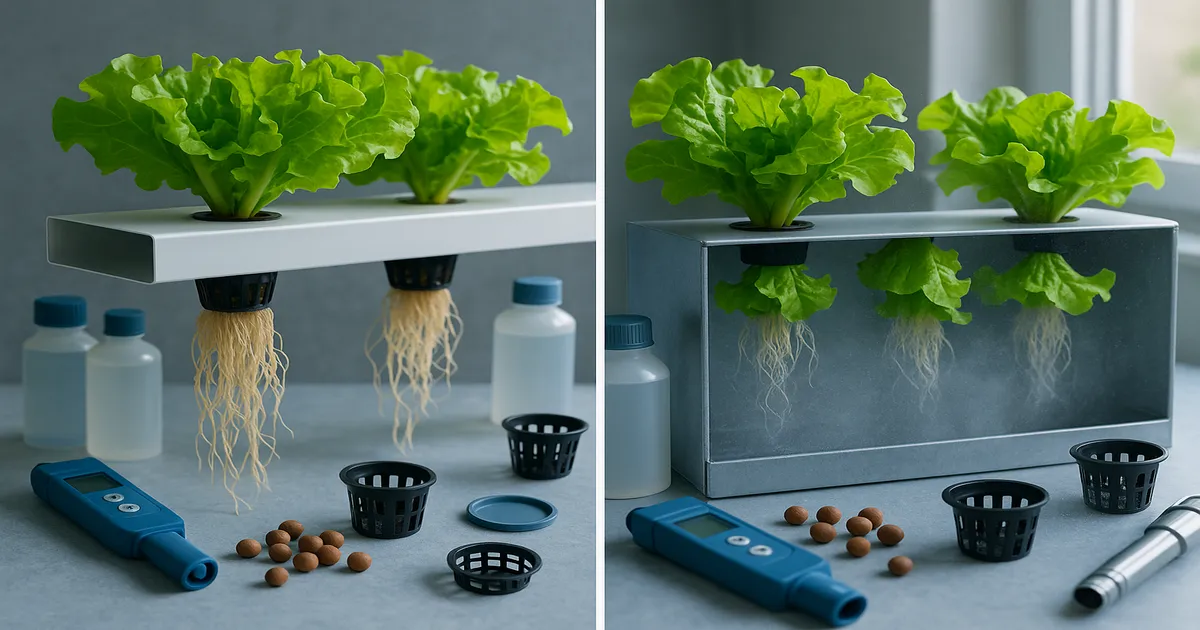
Nutrient Film Technique (NFT): Ideal for Leafy Greens
A thin film of nutrient solution flows continuously through sloped channels, bathing the lower roots while the upper roots access oxygen. NFT systems are space-efficient and scale well, but they’re unforgiving if the pump fails — roots dry out within hours. Startup cost: $100–$250.
Ebb & Flow (Flood & Drain): Versatile for Mixed Crops
A timer-controlled pump floods a grow tray with nutrient solution several times per day, then drains it back to the reservoir. This wet-dry cycle suits a wide range of vegetables and gives roots excellent oxygen exposure. Intermediate difficulty; startup cost: $100–$300.
Drip Systems: Scaling Up to Tomatoes and Peppers
Individual emitters drip nutrient solution directly to each plant’s root zone. It’s the most widely used commercial system and handles large, thirsty plants like tomatoes, peppers, and cucumbers exceptionally well. Startup cost: $150–$400+.
Which System Should You Start With?
| Grower Level | Best System | Best Crops |
|---|---|---|
| Complete beginner | Kratky or DWC | Lettuce, herbs, spinach |
| Intermediate | NFT or Ebb & Flow | Kale, strawberries, cucumbers |
| Advanced | Drip or Aeroponics | Tomatoes, peppers, large fruiting crops |
Start simple. A 5-gallon DWC bucket growing lettuce will teach you more in one season than any amount of reading.
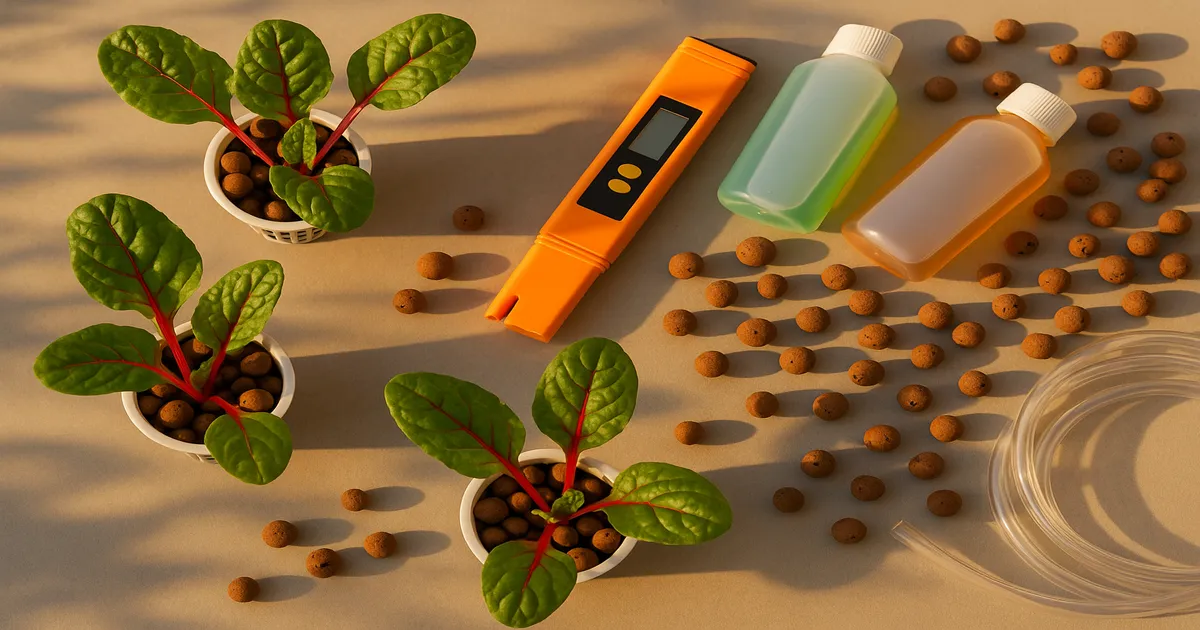
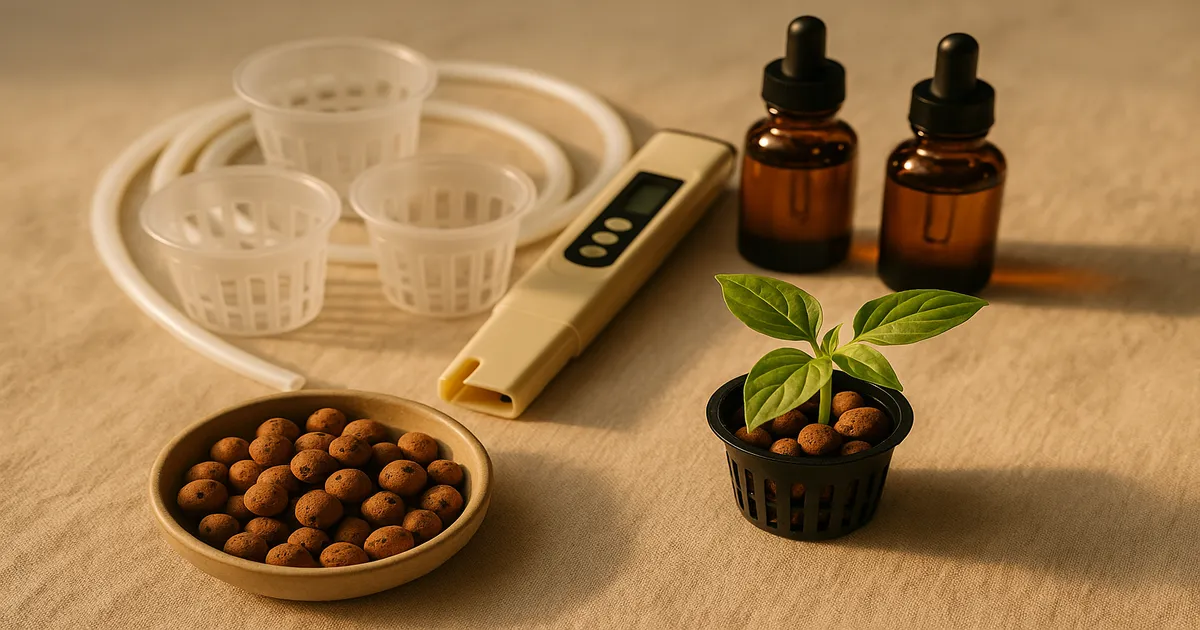
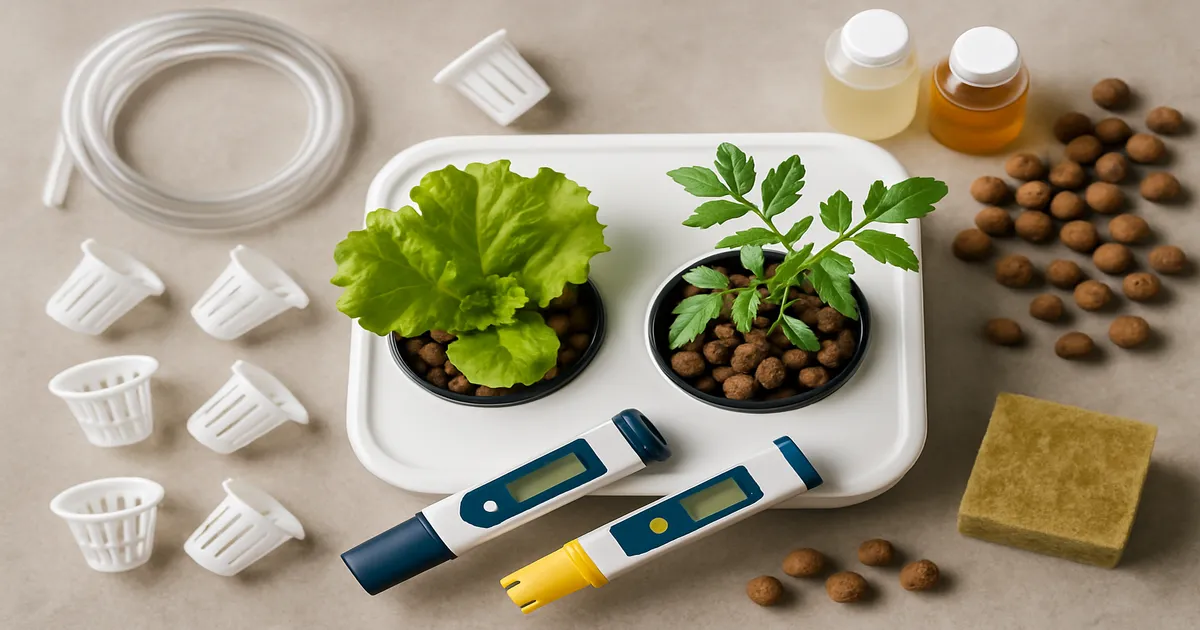
What You Need: Equipment and Materials
Reservoir, Net Pots, and Growing Media
Size your reservoir to at least 1 gallon per plant — more is better, because larger volumes buffer against pH and EC swings. A 5-gallon bucket works perfectly for a single large plant or 2–3 lettuce heads.
- Net pots: 2-inch for herbs and lettuce; 3–4-inch for larger vegetables
- Clay pebbles (hydroton): Reusable, pH-neutral, excellent drainage — rinse thoroughly before use
- Rockwool cubes: Great for starting seeds and clones; soak in pH 5.5 water for one hour before use
- Coco coir or perlite: Good moisture retention; useful in drip and ebb-and-flow systems
Air Pumps, Air Stones, and Water Pumps
For DWC, a general rule is 1 watt of air pump per gallon of water. A single air stone works for reservoirs under 10 gallons; larger systems benefit from a ring or disc stone for even distribution. Place the air pump outside and above the reservoir to prevent back-siphoning if the power cuts out.
pH and EC Meters: Non-Negotiable Tools
You cannot grow hydroponics successfully by guessing. A quality pH pen — such as the Apera PH60 or the Bluelab pH Pen — is worth every cent. Pair it with a dedicated EC meter like the Apera EC60 or the HM Digital COM-300 . Calibrate both before first use with the included buffer solutions, and recalibrate weekly.
Starter Kit Checklist
- Reservoir (5-gallon bucket or opaque tote)
- Net pots (2-inch or 3-inch)
- Clay pebbles or rockwool cubes
- Air pump + air stone + airline tubing (DWC)
- pH meter + calibration solution
- EC/TDS meter
- pH Up (potassium hydroxide) and pH Down (phosphoric acid)
- Hydroponic nutrients (2-part or 3-part concentrate)
- Grow light appropriate for your space
- Outlet timer
- Thermometer
How to Set Up a Hydroponic System for Vegetables: Step by Step
Step 1: Choose Your Location
Pick a space with a stable temperature of 65–75°F (18–24°C), easy access to an outlet, and a floor that can handle occasional splashes. Measure the area before buying a light — your grow footprint determines the fixture size you need.
Step 2: Assemble the Reservoir
Cut or drill holes in your reservoir lid to fit net pots snugly. Light-proof the entire reservoir — algae needs only a pinhole of light to establish. Wrap any translucent containers in black plastic or opaque tape, or buy a black tote from the start.
Step 3: Install Pumps and Aeration
Run airline tubing from your air pump down through a small hole in the lid to the air stone on the reservoir floor. For drip or NFT systems, install your water pump and test flow rates before adding plants.
Step 4: Rinse Your Growing Media
Clay pebbles come coated in dust that clouds your reservoir and shifts pH. Rinse in a colander under running water until it runs clear, then soak in pH-adjusted water (pH 5.8) for 30 minutes. Fill net pots about two-thirds full before placing seedlings.
Step 5: Mix Your Nutrient Solution
Always add nutrients in this order to prevent precipitation:
- Start with base water (RO or filtered is preferred)
- Add Cal-Mag if using RO water, stir well
- Add Part A (or FloraMicro if using GH Flora Series) and stir
- Add Part B (FloraGro and/or FloraBloom) (General Hydroponics Flora Series 3-Part) and stir
- Adjust pH last, after all nutrients are fully dissolved
Note on Cal-Mag order: Add Cal-Mag before other concentrated nutrients to avoid precipitation reactions, but always adjust pH after everything else is dissolved.
Step 6: Calibrate pH and EC
Test your mixed solution and adjust pH to 5.8–6.2. Add pH Up or pH Down in 0.5–1 mL increments per 5 gallons, stir, and wait 15 minutes before retesting. Confirm EC matches your target for the growth stage (see the table below). Don’t rush this step — a correct baseline saves hours of troubleshooting later.
Step 7: Transplant Seedlings
Tip — Harden Off First: If seedlings were started under low light, give them 2–3 days of gradually increasing intensity before placing them under your full grow light. This prevents shock and leaf bleaching.
Set seedlings into net pots so the root ball is close to or just touching the nutrient solution. In DWC, keep the waterline just below the net pot bottom for the first few days, then let it drop as roots extend. Run the air pump 24/7.
Mixing and Managing Your Nutrient Solution
Nutrient Recipes by Crop
Lettuce and leafy greens (per gallon of RO water):
- Masterblend 4-18-38: 2.4 g
- Calcium Nitrate: 2.4 g
- Magnesium Sulfate (Epsom salt): 1.2 g
- Target EC: 1.0–1.6 (500–800 PPM on the 500 scale)
Tomatoes and peppers (fruiting stage):
- General Hydroponics Flora Series at bloom-heavy ratios, plus Cal-Mag
- Target EC: 2.0–3.5 (1,000–1,750 PPM)
- Ensure calcium reaches 150–200 PPM to prevent blossom end rot
PPM scale note: Most North American meters use the 500 scale (1 EC = 500 PPM). European meters often use the 700 scale (1 EC = 700 PPM). Always confirm which scale your meter uses before comparing readings.
EC Targets by Growth Stage
| Stage | EC | PPM (500 scale) |
|---|---|---|
| Seedling/Clone | 0.2–0.8 | 100–400 |
| Early Vegetative | 0.8–1.6 | 400–800 |
| Late Vegetative | 1.6–2.4 | 800–1,200 |
| Early Fruiting | 2.4–3.5 | 1,200–1,750 |
| Late Fruiting/Ripening | 1.6–2.4 | 800–1,200 |
N-P-K Ratios: Vegetative vs. Fruiting
During vegetative growth, keep nitrogen dominant — roughly a 3:1:2 (N:P:K) ratio drives leaf and stem development. Once flowering begins, shift toward 1:3:2: lower nitrogen, higher phosphorus and potassium to support fruit set and quality. With the GH Flora Series, this means increasing FloraBloom relative to FloraGro as plants transition.
Reservoir Maintenance
Top off with plain pH-adjusted water (not nutrient solution) when the level drops from evaporation — evaporation concentrates nutrients and raises EC without you adding anything. Do a partial change (25–30%) every 7–14 days to prevent salt buildup. Perform a complete reservoir change every 2–3 weeks, or immediately if you notice unusual smells, discoloration, or a sudden pH swing.
pH and EC Management
Why pH Is the Most Important Variable
Hydroponics has no soil to buffer pH swings. If pH drifts out of range, nutrients become chemically unavailable no matter how well you’ve mixed them. This is called nutrient lockout, and it’s the leading cause of deficiency symptoms in otherwise healthy systems.
The sweet spot is pH 5.8–6.2. Above pH 6.5, iron and manganese lock out — you’ll see yellowing between the veins of new leaves (interveinal chlorosis). Below pH 5.5, calcium and magnesium become unavailable, causing tip burn and distorted growth.
Common pH and EC Problems
| Problem | Likely Cause | Fix |
|---|---|---|
| pH climbs over 24–48 hours | Algae growth or plant ion uptake | Check for light leaks; increase monitoring frequency |
| pH drops rapidly | Microbial activity or root rot | Partial reservoir change; inspect roots |
| EC rises despite no additions | Evaporation concentrating solution | Top off with plain pH-adjusted water |
| EC drops faster than expected | Heavy nutrient uptake; reservoir too small | Top off with diluted nutrient solution |
Keep reservoir temperature at 65–72°F (18–22°C). Warmer water holds less dissolved oxygen and encourages bacterial growth that destabilizes pH. A larger reservoir volume naturally resists swings — a 20-gallon system drifts far more slowly than a 2-gallon one.
Lighting Your Hydroponic Vegetable Garden
Key Metrics: PPFD and DLI
PPFD measures how many photosynthetically active photons hit a square meter per second — it’s the intensity number on fixture spec sheets. DLI (Daily Light Integral) is the total photon dose over a full day: PPFD × hours of light × 0.0036. DLI is the number that actually predicts yield.
Light Requirements by Crop
| Crop | PPFD Target | DLI Target | Hours/Day |
|---|---|---|---|
| Leafy greens/herbs | 150–250 µmol/m²/s | 12–17 mol/m²/day | 16–18 |
| Tomatoes/peppers | 400–600 µmol/m²/s | 20–30 mol/m²/day | 16–18 |
| Cucumbers/squash | 350–500 µmol/m²/s | 20–25 mol/m²/day | 16–18 |
| Seedlings/clones | 50–150 µmol/m²/s | 6–10 mol/m²/day | 18 |
Choosing a Grow Light
Full-spectrum LEDs are the clear choice for home growers. They run cooler, use less electricity, and last 50,000+ hours. HID lights (HPS and MH) produce excellent results but generate significant heat and require ballasts and reflectors. T5 fluorescents work well for seedlings and herbs but lack the intensity for fruiting crops.
For a 2×2 ft canopy growing lettuce or herbs, the Spider Farmer SF-1000 (100W) delivers roughly 200–220 µmol/m²/s at 18 inches — enough to hit a DLI of 13–14 mol/m²/day on an 18-hour photoperiod. For a 3×3 ft canopy with tomatoes or peppers, step up to the Spider Farmer SF-2000 (200W), which reaches 400–450 µmol/m²/s at the canopy and supports DLIs above 25 mol/m²/day.
Use an outlet timer to maintain consistent photoperiods. Leafy greens thrive on 16–18 hours of light; fruiting crops do best at 16–18 hours as well, but benefit more from hitting their higher DLI targets than from extended hours alone.
Frequently Asked Questions
How long does it take to set up a hydroponic system for vegetables? A Kratky or DWC setup for lettuce or herbs takes 60–90 minutes from unboxing to transplanting. More complex systems like NFT or drip take 2–4 hours the first time. Either way, you can be growing the same day you start.
What vegetables grow best in a hydroponic system? Lettuce, spinach, kale, basil, and other leafy greens are the easiest and fastest. Tomatoes, peppers, and cucumbers do very well but need more light, higher EC, and a larger reservoir. Avoid root vegetables like carrots in most hydroponic setups — they need deep substrate and don’t suit water-based systems.
How often should I change my hydroponic nutrient solution? Top off with plain pH-adjusted water daily or as needed. Do a 25–30% partial change every 7–14 days. Perform a full reservoir change every 2–3 weeks, or immediately if you notice foul odors, slime, or a sudden unexplained pH crash.
What pH should hydroponic water be for vegetables? Target 5.8–6.2 for most vegetables. This narrow range keeps all macro and micronutrients simultaneously available. Check pH daily for the first two weeks until you understand how quickly your system drifts.
Can I use tap water for hydroponics? Yes, but test it first. Tap water with EC above 0.4 already contains minerals that count toward your total nutrient load. High-chloramine tap water should be left out overnight or treated with a campden tablet before use. RO or filtered water gives you the cleanest starting point and the most control over your nutrient recipe.