Quick Answer: The Kratky method is a passive, non-recirculating hydroponic technique invented by Dr. Bernard Kratky at the University of Hawaii (published 2009). Plants sit in net pots above a reservoir of nutrient solution — no pumps, no electricity, no timers required. As the plant drinks, the water level drops naturally, creating an air gap that supplies oxygen to the upper roots while lower roots stay submerged for nutrients.
This Kratky method hydroponics step-by-step guide covers everything from mixing your first nutrient solution to diagnosing root problems — all without a single pump or power cord. Whether you’re growing lettuce on a kitchen counter or tomatoes in a spare room, Kratky is one of the most accessible entry points into hydroponics that exists.
What Is the Kratky Method and How Does It Work?
The Core Mechanism: Air Gap, Water Roots, and Aerial Roots
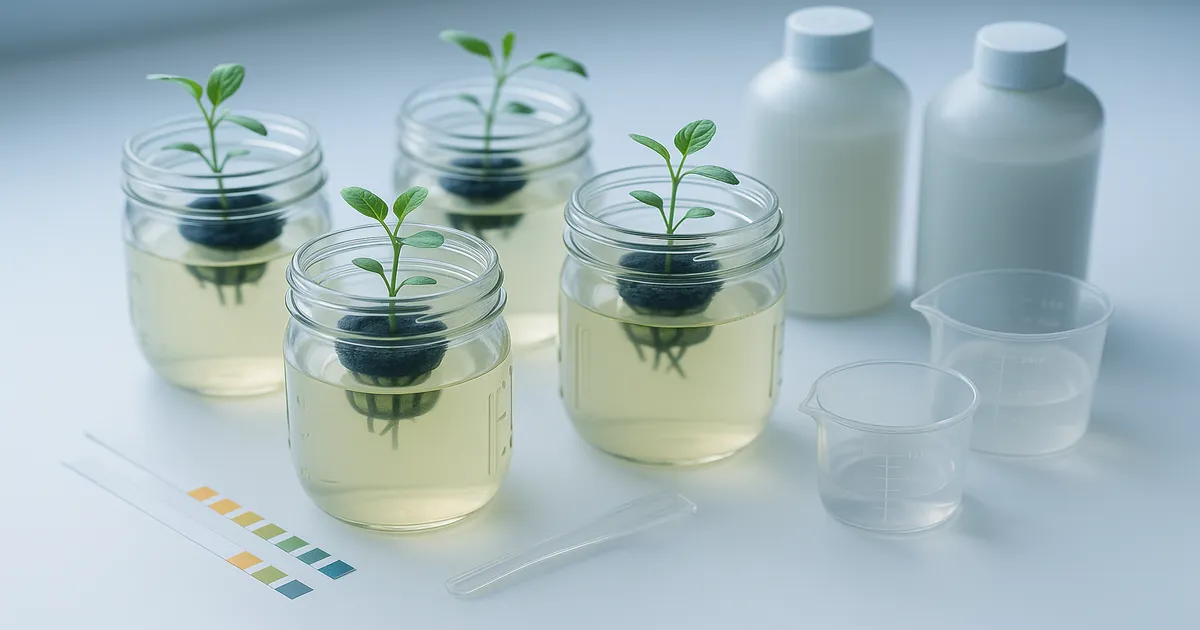
The genius of Kratky is its simplicity. Fill a container with nutrient solution, suspend a plant above it, and let physics do the rest. As the plant drinks, the water level drops and an air gap forms between the solution surface and the underside of the net pot.
Roots that end up in this gap develop a fuzzy, white, almost cotton-like texture — these are aerial roots actively absorbing oxygen. Roots that stay submerged continue pulling up water and dissolved nutrients. One root system, two jobs, zero moving parts.
Why Kratky Needs No Pump and No Electricity
In a traditional Deep Water Culture (DWC) system, an air pump constantly bubbles oxygen into the solution because the roots are fully submerged. Kratky sidesteps this entirely — the air gap is the oxygenation system. As the plant grows and demands more water, it drinks faster, which enlarges the air gap proportionally. The system self-regulates.
Classic vs. Modified Kratky: Which Should You Use?
| Variant | How It Works | Best Crops |
|---|---|---|
| Classic Kratky | Single fill, no refills, harvest at depletion | Lettuce, herbs, leafy greens |
| Modified Kratky | Periodic top-offs to extend the cycle | Tomatoes, peppers, cucumbers |
| Mason Jar Kratky | Individual jar per plant | Herbs, beginners |
| 5-Gallon Bucket Kratky | Large reservoir per plant | Tomatoes, large peppers |
| Multi-Plant Tote | One tote, multiple net pot holes | Batch lettuce production |
For your first grow, classic Kratky with lettuce or herbs is the right call. Save the modified approach for once you understand how the air gap behaves.
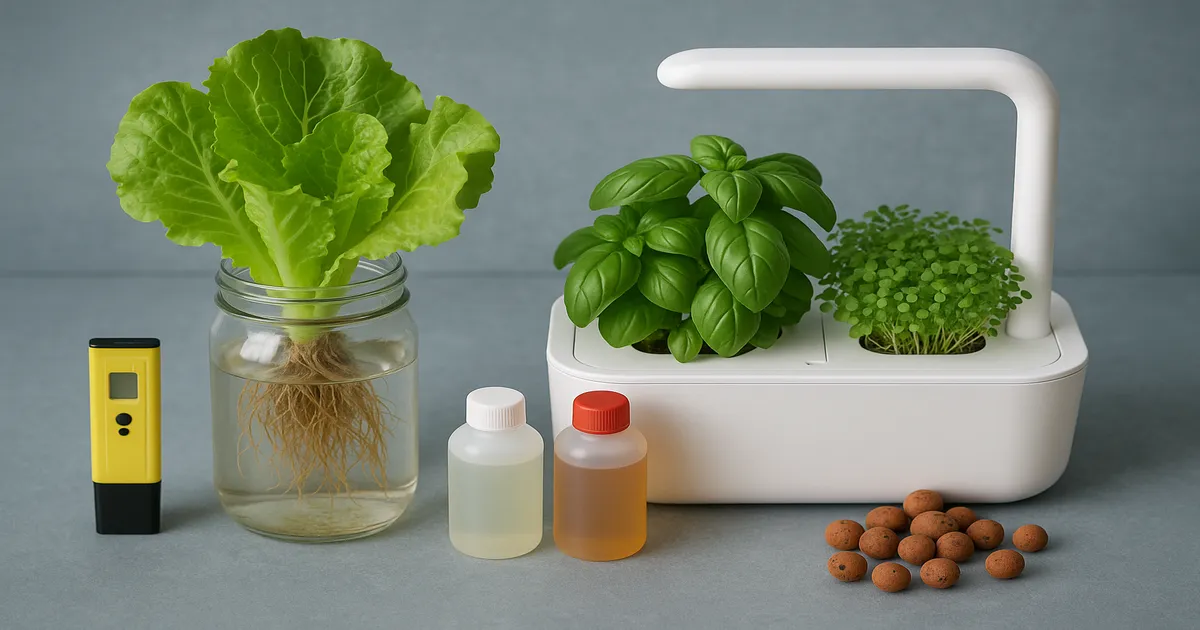
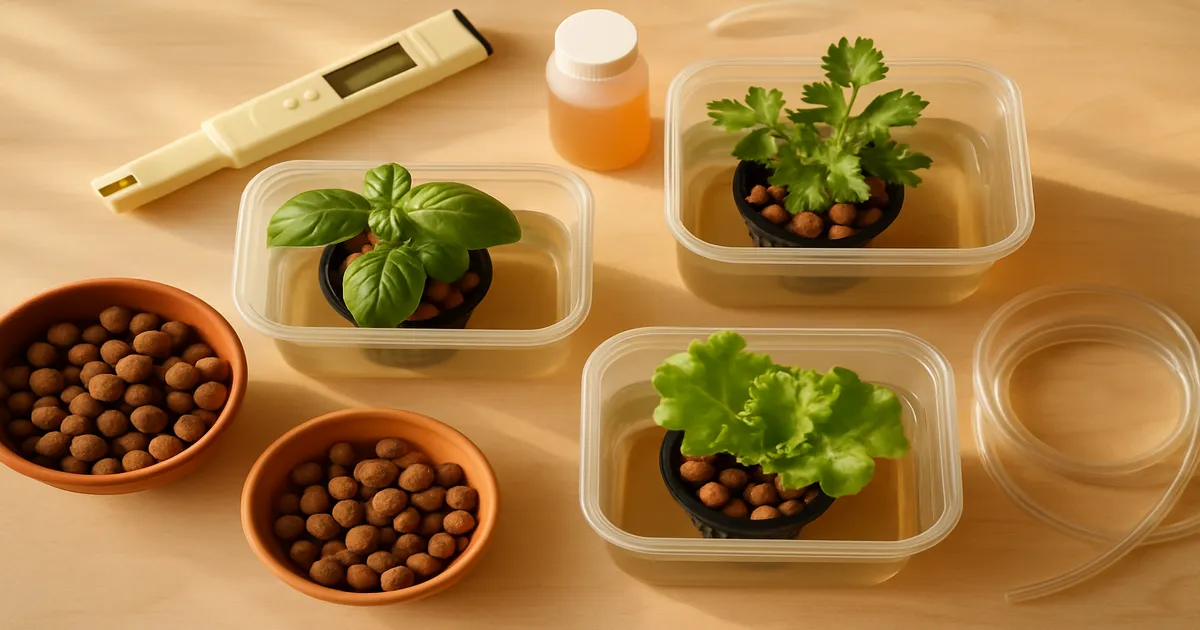
Kratky Method Equipment Checklist
Choosing the Right Container
Container size scales with plant size — this isn’t optional. A quart mason jar holds enough solution for a single herb plant. A 5-gallon bucket gives a tomato plant the reservoir volume it needs to fruit without constant intervention. For a dozen heads of lettuce at once, a large opaque storage tote with multiple net pot holes cut into the lid is the most efficient setup.
Critical rule: your container must be opaque. Light hitting the nutrient solution breeds algae quickly. Black containers are ideal. If you only have clear jars, wrap them in aluminium foil or black tape.
Net Pots, Growing Media, and Seedling Supplies
- 2-inch net pots — standard for lettuce, spinach, and herbs
- 3–4-inch net pots — better for tomatoes, peppers, and cucumbers
- Growing media: hydroton clay pebbles (reusable, excellent drainage) , rockwool starter cubes (great germination rates), or coco coir plugs (beginner-friendly and biodegradable)
- Seedling starter trays if germinating from seed before transplanting
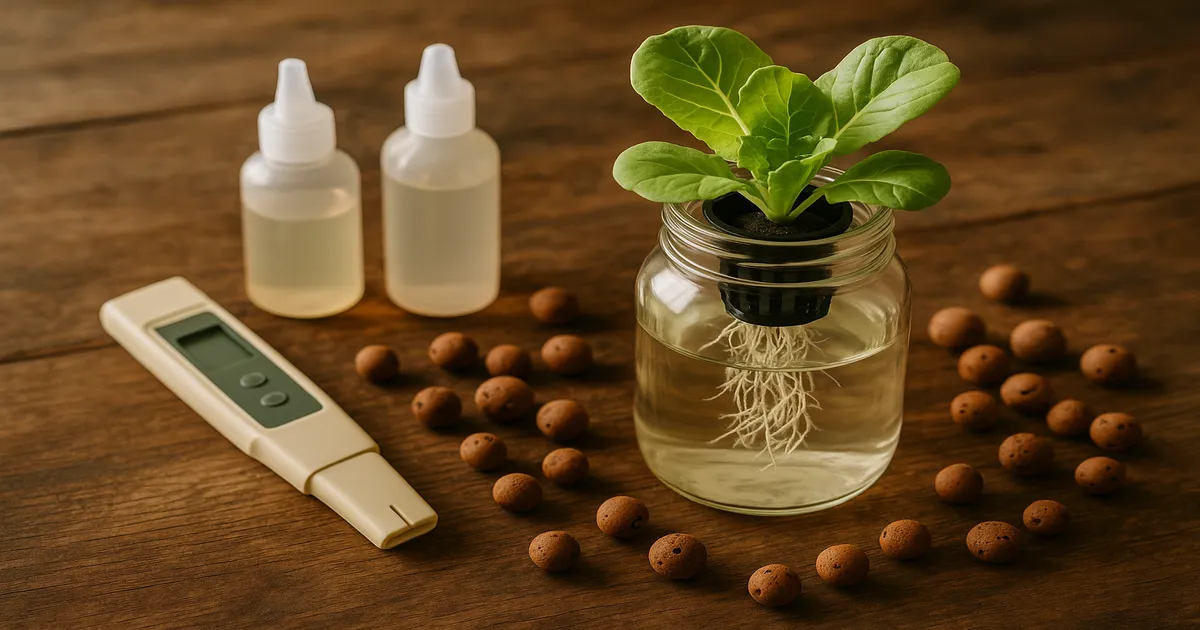
pH and EC Meters: Non-Negotiable Tools
You can approximate nutrients and get away with it for a while. You cannot approximate pH. Nutrient lockout — where the plant can’t absorb what’s dissolved in the solution — happens silently and looks like a deficiency even when your PPM is perfect.
Invest in a reliable digital pH pen (Apera PH20) and a TDS/EC combo meter . You’ll also need pH Up and pH Down solutions and calibration buffer packets (pH 4.0 and 7.0).
Optional Additions: Lighting and Covers
A south-facing window can carry herbs and lettuce without artificial light. For fruiting crops indoors — or any grow in a room without strong natural light — a full-spectrum LED panel is necessary, not optional.
Kratky Method Hydroponics: Step-by-Step Setup
Step 1: Prepare Your Container
Cut or drill holes in your container lid sized to hold your net pots snugly — they should rest in place without falling through. Clean the container with a diluted hydrogen peroxide solution (1 tsp per quart of water), rinse well, and let it dry completely.
Step 2: Mix Your Nutrient Solution
The MasterBlend 4-18-38 recipe is the Kratky community’s favourite for good reason — it’s precise, affordable, and complete.
Per gallon of water:
- MasterBlend 4-18-38: 2.4 g
- Calcium Nitrate (15.5-0-0): 2.4 g
- Epsom Salt (MgSO₄): 1.2 g
This yields roughly 800–1,000 PPM (1.6–2.0 EC) — ideal for lettuce and herbs. If you’d rather skip the measuring, General Hydroponics Flora Series is a reliable beginner alternative with clear mixing instructions on the bottle.
After mixing, test pH and adjust to 5.8–6.2. Add pH Up or Down in 0.5–1 mL increments, stir, wait 30 seconds, and retest. Always mix nutrients before adjusting pH — nutrients shift the pH themselves, so testing plain water first wastes your time.
Step 3: Fill the Reservoir to the Correct Starting Level
This is where most beginners go wrong. Fill the reservoir so that the bottom ¼ inch (0.6 cm) of the net pot is submerged — and no more. Overfilling eliminates the air gap before it can form, which suffocates the roots. The roots will grow downward to chase the solution as the level drops; trust the process.
Step 4: Place Seedlings or Germinate Seeds
If transplanting seedlings, gently nestle the root ball into the net pot and pack growing media around it to hold the plant upright. If starting from seed, place a seed in a moistened rockwool cube or coco plug inside the net pot. Keep the media moist for the first few days by misting — once roots reach the solution, the plant feeds itself.
Step 5: Monitor the First Week
Check the reservoir daily for the first week. You’re looking for two things: the water level dropping (confirming the plant is drinking) and the appearance of fuzzy white aerial roots in the air gap. Both are healthy signs.
If roots look brown or slimy, or the water smells off, something is wrong — see the troubleshooting notes in the FAQ below. If the water level hasn’t dropped at all after five days, check that the roots have actually reached the solution.
Nutrient Solution Guide: PPM, EC, and Recipes by Crop
PPM and EC Ranges by Crop
| Crop | PPM | EC |
|---|---|---|
| Seedlings / Clones | 100–250 | 0.2–0.5 |
| Lettuce & Spinach | 560–840 | 1.1–1.7 |
| Herbs (basil, mint, cilantro) | 700–1,120 | 1.4–2.2 |
| Kale & Chard | 1,120–1,400 | 2.2–2.8 |
| Cucumbers | 1,190–1,750 | 2.4–3.5 |
| Strawberries | 1,260–1,540 | 2.5–3.1 |
| Peppers | 1,400–2,800 | 2.8–5.6 |
| Tomatoes (vegetative) | 1,400–2,100 | 2.8–4.2 |
| Tomatoes (fruiting) | 2,100–3,500 | 4.2–7.0 |
Scaling Nutrients for Fruiting Plants
The standard MasterBlend recipe covers lettuce and herbs. For fruiting plants, double the dose: 4.8 g MasterBlend / 4.8 g Calcium Nitrate / 2.4 g Epsom Salt per gallon, which brings you to approximately 1,600–2,000 PPM (3.2–4.0 EC) — a solid starting point for the vegetative stage before ramping up further at fruit set.
If you want the simplest possible one-part solution, MaxiBloom at 7 g/gallon (the Lucas Formula) produces around 1,400–1,600 PPM (2.8–3.2 EC) and works for both vegetative and fruiting stages. Add CalMag at 5 mL/gal if you’re using RO or very soft tap water.
Water Quality Notes
Always test your tap water before mixing nutrients — many municipal supplies run 100–300 PPM baseline. Subtract that from your target PPM when mixing. If your tap water exceeds 400 PPM, switch to RO water and add a CalMag supplement. For chlorinated tap water, let it sit uncovered for 24 hours. Note: chloramine doesn’t off-gas — you’ll need a carbon filter or RO system for that.
pH and EC Management in a Kratky System
Target pH Range: 5.5–6.5, Sweet Spot 5.8–6.2
pH determines whether your plant can actually access the nutrients dissolved in the water. Outside the 5.5–6.5 window, certain elements become chemically unavailable regardless of concentration. Start at pH 5.8 — this gives you buffer room as pH drifts upward over the grow cycle.
How to Adjust pH Correctly
- Mix your full nutrient solution first
- Test pH with a calibrated meter
- Add pH Up (potassium hydroxide) or pH Down (phosphoric acid) in 0.5–1 mL increments
- Stir thoroughly, wait 30 seconds, retest
- Repeat until stable at your target
Both products are highly concentrated. A little goes a long way, especially in small reservoirs.
Understanding pH Drift
Plants preferentially absorb negatively charged ions (nitrates, phosphates), leaving positively charged ions behind that raise the solution’s pH over time. This upward drift is normal. In a classic Kratky grow with leafy greens, the solution is consumed fast enough that drift rarely becomes a crisis. In modified Kratky with top-offs, check pH every 3–5 days and correct as needed.
EC Monitoring: When to Top Off vs. When to Leave It
- EC rising — the plant is drinking water faster than nutrients; dilute with pH-adjusted plain water
- EC dropping — nutrients are being consumed faster than water; add a fresh, diluted nutrient solution
- Classic Kratky — some EC concentration as water depletes is normal and self-correcting
Calibrating Your Meters
Calibrate your pH meter with pH 4.0 and 7.0 buffer solutions at least once a week. Store the probe in storage solution — not distilled water, which damages the membrane. Calibrate your EC meter monthly using a 1.413 EC calibration solution. One important note: Hanna meters report 1 EC as 500 PPM, while Bluelab meters use 700 PPM. Always note which scale your meter uses so your readings actually mean something.
Lighting for Kratky: Natural Sun vs. Grow Lights
Windowsill Growing: What Actually Works
A south-facing window with 4–6 hours of direct sun handles herbs and lettuce reasonably well. East or west-facing windows are borderline — fine for lettuce, marginal for basil, and genuinely insufficient for anything fruiting. If your plants are stretching toward the light or growing slowly, that’s your answer.
Choosing an LED Grow Light
PPFD (Photosynthetic Photon Flux Density) measures how many light particles hit your plant canopy per second — think of it as intensity at the leaf surface. DLI (Daily Light Integral) is the total dose your plant receives over a full day: PPFD multiplied by hours of light.
Full-spectrum white LEDs in the 3000K–5000K range are the best all-around choice for Kratky. Blue-heavy spectrums (5000K–6500K) keep leafy greens compact and prevent stretching.
PPFD Requirements by Crop
| Crop | PPFD Target |
|---|---|
| Lettuce & Spinach | 150–250 µmol/m²/s |
| Herbs (basil, mint, cilantro) | 200–400 µmol/m²/s |
| Kale & Chard | 250–400 µmol/m²/s |
| Strawberries | 300–500 µmol/m²/s |
| Peppers | 400–700 µmol/m²/s |
| Tomatoes (vegetative) | 400–600 µmol/m²/s |
| Tomatoes (fruiting) | 600–1,000 µmol/m²/s |
Photoperiod Schedules
- Lettuce: 16–18 hours on — long days keep it vegetative and delay bolting
- Basil: 16–18 hours, but watch for premature flowering under continuous long days
- Mint, parsley: 14–16 hours; tolerates some variation
- Tomatoes (vegetative): 18 hours on / 6 hours off
- Tomatoes (fruiting): 12–16 hours — indeterminate varieties are day-neutral
- Peppers: 14–16 hours; consistent schedule matters more than exact hours
- Strawberries: 12–16 hours; choose day-neutral varieties for indoor growing
Best Plants for the Kratky Method
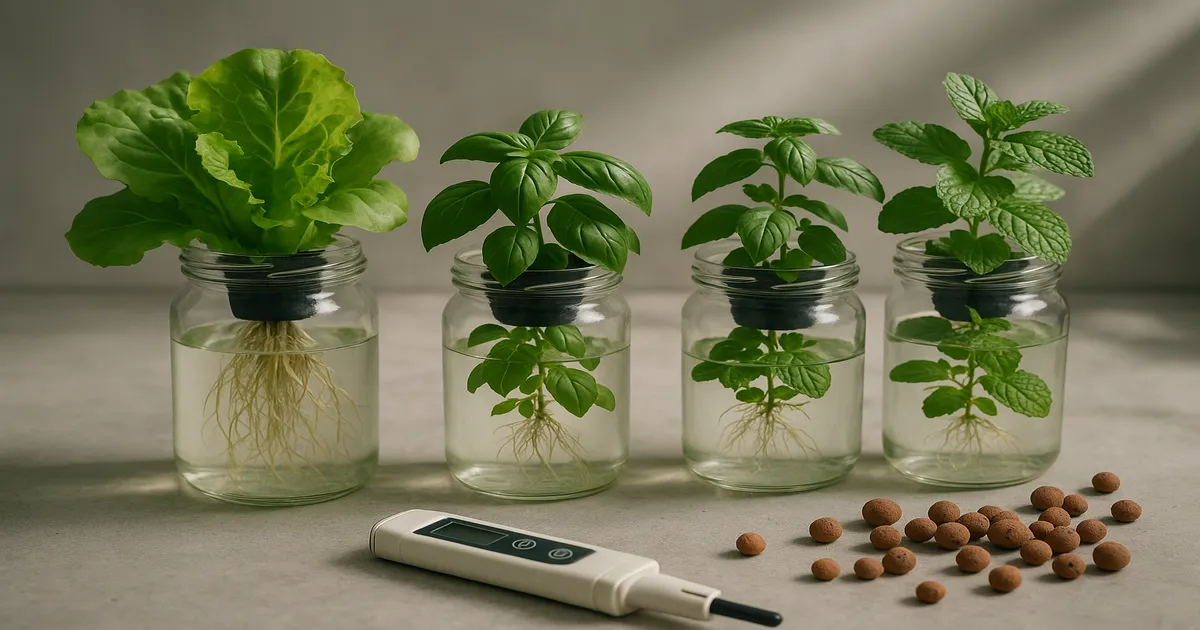
Easiest Crops: Lettuce, Spinach, and Leafy Greens
Lettuce is the perfect first Kratky crop. It has a forgiving PPM range (560–840 PPM / 1.1–1.7 EC), low light requirements (150–250 PPFD), and a fast harvest cycle of 30–45 days. Spinach, arugula, and kale follow the same general approach with slightly higher nutrient needs. These crops genuinely thrive in classic Kratky — fill the reservoir once and harvest when it’s done.
Kratky Herbs: Basil, Mint, Cilantro, and Parsley
Herbs are excellent Kratky candidates, though basil deserves a specific warning: it bolts when stressed by heat or inconsistent photoperiods. Keep basil under 16–18 hours of light and harvest the top leaves regularly to delay flowering. Mint is nearly unkillable in Kratky. Cilantro grows fast but also bolts in heat — keep it cool and harvest frequently.
Advanced Kratky: Tomatoes, Peppers, and Cucumbers
These crops are doable in Kratky but require the modified approach — periodic top-offs — because their grow cycles far outlast a single reservoir fill. Start at 1,400–2,100 PPM (2.8–4.2 EC) during vegetative growth, then ramp to 2,100–3,500 PPM (4.2–7.0 EC) at fruiting. A 5-gallon bucket per plant is the minimum practical container size. Strong lighting (600–1,000 PPFD) is non-negotiable indoors.
Kratky Strawberries: A Rewarding Intermediate Project
Strawberries work well in Kratky but are sensitive to high EC. Keep it between 1,260–1,540 PPM (2.5–3.1 EC) and maintain pH at the lower end of the range — around 5.8–6.0 — for best results. Choose day-neutral varieties such as Albion or Seascape for consistent indoor fruiting regardless of season. Expect fruit in 60–90 days from a well-established runner.
Frequently Asked Questions
Can you reuse Kratky nutrient solution for a second grow? It’s not recommended. By the end of a grow cycle, the solution is depleted and pH-unstable. Residual organic matter also increases the risk of algae and root pathogens. Start fresh each time — it’s cheap insurance.
Why are my Kratky roots turning brown? Brown, slimy roots with a foul smell usually indicate root rot caused by Pythium or similar water mould. It’s most common when the reservoir temperature exceeds 72°F (22°C) or when light leaks into the container. Remove the plant, trim affected roots, treat with a diluted hydrogen peroxide rinse (3% H₂O₂ at 1:5 with water), and address the underlying cause before returning the plant to a clean reservoir.
How often should I check the water level in a Kratky system? Daily for the first week, then every 2–3 days once the plant is established. In classic Kratky, you’re mainly watching that the level is dropping steadily. In modified Kratky with fruiting plants, check every 2–3 days and top off before the reservoir runs completely dry.
Can I use Kratky outdoors? Yes, with caveats. Outdoor temperature swings affect nutrient uptake and can heat the reservoir, promoting root rot. Use insulated or double-walled containers, keep them shaded from direct sun on the sides, and check the solution more frequently in hot weather. Kratky works well on a shaded patio for herbs and lettuce.
What’s the difference between Kratky and Deep Water Culture (DWC)? Both suspend plant roots in nutrient solution, but DWC uses an air pump to oxygenate the water continuously because the roots are fully submerged. Kratky relies on the air gap for oxygenation — no pump needed. DWC is better suited to large fruiting plants with long grow cycles; Kratky is simpler and lower-cost for leafy greens and herbs.