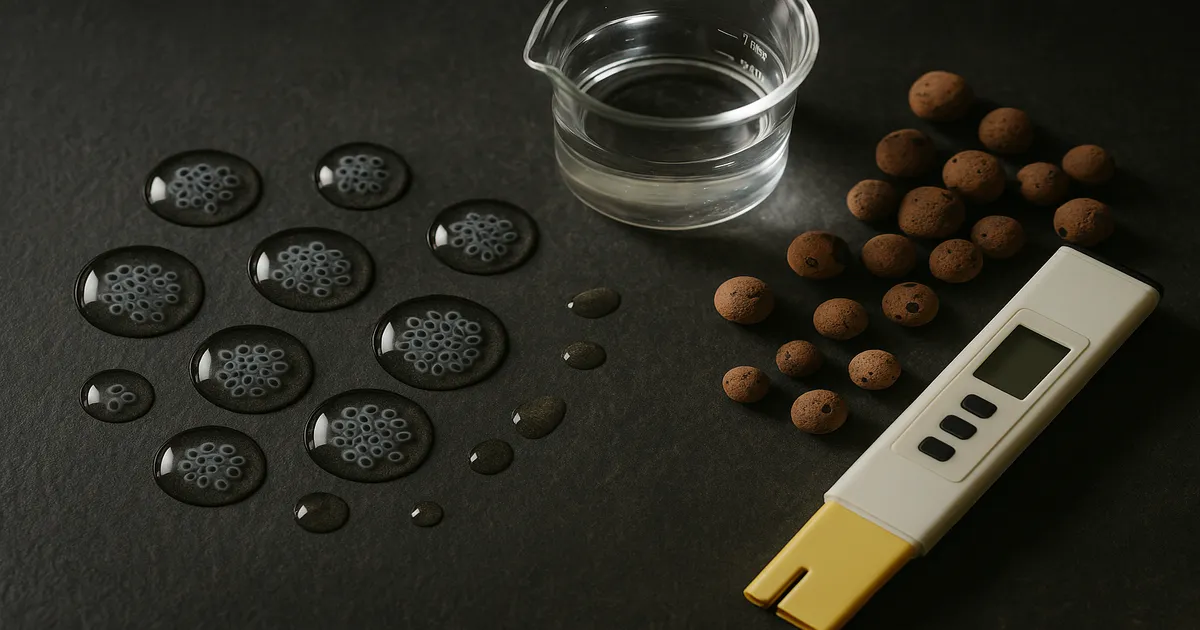
Quick Answer: When basil seeds get wet, two things happen — and both are completely normal. First, a clear gel coating swells up around each seed within 30–60 minutes (that’s mucilage, not mold). Second, after 24–72 hours in a warm, moist environment, a tiny white root called a radicle emerges as germination begins.
If you’ve ever soaked basil seeds and watched them transform into what looks like tiny frog eggs, you’re not alone. “What are these basil seeds doing?” is one of the most common questions new growers ask — and the answer is genuinely fascinating. Whether you’re growing in soil or setting up a hydroponic system, understanding what happens at the seed level will make you a better grower from day one.
What Are These Basil Seeds Doing? The Two-Stage Answer
Stage 1 — Mucilage Gel Formation: The Chia-Like Swelling
That gelatinous bubble surrounding each seed is called mucilage — a natural polysaccharide gel stored in the outer layer of the seed coat. Water triggers rapid expansion, sometimes reaching 30–45 times the seed’s original volume within 30–60 minutes. It looks alarming the first time, but it’s one of the most elegant survival mechanisms in the plant kingdom.
Basil shares this trait with chia and flaxseed. All three belong to the Lamiaceae (mint) family. The gel is not rot, not contamination, and not a problem. It’s the seed doing exactly what it’s supposed to do.
Stage 2 — Germination: When the White Root Appears
Once the gel forms and the seed stays warm and moist, germination begins. The seed coat cracks open and a thin white thread — the radicle, or primary root — pushes out. Under ideal conditions this happens within 24–72 hours. A tiny shoot follows shortly after. At that point, your basil seed is officially a seedling.
The Science Behind Basil Seed Mucilage
What Is Mucilage and Where Does It Come From?
Mucilage is made up of complex carbohydrate polymers, primarily xyloglucan and arabinoxylans, packed into the epidermal cells of the seed coat. When those cells absorb water, they rupture and release the gel outward. The process is entirely passive — no enzyme activation required, just water.
Think of it like a tightly compressed dry sponge sealed inside a shell. The moment moisture arrives, it expands.
Why Do Basil Seeds Produce a Gel Coating?
The gel serves four real ecological purposes:
- Water retention — keeps the seed hydrated during germination, even through dry spells
- Soil adhesion — anchors the seed so wind and rain can’t displace it
- Microbial protection — creates a slightly hostile microenvironment for certain pathogens
- Nutrient absorption — may help the seed pull minerals from surrounding soil during early development
In nature, this is what allows basil to germinate in variable, sometimes harsh conditions. In your hydroponic setup, it just looks strange.
Which Basil Varieties Show the Strongest Gel Formation?
| Variety | Mucilage Level | Notes |
|---|---|---|
| Sweet Basil | High | Most common; classic gel formation |
| Thai Basil | High | Slightly smaller gel bubble |
| Holy Basil / Tulsi | Very High | Used in Southeast Asian drinks |
| Lemon Basil | Moderate | Less pronounced swelling |
| Purple / Dark Opal | Moderate–High | Same behavior, darker seed coat |
| Genovese Basil | High | Industry standard; robust gel |
Holy Basil produces so much mucilage it’s used as a drink ingredient in Thailand — soaked seeds are added to beverages for texture. The gel is completely edible and safe.
How to Germinate Basil Seeds for Hydroponics
Choosing the Right Growing Medium
Rockwool cubes (1.5-inch) are the go-to for most hydroponic growers. They hold moisture well, give the radicle something to grip, and transplant cleanly into almost any system. Coco coir plugs are a close second and suit growers who prefer an organic-friendly option.
Avoid loose media like perlite or clay pebbles at the germination stage. Basil seeds are tiny, the gel makes them slippery, and they need consistent contact with a moist surface to sprout reliably.
Step-by-Step Germination Process
- Pre-soak your medium — Soak rockwool cubes in pH-adjusted water (pH 5.5–6.0) for 30 minutes, then squeeze out the excess gently. The cube should feel moist, not dripping.
- Place seeds on the surface — Drop 2–3 seeds into the pre-drilled hole or press them lightly onto the surface. Don’t bury them deeper than 1/8 inch — basil needs light to germinate well.
- Mist lightly — Use a spray bottle with plain pH-adjusted water. No nutrients yet.
- Cover with a humidity dome — This keeps moisture in and stops the gel from drying out before the radicle emerges.
- Check daily — Mist if the surface looks dry. Don’t flood. Look for the white root tip after 24–72 hours.
- Remove the dome once sprouts appear — Gradually increase airflow to prevent damping off.
Temperature, Humidity, and Heat Mats
Basil germinates best at 70–80°F (21–27°C). Below 65°F (18°C), germination slows dramatically or stalls — this is one of the most common reasons seeds fail. Aim for 70–80% relative humidity under the dome.
If your grow space runs cool, a seedling heat mat is worth every penny. The Vivosun Seedling Heat Mat is a reliable, affordable option that fits standard 10×20 trays.
Common Germination Mistakes
- Overwatering — The mucilage gel already holds moisture; soggy media causes rot before the radicle can establish
- Burying seeds too deep — More than 1/8 inch and you’re fighting the seed’s natural light response
- Adding nutrients too early — Use plain pH-adjusted water at 0–100 PPM / 0.0–0.2 EC during germination; salts stress roots before they’re ready
- Cold temperatures — Below 65°F (18°C) is a germination killer for basil
Best Hydroponic Systems for Basil
Deep Water Culture (DWC): The Top Choice
DWC suspends plant roots in an oxygenated, nutrient-rich reservoir. Basil thrives in it — growth is fast, yields are high, and the system is straightforward once dialed in. Most home setups use 5-gallon buckets with air stones and a simple air pump. The General Hydroponics WaterFarm is a solid entry-level option.
The main downside: pH and EC can swing quickly in smaller reservoirs, so plan to check levels daily.
Kratky Method: Passive Hydroponics for Beginners
Kratky is DWC without the air pump. Roots hang in nutrient solution, and as the plant drinks, an air gap forms naturally above the water line, providing oxygen. It’s the easiest entry point into hydroponics and works remarkably well for basil. Growth is slower than aerated DWC, and you’ll need to monitor the reservoir as it depletes, but the setup cost is minimal.
Other System Options at a Glance
| System | Pros | Cons | Difficulty |
|---|---|---|---|
| NFT | Excellent for commercial scale | Requires pump; no buffer if power fails | Intermediate |
| Ebb & Flow | Versatile; handles multiple plants | More complex plumbing | Intermediate |
| Aeroponics | Fastest growth rates | High cost; high maintenance | Advanced |
| Wicking | Zero electricity needed | Slow growth; limited scale | Beginner |
Which system should you choose?
- Complete beginner → Kratky
- Home grower wanting speed → DWC in a 5-gallon bucket
- Scaling up (10+ plants) → NFT channel system
- Commercial production → NFT or recirculating DWC
Nutrient Requirements for Hydroponic Basil
pH Range at Every Growth Stage
Keep hydroponic basil between pH 5.5–6.5, with the sweet spot at pH 6.0–6.2. During the seedling stage, lean slightly lower — pH 5.8–6.0 — for optimal early nutrient uptake. Outside this range, certain nutrients become chemically unavailable even when they’re present in the solution.
EC and PPM Targets from Germination to Harvest
| Growth Stage | PPM | EC | Notes |
|---|---|---|---|
| Germination | 0–100 | 0.0–0.2 | Plain water only |
| Seedling (Wk 1–2) | 400–600 | 0.8–1.2 | Sensitive roots; start light |
| Vegetative (Wk 3–5) | 700–1,000 | 1.4–2.0 | Primary growth phase |
| Pre-Harvest / Mature | 800–1,200 | 1.6–2.4 | Boosts essential oil production |
| Flowering (if allowed) | 600–800 | 1.2–1.6 | Lower N, higher P/K; pinch flowers to maintain leaves |
Macronutrients: N, P, and K
Basil is a heavy nitrogen feeder. Nitrogen drives lush, aromatic leaf production — target an N-P-K ratio of roughly 3:1:2 during the vegetative phase. Phosphorus supports root development early on and becomes more important if you let the plant flower. Potassium regulates water uptake and directly influences flavor compounds like linalool and eugenol, so higher K means more aromatic basil.
Calcium, Magnesium, and Micronutrients
Calcium is critical for cell wall integrity and is the primary cause of tip burn when deficient — that browning on leaf edges common in fast-growing hydroponic basil. Target 150–200 PPM calcium and supplement with Cal-Mag if you’re using RO water. General Hydroponics CALiMAGic mixes cleanly and is widely available.
Magnesium sits at the center of every chlorophyll molecule. Deficiency shows up as yellowing between leaf veins (interveinal chlorosis) while the veins themselves stay green. Target 30–50 PPM magnesium.
| Micronutrient | Target PPM | Deficiency Sign |
|---|---|---|
| Iron (Fe) | 1–3 | Young leaf yellowing |
| Manganese (Mn) | 0.5–1 | Interveinal chlorosis |
| Zinc (Zn) | 0.1–0.5 | Small, distorted leaves |
| Boron (B) | 0.1–0.5 | Distorted growing tips |
| Copper (Cu) | 0.05–0.1 | Bluish-green wilting |
| Molybdenum (Mo) | 0.01–0.05 | Marginal leaf scorch |
Recommended Nutrient Recipes
General Hydroponics Flora Series (3-Part) — per gallon, vegetative stage:
- FloraMicro: 5 mL / FloraGro: 10 mL / FloraBloom: 5 mL
- Target: ~900–1,000 PPM (1.8–2.0 EC)
Masterblend 4-18-38 (Budget Favorite) — per gallon:
- Masterblend 4-18-38: 2.4 g / Calcium Nitrate (15.5-0-0): 2.4 g / Epsom Salt (MgSO₄): 1.2 g
- Target: ~800–900 PPM (1.6–1.8 EC)
This is the most cost-effective option for home growers. A small bag covers dozens of grow cycles.
pH and EC Management
Monitoring Accurately
A reliable pH meter is non-negotiable. The Apera PC60 and Bluelab pH Pen are both excellent — calibrate weekly with pH 4.0 and 7.0 buffer solutions, and rinse the probe with distilled water before and after each use.
For EC and PPM, the Bluelab Truncheon is durable and needs minimal calibration. Confirm your meter’s TDS conversion factor — most home meters use the 0.5 (500) scale.
Adjusting pH Up and Down
- pH too low: Add pH Up (potassium hydroxide) in 1–2 mL increments, stir, wait 15 minutes, retest.
- pH too high: Add pH Down (phosphoric acid) the same way — small increments, never dump it in.
Never add concentrated pH Down directly near roots. Always dilute into the reservoir with the pump running, then test.
Understanding pH Drift and EC Swings
pH drifting up is the most common issue in basil DWC. Basil roots absorb more nitrate ions than positive ions, releasing hydroxide in the process. Check pH daily.
pH crashing suddenly usually signals microbial activity or early root rot. Change the reservoir, clean the system, and treat roots with a 3% hydrogen peroxide solution at 1 mL per gallon.
EC creeping up means your plant is drinking more water than nutrients. Top off with plain pH-adjusted water — not more nutrient solution.
EC dropping is a good sign — your plant is feeding actively. Add fresh diluted nutrient solution to bring it back to target.
Reservoir Management
- Full reservoir change every 7–14 days in DWC; every 14–21 days in NFT
- Keep reservoir temperature at 65–72°F (18–22°C) — warmer water holds less dissolved oxygen and invites root rot
- Run air stones continuously; target dissolved oxygen above 6 mg/L
- Larger reservoirs (5+ gallons) buffer pH and EC swings far better than small ones
Lighting for Basil Seeds and Seedlings
Spectrum, PPFD, and DLI Targets
Seedlings need blue-heavy light (400–500 nm) to develop compact, strong stems. Without enough blue light, seedlings stretch and become leggy — a condition called etiolation that’s hard to reverse. Once in the vegetative phase, full-spectrum light at a color temperature equivalent of 5,000–6,500K works well. UV-B light (280–315 nm) can boost essential oil content by up to 30% — some advanced LED fixtures include UV diodes specifically for this.
| Growth Stage | PPFD (µmol/m²/s) | DLI (mol/m²/day) |
|---|---|---|
| Germination | 50–100 | 3–5 |
| Seedling | 150–250 | 8–12 |
| Vegetative | 300–600 | 15–25 |
| High-Yield Production | 600–800 | 22–30 |
DLI formula: PPFD × hours of light × 0.0036 = DLI Example: 400 PPFD × 16 hours × 0.0036 = 23 DLI — right in the sweet spot for mature basil.
Photoperiod
Run 16 hours on / 8 hours off. Basil is a long-day plant — extended light keeps it in vegetative mode and delays flowering. Drop below 12 hours and you’ll trigger bolting, which tanks leaf quality fast. Don’t run continuous 24/0 light; basil needs the dark period for respiration and recovery.
Recommended LED Grow Lights
- Mars Hydro TS 1000 (~150W) — great for small DWC or Kratky setups
- Spider Farmer SE3000 (~300W) — excellent for a 3×3 ft tent
- HLG 300L Rspec — Samsung LM301H diodes; outstanding efficiency for serious home growers
Frequently Asked Questions
Is the gel around my basil seeds mold? No. That clear, jelly-like coating is mucilage — a natural gel the seed produces when it contacts water. Mold is fuzzy, typically white or gray, and appears after several days in stagnant, humid conditions. Mucilage forms within an hour and is completely clear.
What are these basil seeds doing if they haven’t sprouted after 3 days? Check temperature first — below 65°F (18°C) is the most common culprit. Also confirm the medium is moist but not waterlogged, and that seeds aren’t buried more than 1/8 inch deep. If conditions are correct, give it another 24–48 hours before assuming failure.
Can I start basil seeds directly in my hydroponic reservoir? Not recommended. Seeds need a stable, moist surface to germinate — floating in a reservoir doesn’t provide that. Start seeds in rockwool cubes or coco coir plugs, then transplant once the radicle is visible and a small root system has formed.
How many basil seeds should I plant per cube or plug? Two to three seeds per site. Once seedlings emerge, thin to the strongest one by snipping the others at the base with scissors — don’t pull them out, as this can disturb the surviving root.
Why is my hydroponic basil turning yellow? The most likely causes are nitrogen deficiency (older leaves yellow first), magnesium deficiency (yellowing between veins), or pH out of range locking out nutrients. Check pH first — if it’s outside 5.5–6.5, correct it before adding more nutrients.