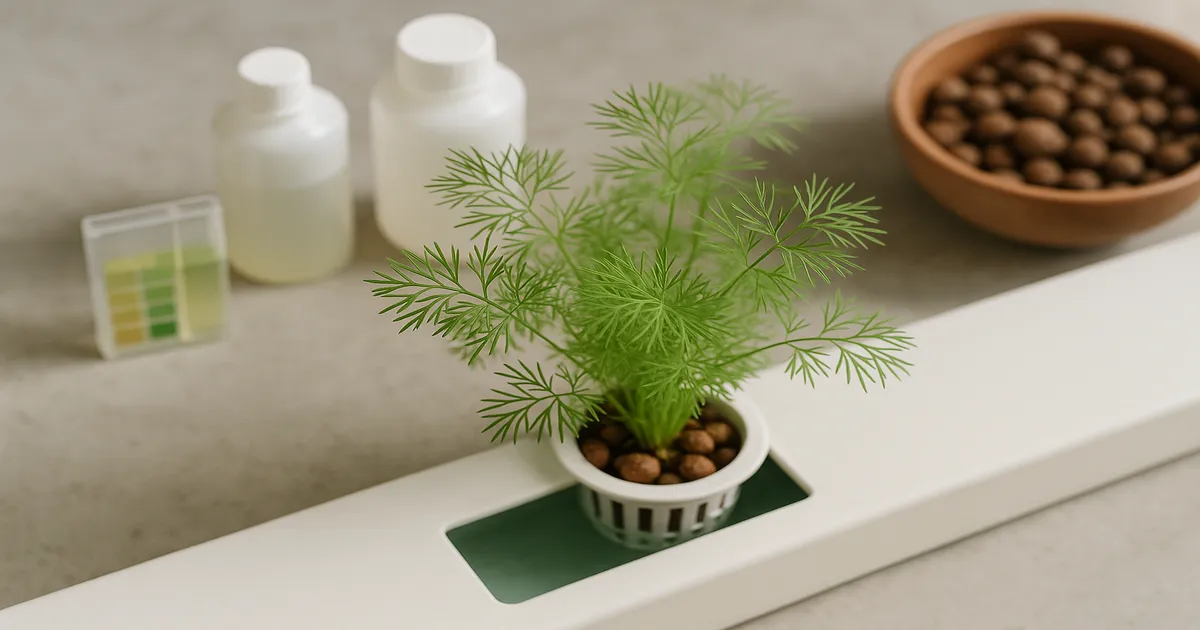
Quick Answer: Dill grows best in cool temperatures below 75°F (24°C), at pH 5.8–6.2 in hydroponic systems, with moderate nutrients (600–900 PPM / 1.2–1.8 EC) during vegetative growth. Expect your first harvest in 40–60 days from seed. The single biggest challenge is preventing premature bolting — manage it with the right variety, controlled temperatures, and a photoperiod no longer than 14–16 hours.
Learning how to grow the herb dill is genuinely rewarding — it’s fast, fragrant, and versatile across almost any growing system. Whether you’re tucking it into a container on your patio or running a DWC setup in your basement, dill delivers fresh harvests in under two months. The catch? It bolts (flowers and goes to seed) quickly if temperatures creep up or the lights stay on too long. Get those two variables under control and you’ll have more feathery fronds than you know what to do with.
How to Grow the Herb Dill: Key Facts at a Glance
| Factor | Target |
|---|---|
| Temperature | 60–75°F (15–24°C) |
| Hydroponic pH | 5.8–6.2 |
| Soil pH | 6.2–6.8 |
| Seedling EC/PPM | 0.8–1.0 EC / 400–500 PPM |
| Vegetative EC/PPM | 1.2–1.8 EC / 600–900 PPM |
| Light (vegetative) | 250–400 PPFD |
| Photoperiod | 14/10 to 16/8 (light/dark) |
| Days to first harvest | 40–60 days |
Soil vs. Hydroponic Growing: Which Is Right for You?
Soil and container growing is the most forgiving path. A 6–8 inch deep pot, quality potting mix, and a sunny windowsill or outdoor spot will get you started with minimal investment. The tradeoff is slower growth and less control over nutrients and temperature.
Hydroponics accelerates everything. DWC and NFT systems can cut your time to first harvest by a week or more, and you gain precise control over the variables that matter most for dill. If bolt prevention is your priority, that level of control is genuinely useful.
Choosing the Best Dill Variety
Variety selection matters more for dill than for most herbs because bolt resistance varies significantly. Picking the wrong variety for an indoor setup is one of the most common reasons growers end up with flowers instead of fronds.
Fernleaf Dill: The Top Pick for Hydroponics and Containers
Fernleaf is a dwarf compact variety that tops out at 18–24 inches — perfect for grow tents, shelves, and tower gardens. It’s slow to bolt, dense with feathery foliage, and forgiving enough that beginners consistently get good results. If you’re growing indoors or hydroponically for the first time, start here.
- Days to harvest: 40–55 days
- Bolt resistance: High
- Best for: DWC, Kratky, containers, vertical towers
Dukat Dill: Best Flavor for Culinary Use
Dukat (sometimes called Tetra Dill) is the go-to for growers who prioritize flavor. It has a noticeably higher essential oil content than most varieties, which means more aromatic, intense dill flavor. It grows 24–36 inches tall and is moderately bolt-resistant — a solid choice once you’ve dialed in your temperature control.
- Days to harvest: 45–60 days
- Bolt resistance: Moderate
- Best for: NFT systems, culinary herb gardens
Bouquet Dill: The Classic All-Rounder
Bouquet is the variety you’ll find at almost every garden center. It’s vigorous, widely available, and works well for both leaf and seed production. At 24–36 inches, it needs more vertical space than Fernleaf, but it’s a reliable performer in outdoor beds and larger containers.
- Days to harvest: 40–55 days
- Bolt resistance: Moderate
- Best for: Outdoor gardens, raised beds, ebb and flow systems
Variety Comparison
| Variety | Height | Days to Harvest | Bolt Resistance | Best System |
|---|---|---|---|---|
| Fernleaf | 18–24 in | 40–55 | High | Hydro, containers, towers |
| Dukat | 24–36 in | 45–60 | Moderate | NFT, commercial, culinary |
| Bouquet | 24–36 in | 40–55 | Moderate | Outdoor, raised beds, ebb & flow |
Setting Up Your Growing System for Dill
Soil and Container Growing
Use a pot at least 6–8 inches deep — dill has a taproot that doesn’t appreciate being cramped. Good drainage is non-negotiable; soggy roots are a fast track to rot. Outdoors, a spot with 6–8 hours of direct sun works well. Indoors, supplement with a grow light if your windowsill doesn’t deliver enough intensity.
Dill is a good companion plant for tomatoes, cucumbers, and brassicas. Keep it well away from fennel — the two are allelopathic to each other and will suppress each other’s growth.
- Difficulty: ⭐ Beginner
- Pot minimum: 6–8 inches deep, 6 inches wide
Deep Water Culture (DWC)
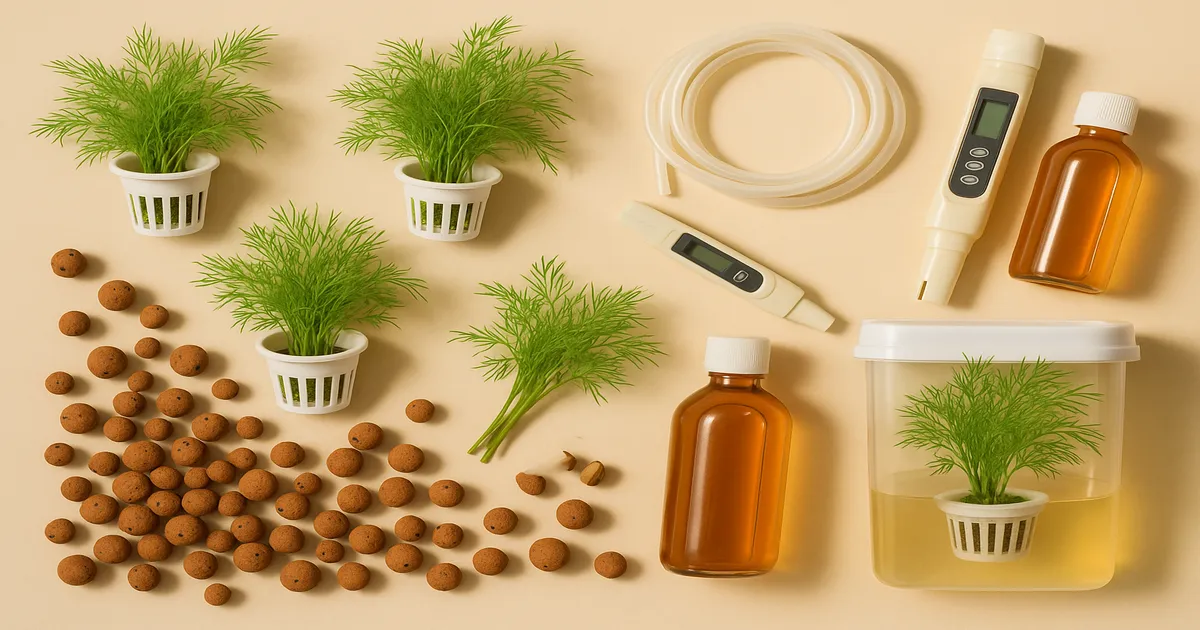
DWC suspends dill roots in oxygenated nutrient solution, producing fast, lush vegetative growth. Use a minimum of 1 gallon of reservoir volume per plant — this buffers pH and EC swings, which dill is sensitive to. An air stone and pump keep dissolved oxygen high enough to prevent root rot. A reliable air pump makes a real difference in root health over the long run.
- Difficulty: ⭐⭐ Beginner–Intermediate
- Best for: Home growers wanting fast leaf production
Nutrient Film Technique (NFT)
A thin film of nutrient solution flows continuously over exposed roots in sloped channels. NFT is water- and nutrient-efficient, making it popular for commercial dill production. Because the film is so thin, any pump failure can dry out roots within minutes — redundancy matters here.
- Difficulty: ⭐⭐⭐ Intermediate
- Best for: Commercial or serious hobby growers
Kratky Method: The Beginner Passive Option
The Kratky method is about as simple as hydroponics gets — seeds in a net pot, roots hanging into a nutrient solution reservoir, no pump required. As plants drink the solution down, an air gap forms naturally above the liquid, providing passive oxygen to the roots. It’s the easiest possible entry point into hydroponic dill growing.
- Difficulty: ⭐ Beginner
- Best for: First-time hydroponic growers, small batches
Ebb and Flow, Aeroponics, and Vertical Tower Gardens
Ebb and flow systems flood a grow tray with nutrient solution on a timer, then drain it back to the reservoir — versatile and well-suited to dill in net pots filled with clay pebbles or rockwool. Aeroponics mists roots directly for the fastest possible growth rates, but the technical complexity puts it firmly in advanced territory. Vertical tower gardens are excellent space-efficient options for home kitchen herb production.
- Ebb and Flow: ⭐⭐⭐ Intermediate
- Aeroponics: ⭐⭐⭐⭐⭐ Advanced
- Vertical Tower: ⭐⭐ Beginner–Intermediate
Aquaponics
Dill grows well in aquaponic systems where fish waste supplies nitrogen. The main challenge is pH — aquaponic systems typically run 6.8–7.2, which is slightly above dill’s ideal range of 5.8–6.2. Monitor closely and supplement with chelated iron, potassium, and calcium, which fish waste alone won’t supply in adequate amounts.
Nutrient Requirements for Growing Dill Hydroponically
EC and PPM Targets by Growth Stage
| Growth Stage | PPM | EC |
|---|---|---|
| Seedling (0–2 weeks) | 400–500 PPM | 0.8–1.0 EC |
| Vegetative (2–5 weeks) | 600–900 PPM | 1.2–1.8 EC |
| Active Harvest/Mature | 800–1,100 PPM | 1.6–2.2 EC |
| Seed Production | 1,000–1,400 PPM | 2.0–2.8 EC |
Dill is a light-to-moderate feeder. Overfeeding causes tip burn, makes leaves taste bitter, and accelerates bolting. Start seedlings dilute and increase gradually as plants establish.
Macronutrients: N, P, and K
Nitrogen drives leafy growth during the vegetative phase. Aim for roughly 10–20% of your total nitrogen as ammoniacal nitrogen (NH₄⁺) for lush foliage without excessive stretching. As plants approach maturity, ease back on nitrogen — high N late in the cycle encourages bolting.
Potassium deserves special attention. High K supports essential oil production, which is directly responsible for that characteristic dill flavor. Maintain an N:K ratio of roughly 1:1 to 1:1.5 for the best-tasting herb. Phosphorus needs are moderate — an N:P ratio of 3:1 to 4:1 during vegetative growth is sufficient.
Key Micronutrients
Iron is the micronutrient most likely to cause problems. Deficiency shows up as interveinal chlorosis on new growth — leaf tissue turns yellow while veins stay green. Always use chelated iron (Fe-EDTA or Fe-DTPA) at 2–4 PPM; non-chelated iron precipitates out of solution too easily to be reliable.
Zinc (0.1–0.3 PPM) is involved in essential oil biosynthesis, and boron (0.3–0.5 PPM) is critical for cell division and healthy flowering if you’re growing for seed. Most complete hydroponic nutrient formulas cover these at adequate levels.
Beginner Nutrient Recipe: Masterblend for Dill
This recipe hits the sweet spot for active vegetative growth:
- Masterblend 4-18-38: 2.4 g/gallon
- Calcium Nitrate (15.5-0-0): 2.4 g/gallon
- Magnesium Sulfate (Epsom Salt): 1.2 g/gallon
Mix in that order, always dissolving calcium nitrate before adding Masterblend. This yields approximately 800–900 PPM (1.6–1.8 EC) — right in the vegetative sweet spot.
Intermediate Herb-Specific Nutrient Targets
Once you’re comfortable with the basics, dialing in a custom ratio improves flavor noticeably:
- N: 150–180 PPM | P: 40–60 PPM | K: 180–220 PPM
- Ca: 150–180 PPM | Mg: 45–55 PPM | S: 60–80 PPM
pH and EC Management
Ideal pH Ranges
- Hydroponics: 5.8–6.2 (keep swings within a 0.3-unit range)
- Soil/containers: 6.2–6.8
Stability matters as much as hitting the target. Wild pH swings lock out nutrients even if your average reading looks fine.
Monitoring Tools and Frequency
A quality digital pH pen is non-negotiable. The Apera PH20 and Bluelab pH Pen are both reliable choices — calibrate weekly using pH 4.0 and 7.0 buffer solutions. For EC, the Apera EC20 works well for home setups.
- Home systems: Check pH daily, EC every 2–3 days
- Commercial systems: Continuous monitoring with daily manual verification
Adjusting pH Safely
For pH Up, use potassium hydroxide (KOH) rather than sodium hydroxide — KOH adds beneficial potassium while NaOH causes sodium accumulation that’s toxic to plants over time. For pH Down, phosphoric acid is the standard choice; citric acid works in organic systems.
Always add adjusters drop by drop, mix thoroughly, and wait 5–10 minutes before re-testing. Never add pH adjusters directly to concentrated nutrient stock solutions.
EC Management and Reservoir Changes
When EC rises between top-offs, plants are drinking water faster than nutrients — top off with plain pH-adjusted water. When EC drops faster than expected, plants are consuming nutrients aggressively; top off with a half-strength nutrient solution. Replace your full reservoir every 7–14 days in recirculating systems to prevent salt accumulation and nutrient lockout.
In hard water areas, start with reverse osmosis (RO) water to eliminate bicarbonate interference and give yourself a clean 0 PPM baseline.
Lighting for Indoor Dill Growing
What Dill Actually Needs
Dill needs full-spectrum light covering blue (400–500 nm) for compact growth and essential oil production, red (620–700 nm) for photosynthesis and biomass, and some green (500–600 nm) for canopy penetration. A good target ratio is roughly 20% blue, 65% red, and 15% green/white. Go easy on far-red wavelengths — excess far-red accelerates bolting in long-day plants like dill.
PPFD and DLI Targets
| Growth Stage | PPFD (µmol/m²/s) | DLI (mol/m²/day) |
|---|---|---|
| Germination | 50–150 | 3–6 |
| Seedling | 150–250 | 8–12 |
| Vegetative (leaf harvest) | 250–400 | 14–20 |
| Mature/Seed production | 350–500 | 18–25 |
A DLI of 16–18 mol/m²/day is the practical sweet spot for leaf yield. Pushing beyond 500 PPFD without CO₂ supplementation gives diminishing returns and risks heat stress.
Photoperiod and Bolt Prevention
This is where most indoor growers go wrong. Dill is a facultative long-day plant — photoperiods exceeding 14 hours accelerate flowering. The safest default for leaf production is 14/10 or 16/8 (light/dark). Some growers run 18/6 successfully, but only when temperatures stay consistently below 70°F (21°C). If your grow space runs warm, a shorter photoperiod is your best insurance against bolting.
For intentional seed or flower production, extend to 16–18 hours of light and allow temperatures to rise naturally.
Recommended LED Grow Lights
Home/Hobby (1–4 sq ft):
- Spider Farmer SF-1000 — full-spectrum Samsung diodes, ideal for a 2×2 ft herb garden
- Barrina T5 LED Grow Lights — low heat, excellent for shelf-style setups
Mid-Scale (4–16 sq ft):
- AC Infinity IONBOARD S24 — dimmable, great heat management, well-suited to enclosed grow tents
Commercial/Large Scale:
- Fluence SPYDR 2i — industry standard for commercial herb production, 2.5–2.8 µmol/J efficiency
Keep most mid-power LED fixtures 18–24 inches above the canopy. Use a PAR meter (Apogee MQ-500) to verify actual PPFD at canopy level rather than relying on manufacturer estimates — real-world numbers often differ significantly.
How to Grow the Herb Dill: Planting, Care, and Harvesting
Starting from Seed
Direct sow dill wherever it will grow — avoid transplanting if at all possible. The taproot is sensitive to disturbance, and transplant shock sets plants back noticeably. Sow seeds ¼ inch deep, keep the medium consistently moist (not saturated), and maintain temperatures between 65–75°F (18–24°C). Germination typically takes 7–14 days. In hydroponic systems, start seeds in rockwool cubes or rapid rooter plugs and move them to your system once the root tip is visible below the plug — usually around day 10–14.
Ongoing Care
Once established, dill is relatively low-maintenance. The main tasks are:
- Temperature: Keep it below 75°F (24°C). This is your single most effective bolt-prevention tool.
- Pruning: Pinch off any flower buds the moment they appear if you want to extend your leaf harvest. Once a plant fully bolts, leaf production drops sharply.
- Thinning: In soil, thin to one plant every 6–9 inches. In hydroponic net pots, one plant per site is standard.
- Reservoir maintenance: In recirculating systems, top off daily and do a full reservoir change every 7–14 days.
Harvesting Dill
Begin harvesting once plants have at least 4–5 mature fronds — typically 40–60 days from seed. Cut stems from the outside of the plant, leaving the central growing tip intact to encourage continued production. Harvest in the morning when essential oil concentration is highest. For the most intense flavor, use fresh-cut dill within a few hours; it loses aroma quickly after cutting.
If you’re growing for seed, allow the plant to bolt fully, then harvest seed heads once they turn brown and begin to dry on the stem.
Frequently Asked Questions
How long does it take to grow dill hydroponically? Most varieties are ready for a first harvest in 40–55 days from seed in a well-managed hydroponic system. Fernleaf tends to be on the faster end; Dukat can take up to 60 days.
Why is my dill bolting so fast? The two most common causes are temperatures above 75°F (24°C) and photoperiods longer than 14–16 hours. Address both simultaneously — reducing one while ignoring the other often isn’t enough. Switching to a bolt-resistant variety like Fernleaf also helps significantly.
Can I grow dill in the same hydroponic system as other herbs? Yes, with some caveats. Dill shares compatible pH and EC ranges with basil, parsley, and cilantro, making them reasonable system-mates. Avoid pairing dill with fennel — they are allelopathic to each other. Also note that dill grows taller than most compact herbs, so plan your canopy height accordingly.
What’s the best pH for growing dill hydroponically? Keep pH between 5.8 and 6.2. Stability within that range matters more than hitting an exact number — swings wider than 0.3 units in 24 hours can trigger nutrient lockout even if your average reading looks correct.
Can dill be grown indoors year-round? Absolutely. With a full-spectrum LED, temperature control below 75°F, and a 14/10 photoperiod, dill can be grown continuously indoors regardless of season. Succession planting every 3–4 weeks ensures a steady supply, since individual plants have a relatively short productive window before bolting.