Quick Answer: Hydroponics for beginners at home is more accessible than most people think. Start with a Deep Water Culture or Kratky system, keep your pH between 5.8–6.2, feed your plants nutrients matched to their growth stage, and you can be harvesting lettuce or herbs within 3–4 weeks — no soil, no garden, no prior experience required.
Getting started with hydroponics for beginners at home can feel overwhelming when you’re staring at a wall of pumps, meters, and nutrient bottles. The fundamentals, though, are simple: give your plants water, nutrients, light, and oxygen in the right balance, and they’ll thrive — often 30–50% faster than they would in soil.
This guide walks you through choosing your first system, dialing in nutrients and pH, picking the right light, and troubleshooting common problems — with specific product recommendations and exact numbers so you can take action today.
What Is Home Hydroponics (and Is It Right for You)?
Hydroponics means growing plants in a nutrient-rich water solution instead of soil. Rather than roots searching through dirt for food, your plants get everything delivered directly to them. At home, that typically means a reservoir of water, some net pots, a growing medium to support the roots, and a light source if you’re growing indoors.
A few numbers that make the case:
- Up to 90% less water than conventional gardening — water is recirculated, not lost to soil
- Year-round growing regardless of climate or season
- No soil-borne pests or diseases to contend with
- Faster harvests and higher yields per square foot
How Much Does a Beginner Setup Cost?
As little or as much as you want to spend. A DIY mason jar Kratky setup runs around $30–50 including nutrients and a basic pH kit. A proper grow tent with an LED and a DWC system lands in the $150–300 range. Full commercial-style kits can push $500+, but you don’t need them to start.
Choosing the Best Hydroponic System for Beginners at Home
Deep Water Culture (DWC): The Top Beginner Choice
In a DWC system, plant roots hang suspended in a reservoir of oxygenated nutrient solution. An air pump and air stone keep the water oxygenated — similar to a fish tank. It’s forgiving, inexpensive to build, and produces fast results with lettuce, herbs, and leafy greens. A basic 5-gallon bucket DWC setup costs under $50 to build from scratch.
Kratky Method: Passive Hydroponics With Zero Electricity
Kratky is DWC without the pump. You fill a container with nutrient solution, suspend your plant above it in a net pot, and leave a small air gap between the water surface and the net pot bottom. As the plant drinks the solution down, that gap expands and fills with oxygen for the roots. No electricity, no moving parts, almost nothing to go wrong. It’s ideal for lettuce and herbs on a countertop.
Wick Systems: Simplest Possible Setup
A wick system uses an absorbent cord — cotton, nylon, or felt — to draw nutrient solution up from a reservoir into the growing medium. There’s no pump, no timer, nothing to plug in. The downside is limited delivery speed. Wicks can’t keep up with thirsty plants, so this method works best for small herbs and microgreens, not fruiting vegetables.
NFT and Ebb & Flow: When You’re Ready to Level Up
Nutrient Film Technique (NFT) channels a thin, continuous stream of nutrient solution over the roots inside sloped tubes or channels. It’s efficient and scalable but requires reliable pumps and careful slope calibration.
Ebb & Flow periodically floods a grow tray with nutrient solution, then drains it back to the reservoir on a timer. It’s versatile and works well for a wider range of crops, but a pump failure can stress plants quickly.
Both are excellent systems — just not ideal as your very first build. Skip aeroponics entirely until you have at least a year of experience.
Which System Should You Start With?
| Your Situation | Recommended System |
|---|---|
| Absolute beginner, minimal budget | Kratky method |
| Beginner who wants faster growth | DWC |
| Ready to expand and experiment | NFT or Ebb & Flow |
Setting Up Your First Home Hydroponic System
Choosing Your Growing Space
A 2×2 ft grow tent is the sweet spot for most beginners — enough space for 4–9 lettuce plants or a solid herb garden, and compact enough to fit in a bedroom corner. A 4×4 ft tent makes sense if you want to grow fruiting crops like tomatoes. No tent? A spare closet or kitchen countertop works fine for Kratky or small DWC setups.
Selecting the Right Growing Medium
Your growing medium anchors the plant and supports root development — it doesn’t provide nutrients.
- Hydroton (expanded clay pebbles): Reusable, excellent drainage, pH neutral. Best all-around choice for DWC.
- Rockwool cubes: Great for germination and cloning; not reusable and requires pre-soaking at pH 5.5.
- Perlite: Lightweight, cheap, good aeration — works well mixed with coco coir.
- Coco coir: Holds moisture well and is organic, but can affect pH if not properly buffered.
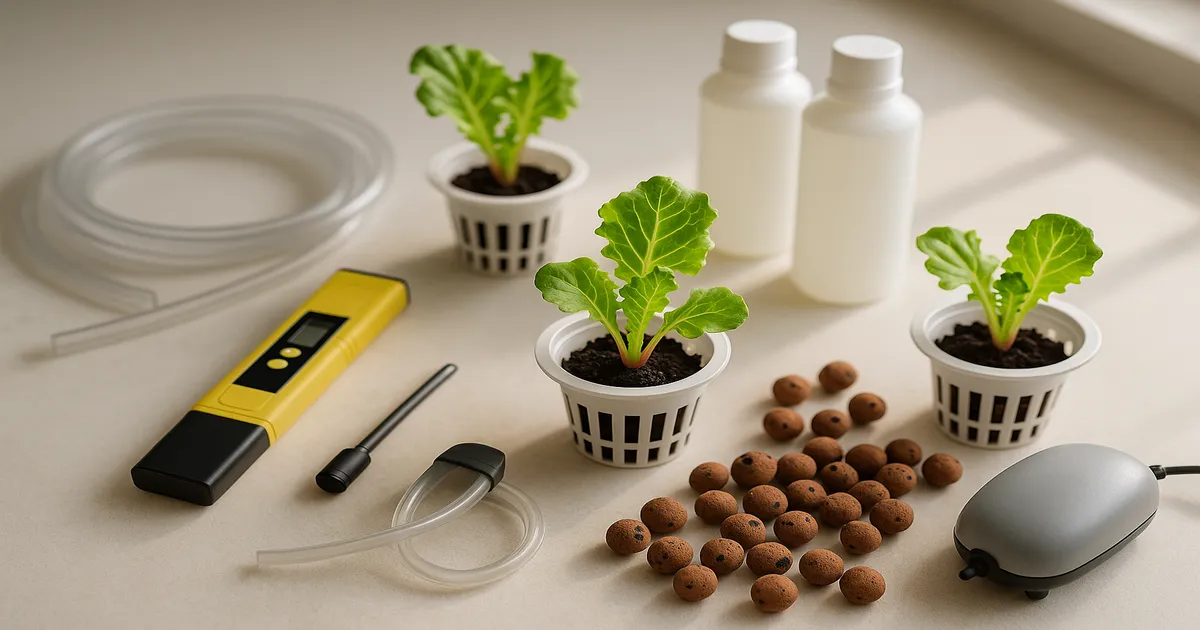
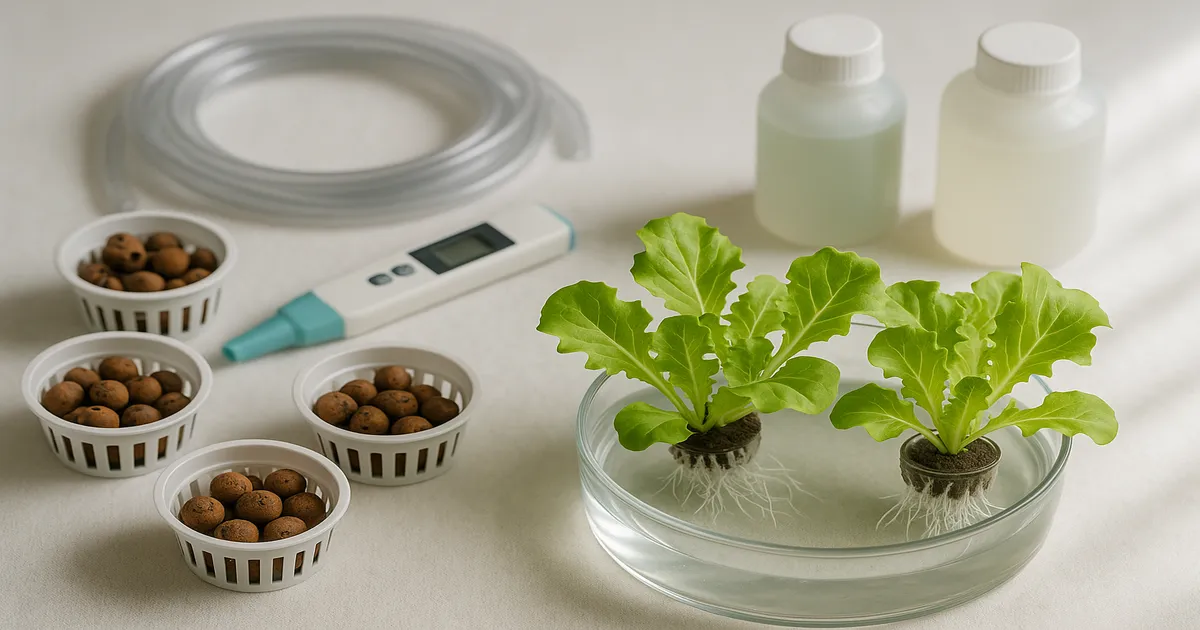
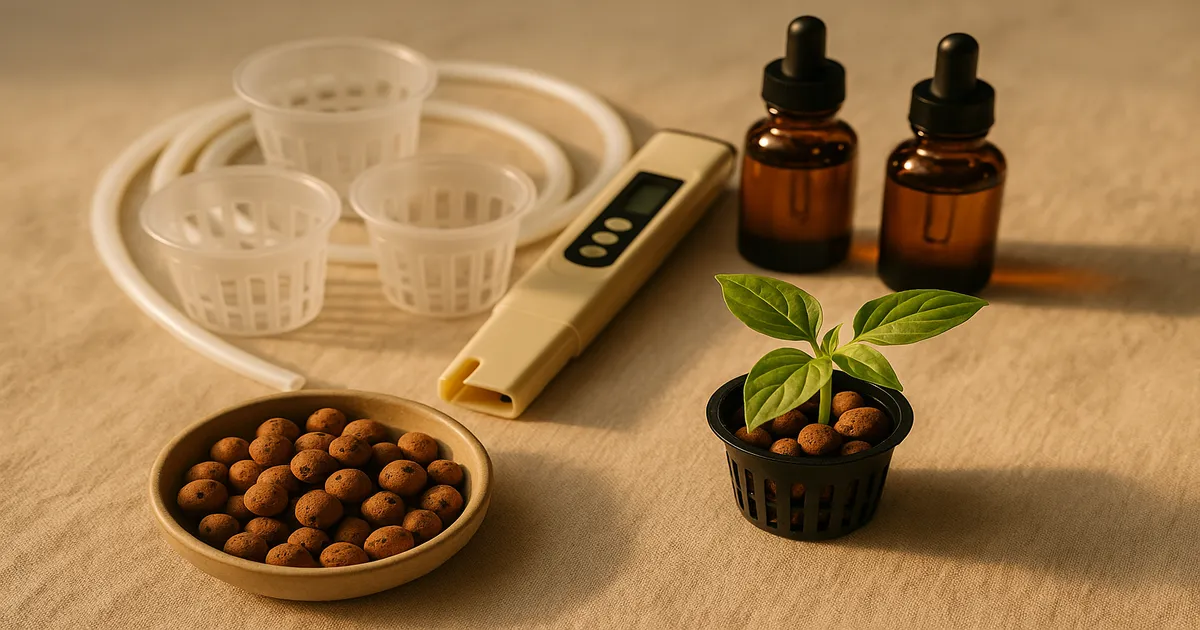
Essential Equipment Checklist
- Opaque reservoir (5-gallon bucket or tote)
- Net pots (2” or 3”)
- Air pump, air stone, and tubing
- pH meter (Apera PH20)
- EC/TDS meter (HM Digital TDS-3)
- pH Up and pH Down solutions
- Hydroponic nutrient solution (General Hydroponics Flora Series)
- LED grow light (Spider Farmer SF-1000)
- Timer for the light
- Hydroton or rockwool as growing medium
Step-by-Step DWC Setup
- Drill net pot holes in the reservoir lid — typically 2” holes spaced evenly.
- Install the air stone at the bottom of the reservoir and run tubing to the air pump outside.
- Mix your nutrient solution — add nutrients to water (never the reverse), then adjust pH to 5.8–6.2.
- Fill the reservoir so the bottom of the net pots just touches the solution.
- Place your seedlings in net pots with hydroton supporting the roots.
- Set up your light on a timer — 16–18 hours on for leafy greens.
- Check pH and water level daily. Top off with plain pH-adjusted water as the level drops.
Keep the reservoir completely light-proof. Any light penetration will trigger algae growth.
Hydroponic Nutrients: Feeding Your Plants the Right Way
Understanding NPK and Growth Stages
The three primary macronutrients — Nitrogen (N), Phosphorus (P), and Potassium (K) — each serve a distinct role. Nitrogen drives leafy vegetative growth. Phosphorus supports root development and flowering. Potassium regulates water movement and overall plant health. During vegetative growth, you want a higher N ratio. As plants transition to flowering and fruiting, shift toward higher P and K.
Don’t overlook secondary nutrients. Calcium (target 150–200 PPM) prevents tip burn in lettuce and blossom end rot in tomatoes. Magnesium (50–75 PPM) deficiency shows up as yellowing between the veins of older leaves. A Cal-Mag supplement is worth having on hand, especially if you’re growing in soft water.
Best Beginner Nutrient Products
General Hydroponics Flora Series is the most widely used 3-part system for good reason. Always add FloraMicro first, then FloraGro, then FloraBloom — always into water, in that order. A standard vegetative ratio is 3:2:1 (Micro:Gro:Bloom) at roughly 5 mL/gallon each.
General Hydroponics MaxiGro/MaxiBloom is a simpler powder system at around $15–25. Use MaxiGro at 7g/gallon for vegetative growth and MaxiBloom at 7g/gallon for flowering.
MasterBlend 4-18-38 is the most cost-effective long-term option. The standard recipe per gallon:
- 2.4g MasterBlend 4-18-38
- 2.4g Calcium Nitrate (15.5-0-0)
- 1.2g Epsom Salt (MgSO₄)
This produces roughly 800–900 PPM (1.6–1.8 EC) — ideal for most vegetables in the vegetative stage.
Water Quality Matters
If your tap water reads above 200 PPM at baseline, those dissolved minerals will interfere with your target EC. Always measure your tap water’s PPM before mixing nutrients so you can account for it, and use reverse osmosis or filtered water when possible.
pH and EC Management: The Keys to Healthy Plants
Why pH Is Critical in Hydroponics
Soil has natural buffering capacity — it resists pH swings. Hydroponic solution has none. When pH drifts outside the 5.5–6.5 range, nutrients become chemically unavailable to your plants even if they’re present in the water. This is called nutrient lockout, and it’s the most common cause of deficiency symptoms in otherwise well-fed plants.
Target pH and EC Ranges by Growth Stage
| Stage | PPM Target | EC Target | pH Range |
|---|---|---|---|
| Seedling/Clone | 100–400 PPM | 0.2–0.8 EC | 5.8–6.2 |
| Vegetative | 800–1,200 PPM | 1.6–2.4 EC | 5.8–6.2 |
| Fruiting/Flowering | 1,200–1,800 PPM | 2.4–3.6 EC | 5.8–6.2 |
| Leafy Greens (full cycle) | 560–840 PPM | 1.1–1.7 EC | 5.8–6.2 |
How to Test and Adjust pH
- Mix your nutrient solution completely before testing.
- Test pH and note the reading.
- Add pH Up or pH Down in small increments — 0.5–1 mL per 5 gallons.
- Stir thoroughly and wait 5 minutes before retesting.
- Repeat until you hit 5.8–6.2.
- Recheck after 24 hours — plants shift pH as they feed.
Don’t chase a single number. A natural oscillation between 5.8 and 6.2 actually improves overall nutrient availability by cycling through the optimal ranges for both micro and macronutrients.
Understanding EC and PPM Readings
EC (Electrical Conductivity) measures dissolved ions in your water — a proxy for nutrient concentration. TDS meters convert EC to PPM using either a 0.5 or 0.7 conversion factor depending on the meter. At 1.0 EC, a 0.5-factor meter reads 500 PPM while a 0.7-factor meter reads 700 PPM. Check your meter’s spec sheet, and make sure you’re using the same factor as anyone you’re comparing notes with.
The Apera PH20 is the best value pH meter for beginners at around $35. For EC, the HM Digital TDS-3 gets the job done at around $15.
Common pH and EC Problems
| Problem | Likely Cause | Fix |
|---|---|---|
| pH rising daily | Plants consuming N and K, leaving water alkaline | Top off with pH-adjusted water; do a weekly partial reservoir change |
| pH dropping rapidly | Algae or microbial activity | Check for light leaks; clean reservoir |
| EC rising (PPM going up) | Plants drinking water faster than nutrients | Top off with plain pH-adjusted water only |
| EC dropping (PPM going down) | Normal nutrient consumption | Add fresh nutrient solution at full strength |
| EC won’t stabilize | High-mineral tap water | Switch to RO or filtered water |
Lighting Your Indoor Hydroponic Garden
How Much Light Does Each Plant Type Need?
| Plant Type | PPFD Target | Photoperiod |
|---|---|---|
| Microgreens | 100–200 µmol/m²/s | 12–16 hrs |
| Lettuce & leafy greens | 150–250 µmol/m²/s | 16–18 hrs |
| Herbs (basil, cilantro) | 200–400 µmol/m²/s | 16–18 hrs |
| Fruiting vegetables | 400–600 µmol/m²/s | 18 hrs veg / 12 hrs flower |
PAR (Photosynthetically Active Radiation) is the 400–700 nm wavelength range plants actually use. PPFD measures how much of that light hits your canopy per second. For most beginners growing herbs and greens, a 3500K full-spectrum LED covers all your needs without requiring spectrum-switching.
Best LED Grow Lights for Beginners
Budget ($30–80):
- Spider Farmer SF-1000 — 100W, covers a 2×2 ft footprint, excellent value
- Mars Hydro TS-600 — 100W, covers 2×2 ft, solid entry-level option
Mid-Range ($80–200):
- Spider Farmer SF-2000 — 200W, covers 2×4 ft, dimmable
- AC Infinity IONBOARD S24 — 200W, excellent build quality with smart controls
Start with your light at the manufacturer’s recommended height — typically 18–24 inches above the canopy — and adjust based on plant response. Bleaching or upward leaf curl means too close; stretching means too far. Always use a timer. Consistent photoperiods are non-negotiable.
Plant Care and Reservoir Management
Daily and Weekly Maintenance Routines
Daily (5 minutes):
- Check pH and adjust if outside 5.8–6.2
- Check EC/PPM
- Top off reservoir with plain pH-adjusted water if the level has dropped
Weekly:
- Full reservoir change every 7–14 days for leafy greens; every 14–21 days for larger plants
- Rinse reservoir walls and air stone to prevent biofilm buildup
- Inspect roots — healthy roots are white or cream-colored; brown, slimy roots indicate root rot
Every Harvest:
- Fully clean and sterilize the reservoir with a diluted hydrogen peroxide solution (3% H₂O₂ at 1–2 mL per liter) before starting a new crop
Recognizing and Fixing Common Problems
Yellowing older leaves usually points to nitrogen deficiency — increase your nutrient concentration or check that pH isn’t locking out N uptake.
Yellowing new leaves with green veins is typically iron deficiency. Check pH first; iron becomes unavailable above pH 6.5.
Brown, slimy roots mean root rot, most often caused by Pythium species. Increase oxygenation, drop reservoir temperature below 72°F (22°C), and consider adding beneficial bacteria such as Hydroguard.
Stunted growth with no visible deficiency often means your EC is too low for the plant’s current stage. Bump it up gradually — no more than 0.2–0.3 EC per adjustment.
Frequently Asked Questions: Hydroponics for Beginners at Home
How long does it take to grow lettuce hydroponically? Most lettuce varieties reach harvest size in 3–4 weeks from transplant in a DWC or Kratky system. Germination adds another 5–7 days, so expect your first full harvest in about 4–5 weeks from seed.
Do I need a grow tent to start hydroponics at home? No. A grow tent helps with light containment, humidity control, and keeping things tidy, but a Kratky jar on a windowsill or under a clip-on LED is a perfectly valid starting point. Add a tent when you’re ready to scale up.
Can I use tap water for hydroponics? Yes, but test it first. If your tap water is above 200 PPM, those dissolved minerals eat into your nutrient budget and can cause imbalances. Water above 7.0 pH will also need significant adjustment. Filtered or reverse osmosis water gives you a cleaner baseline.
What’s the easiest plant to grow hydroponically as a beginner? Lettuce is the classic beginner crop — fast, forgiving, and happy at moderate light and nutrient levels. Basil, spinach, and kale are close runners-up. Avoid tomatoes and peppers until you’re comfortable managing pH and EC through a full fruiting cycle.
How often should I change my nutrient solution? For leafy greens in a small DWC system, change the full reservoir every 7–14 days. For larger plants with longer cycles, every 14–21 days is typical. Always top off between changes with plain pH-adjusted water — not fresh nutrient solution — to avoid salt buildup.