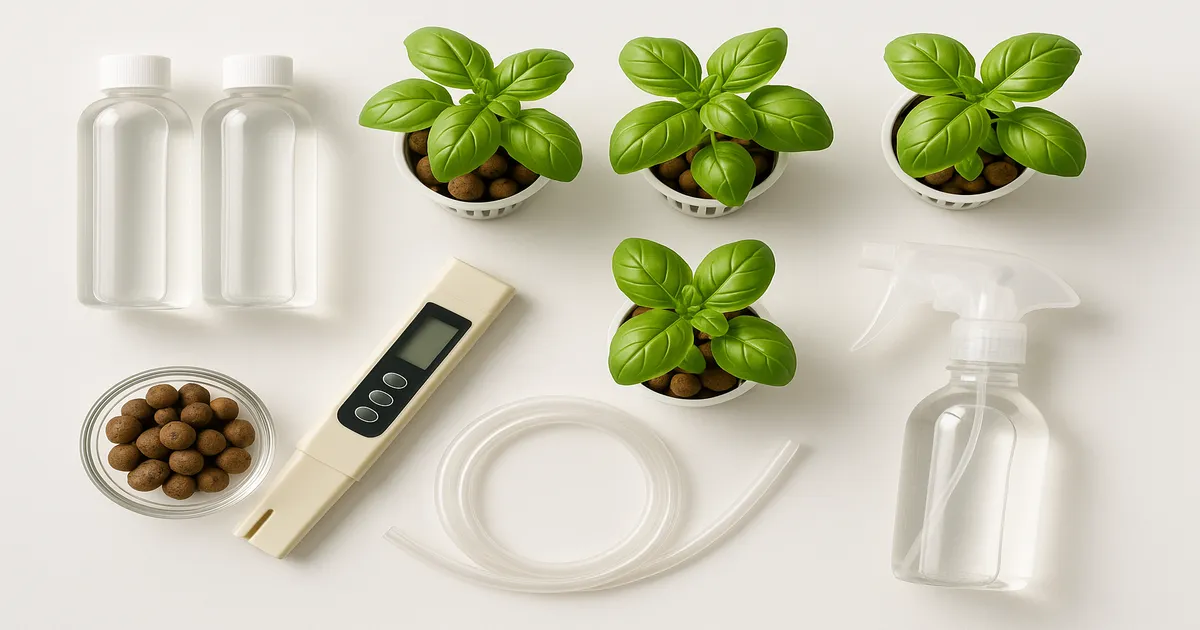
Quick Answer: Basil grows well indoors year-round with 16 hours of full-spectrum light, temperatures of 70–80°F (21–27°C), and pH-adjusted water or soil. In soil, expect your first harvest in 28–42 days; hydroponic setups like Kratky or DWC cut that down to 21–28 days. Regular pruning is the single most important habit for keeping plants productive for 4–6 months.
Growing basil indoors is one of the most rewarding things you can do with a small grow space. Whether you’re learning how to grow basil indoors for the first time or upgrading from a struggling windowsill plant to a proper hydroponic setup, this guide covers everything — from choosing a system and selecting varieties to dialing in your nutrients and troubleshooting problems before they kill your crop.
How to Grow Basil Indoors: Key Requirements at a Glance
| Factor | Soil | Hydroponics |
|---|---|---|
| pH | 6.0–7.0 (optimal 6.5) | 5.5–6.5 (optimal 5.8–6.2) |
| Temperature | 70–80°F (21–27°C) | 70–80°F (21–27°C) |
| Light | 16 hrs / 200–400 PPFD | 16 hrs / 200–400 PPFD |
| First harvest | 28–42 days | 21–28 days |
| Nutrients (established) | N-heavy fertilizer | 900–1,200 PPM (1.8–2.4 EC) |
Soil is forgiving. It buffers pH swings, needs no pumps or reservoirs, and lets you focus on the plant before worrying about equipment. It’s the right starting point for most beginners.
Hydroponics is faster and more productive once you’re comfortable with the basics. A well-maintained DWC or Kratky setup can yield 1–3 oz of fresh basil per week from a single Genovese plant — roughly double what you’d get from soil. The tradeoff is monitoring pH and EC every few days.
Choosing Your Indoor Basil Growing System
Soil: Best for Beginners
Use a well-draining potting mix — not garden soil — in a container with drainage holes. A peat-perlite or coco-perlite blend works well. Water when the top inch feels dry, and feed with a diluted nitrogen-heavy fertilizer every 1–2 weeks.
Difficulty: ⭐ Easy | Best for: First-time growers, low-budget setups
Kratky Method: Passive Hydroponics Made Simple
The Kratky method suspends roots in a static nutrient solution inside an opaque container, with an air gap above the waterline for oxygen. No pump, no electricity, no timer — mix your nutrients, set it, and top off as needed. It’s the easiest entry point into hydroponics.
Difficulty: ⭐ Easy | Best for: Beginners curious about hydroponics without the investment
Deep Water Culture (DWC): Fastest Growth Rates
In DWC, roots hang in an oxygenated reservoir kept moving by an air pump running continuously. This delivers the fastest growth of any method covered here. The main risks are root rot if reservoir temperature climbs above 72°F (22°C) and pH drift, which you’ll need to check every day or two.
Difficulty: ⭐⭐ Intermediate | Best for: Growers who want maximum yield from a small number of plants
NFT, Ebb & Flow, and Aeroponics: Scaling Up
- NFT (Nutrient Film Technique): A thin stream of nutrient solution flows continuously over exposed roots in channels. Highly efficient and popular in commercial basil production. Requires a pump, timer, and some plumbing knowledge. Difficulty: ⭐⭐ Intermediate
- Ebb & Flow: A grow tray floods with nutrient solution on a timer, then drains back to a reservoir. Versatile and scalable. Difficulty: ⭐⭐ Intermediate
- Aeroponics: Roots are misted with nutrient solution rather than submerged. Fastest possible growth, but also the most technically demanding — if the pump fails, plants can crash within hours. Difficulty: ⭐⭐⭐ Advanced
- Wicking systems are the lowest-cost passive option. A wick draws nutrient solution up from a reservoir into the growing medium. Yields are modest, but setup costs almost nothing.
New to this? Start with soil or Kratky. Move to DWC or NFT once you’re comfortable monitoring pH and EC. Aeroponics is for growers who’ve already had success with simpler methods and want to push yields further.
Best Basil Varieties to Grow Indoors
Genovese: The Classic Choice
Genovese is the gold standard for indoor growing. It produces large, aromatic leaves with a classic sweet-clove flavor, performs well in every system, and responds beautifully to regular pruning. It’s the top pick for most home growers.
Compact Varieties for Small Spaces
Spicy Globe tops out at 8–12 inches and stays naturally bushy with minimal pruning. It’s excellent in Kratky jars or small NFT channels. Lemon Basil is similarly compact at 12–15 inches and adds a bright citrus note to dishes and cocktails.
Specialty Varieties Worth Trying
- Thai Basil — Anise-licorice flavor; slightly more heat-tolerant than Genovese; works in any system
- Purple/Dark Opal — Mild flavor with ornamental value; good in soil or DWC
- Cinnamon Basil — Warm, spicy-sweet; great for teas and desserts
- Tulsi (Holy Basil) — Clove-pepper flavor with medicinal uses; prefers soil and grows quite bushy
| Variety | Flavor Profile | Height | Best System | Difficulty |
|---|---|---|---|---|
| Genovese | Sweet, clove-like | 18–24 in | All systems | Easy |
| Lettuce Leaf | Mild, sweet; large leaves | 12–18 in | Soil, DWC | Easy |
| Spicy Globe | Spicy, compact | 8–12 in | Kratky, NFT, soil | Easy |
| Thai Basil | Anise/licorice | 12–18 in | All systems | Easy–Moderate |
| Lemon Basil | Bright citrus | 12–15 in | Kratky, soil | Easy |
| Purple/Dark Opal | Mild, slightly spicy | 12–18 in | Soil, DWC | Easy–Moderate |
| Cinnamon Basil | Warm, spicy-sweet | 18–24 in | Soil, DWC | Moderate |
| Tulsi | Clove-pepper, medicinal | 18–24 in | Soil | Moderate |
All varieties germinate in 5–10 days at 70–80°F (21–27°C).
Lighting Requirements for Indoor Basil
PPFD and DLI Targets
PPFD measures how much light hits your canopy in micromoles per square meter per second (µmol/m²/s). DLI is the total light dose over the full photoperiod.
DLI formula: PPFD × photoperiod hours × 0.0036 = DLI (mol/m²/day)
- Seedlings: 100–200 PPFD; DLI of 6–10
- Vegetative/Harvest: 200–400 PPFD; DLI of 12–20
- Maximum useful: ~600 PPFD — beyond this, basil shows diminishing returns and may bolt
Blue light (400–500 nm) drives compact vegetative growth and essential oil development. Red light (600–700 nm) powers photosynthesis efficiency and biomass. A small amount of far-red can accelerate growth, but avoid UV-heavy spectra — they stress basil and can trigger early bolting.
Photoperiod: 16 Hours On, 8 Hours Off
Sixteen hours of light and eight hours of darkness is the sweet spot for continuous leaf production. You can push to 18 hours, but don’t exceed it — some varieties will start to bolt. A 24-hour light cycle is actively harmful; basil needs that dark period.
Recommended LED Grow Lights
| Setup Scale | Recommended Fixture | Coverage | Cost |
|---|---|---|---|
| Single pot / windowsill | Spider Farmer SF-1000, Mars Hydro TS-600 | 2×2 ft | $60–$100 |
| Small shelf (4–6 plants) | Mars Hydro TS-1000, AC Infinity IONBOARD S22 | 2×2 to 2×3 ft | $100–$180 |
| Medium tent (12–20 plants) | Spider Farmer SF-2000, Mars Hydro TSW-2000 | 2×4 ft | $180–$280 |
| Serious hobbyist | Gavita Pro 1700e LED, Fluence SPYDR | 4×4 ft+ | $800–$1,500+ |
Hang most LED panels 18–24 inches above the canopy and verify with the manufacturer’s PPFD charts. A south-facing window can deliver 2–4 hours of direct sun on a clear day — supplement with an LED to hit 16 total hours, especially in winter.
Nutrient Requirements for How to Grow Basil Indoors Successfully
Why Nitrogen Is King
Basil is a heavy nitrogen feeder. Without enough of it, plants yellow quickly and stall. Aim for an N:P:K ratio of approximately 3:1:2 during vegetative and harvest stages. Avoid bloom formulas — high phosphorus is counterproductive when you want leaves, not flowers.
Potassium matters more than most growers realize. It regulates water uptake, strengthens cell walls, and directly influences the essential oils that give basil its aroma and flavor. Calcium and magnesium are both critical too — calcium prevents tip burn, and magnesium is the core of every chlorophyll molecule.
Preventing Iron and Calcium Deficiencies
Iron deficiency is the most common micronutrient problem in hydroponic basil. It shows up as yellowing between the veins of new leaves — pale or yellow new growth while older leaves stay green. Keep pH in the 5.8–6.2 range to maintain iron solubility, and use chelated iron if the problem persists.
Calcium deficiency causes tip burn — the brown, crispy edges on young leaves that growers often mistake for overfeeding. Ensure your nutrient solution contains adequate calcium and keep pH above 6.0 in hydroponic systems.
EC and PPM Targets by Growth Stage
| Growth Stage | PPM | EC |
|---|---|---|
| Seedling (0–2 weeks) | 350–500 PPM | 0.7–1.0 EC |
| Vegetative (2–5 weeks) | 700–900 PPM | 1.4–1.8 EC |
| Established/Harvest | 900–1,200 PPM | 1.8–2.4 EC |
| Maximum (do not exceed) | 1,400 PPM | 2.8 EC |
Exceeding 1,400 PPM (2.8 EC) reliably causes tip burn and leaf curl. If you’re seeing those symptoms, check your PPM before anything else.
Recommended Nutrient Products
- General Hydroponics Flora Series — 3-part system; highly customizable for each growth stage
- General Hydroponics MaxiGro — one-part powder; 10-5-14 NPK; simple and effective for beginners
- Masterblend 4-18-38 — commercial-grade; requires mixing with calcium nitrate and Epsom salt
- FoxFarm Grow Big — liquid concentrate; well-suited for soil
Simple DIY Nutrient Recipe (Per Gallon of RO or Distilled Water)
- Masterblend 4-18-38: 2.4 g
- Calcium Nitrate (15.5-0-0): 4.8 g
- Epsom Salt (MgSO₄): 1.2 g
This yields approximately 800–1,000 PPM (1.6–2.0 EC). Scale proportionally to hit your target stage.
Managing pH and EC
Ideal pH Ranges
Keep soil pH between 6.0–7.0, targeting 6.5. In hydroponics, aim for 5.5–6.5, with the sweet spot at 5.8–6.2. These ranges aren’t arbitrary — they’re where each essential nutrient is most available to the plant. Drift outside them and deficiency symptoms appear even when nutrients are present in the solution.
How to Measure Accurately
A quality digital pH meter is non-negotiable for hydroponics. The Apera PH20 and Bluelab pH Pen are reliable mid-range options. Calibrate weekly using pH 4.0 and 7.0 buffer solutions — an uncalibrated meter is worse than no meter at all.
For EC, the Bluelab Truncheon and Apera EC60 are solid choices. Check EC every 2–3 days in active hydroponic systems and weekly in soil.
Adjusting pH: Step-by-Step
- Mix nutrients into water first, then test pH.
- To raise pH: add pH Up (potassium hydroxide-based) in 1–2 mL increments per gallon.
- To lower pH: add pH Down (phosphoric acid-based) the same way.
- Stir thoroughly and retest after 15 minutes before adding more.
Small, incremental adjustments prevent overshooting. Never dump a large amount of adjuster in at once.
EC Drift: Top Off vs Refresh
EC rising means your plant is drinking water faster than nutrients — top off with plain pH-adjusted water. EC falling means nutrients are being depleted — top off with fresh solution at your target PPM. Both are normal; the key is checking frequently enough to catch drift early.
Reservoir schedule:
- DWC/NFT: Full change every 7–14 days to prevent salt buildup and pathogen accumulation
- Soil: Flush with plain pH-adjusted water every 4–6 weeks to clear accumulated salts
Planting, Pruning, and Ongoing Care
Seeds vs Cuttings
Sow seeds in moist seedling medium at 70–80°F (21–27°C). Germination takes 5–10 days. Once seedlings have two sets of true leaves, they’re ready to transplant. Starting from cuttings is faster — snip a 4-inch stem below a leaf node, strip the lower leaves, and root it in water or a propagation medium within 7–10 days.
Temperature and Humidity
Basil is a tropical plant and acts like one. Keep temperatures at 70–80°F (21–27°C) consistently. Even brief exposure below 50°F (10°C) causes cell damage and blackening that won’t recover. Above 85°F (29°C), plants become stressed and bolt. Target relative humidity around 50–70%.
How to Prune Basil for Maximum Yield
Pruning is the most important skill for indoor basil. Cut stems just above a leaf node — the plant branches from that point, doubling the number of growing tips. Never remove more than one-third of the plant at a time. Start once plants reach 6–8 inches tall, and prune every 1–2 weeks to stay ahead of bolting.
Preventing Bolting
Bolting — when basil shifts energy from leaves to flower production — is triggered by heat above 85°F (29°C), photoperiods over 18 hours, or general stress. The moment you see a flower spike forming, pinch it off completely. If flowers develop, leaf quality and flavor drop noticeably within days.
Extending Your Harvest: 4–6 Months of Continuous Production
A well-pruned hydroponic Genovese plant can yield 1–3 oz of fresh basil per week for 4–6 months before it becomes woody and unproductive. At that point, take cuttings from the healthiest stems and start a new generation — you’ll have rooted replacements ready in under two weeks.
Frequently Asked Questions
How long does it take to grow basil indoors? In soil, expect your first harvest in 28–42 days from transplant. Hydroponic systems like Kratky and DWC cut that to 21–28 days. Starting from cuttings instead of seed saves another 5–10 days.
Can basil grow indoors without a grow light? It can survive on a bright south-facing windowsill, but it won’t thrive. Most windows deliver 2–4 hours of adequate light on a clear day — far short of the 16 hours basil needs for strong growth. A basic LED panel costing $60–$100 makes a significant difference year-round.
Why is my indoor basil turning yellow? Yellowing on older leaves usually signals nitrogen deficiency or overwatering. Yellowing on new growth between the veins points to iron deficiency, which is almost always caused by pH drifting out of range. Check pH first, then nutrient levels.
How often should I water indoor basil? In soil, water when the top inch feels dry — typically every 2–3 days depending on pot size and temperature. In hydroponics, the system handles moisture continuously; your job is topping off the reservoir and monitoring EC.
What is the best hydroponic system for growing basil indoors? For beginners, Kratky is the easiest — no electricity, no moving parts. For maximum yield, DWC is the top choice. NFT is the preferred method for scaling up to 10+ plants. All three work well for basil; the best system is the one you’ll actually maintain consistently.