Quick Answer: The Kratky method and Click and Grow are both passive, beginner-friendly growing systems — but they work very differently. Kratky is a true DIY hydroponic technique using a nutrient solution and a critical air gap for root oxygenation, while Click and Grow is a proprietary self-watering pod system with nutrients pre-embedded in the growing medium. You can convert a Click and Grow unit into a Kratky system, which is exactly why many people search for both terms together.
If you’ve been researching the Kratky method and Click and Grow in the same breath, you’re not alone. Both systems are quiet, soil-free, and need almost no daily attention — which makes them easy to confuse. But under the hood, they’re genuinely different technologies. Knowing how each one works will help you choose the right fit, or combine them in clever ways.
Kratky Method vs Click and Grow: Key Differences at a Glance
What Is the Kratky Method?
Developed by Dr. Bernard Kratky at the University of Hawaii and published in 2009, the Kratky method is a passive, non-circulating hydroponic technique. Plants sit in net cups above a reservoir of nutrient solution. As roots drink down the liquid, an air gap forms naturally — giving roots the oxygen they need without pumps, air stones, or any electricity at all.
What Is Click and Grow?
Click and Grow is a commercial smart garden system founded in Estonia in 2009. Pre-seeded plant pods slot into a peat-based “Smart Soil” medium that has nutrients built right in. The unit wicks water up to the roots automatically. It’s technically closer to a self-watering container than true hydroponics — there’s no free-standing nutrient solution for roots to grow into.
How They Compare Side by Side
| Feature | Kratky Method | Click and Grow |
|---|---|---|
| Water circulation | None (passive) | None (wicking) |
| Growing medium | Rockwool or hydroton in net cups | Proprietary peat-based pods |
| Nutrient delivery | Pre-mixed liquid solution | Embedded in pod medium |
| Air gap required | Yes — critical | No |
| Electricity needed | No (without lights) | Yes (built-in LED) |
| Customization | Very high | Low (closed ecosystem) |
| Scalability | Mason jars to 27-gallon totes | Limited to pod count per model |
How Each System Works
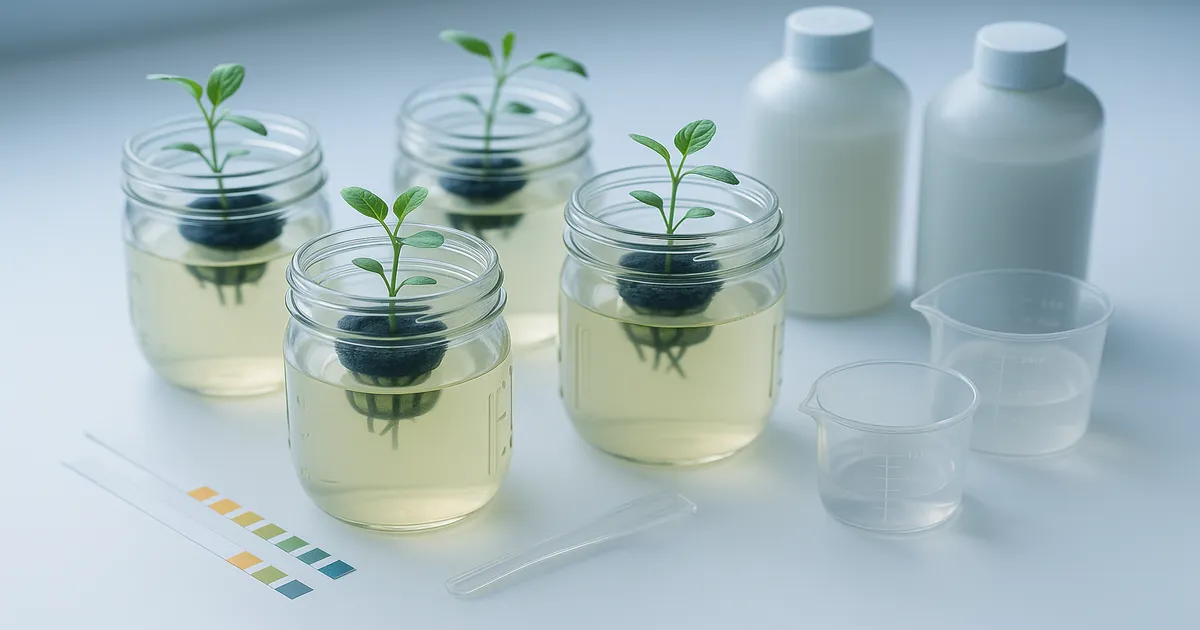
The Kratky Method, Step by Step
Fill a dark container with nutrient solution, leaving a small gap between the water surface and the bottom of your net cup. The plant’s roots reach down into the solution. As they drink, the liquid level drops and the air gap widens. The upper portion of the roots stays moist and gets oxygen from that gap; the lower portion stays submerged for water and nutrients. No pump required — ever.
Click and Grow: Smart Soil and Pod System
Click and Grow uses a controlled-release nutrient matrix baked into each pod. Water goes into the reservoir beneath the pods, and the Smart Soil wicks moisture upward to the roots. pH buffering is handled passively by the medium, targeting roughly 5.5–6.5. You fill the tank with tap water and let the system do the rest.
The Air Gap: Why Kratky Needs It and Click and Grow Does Not
In Kratky, the air gap is everything. Without it, roots drown from lack of oxygen. Click and Grow sidesteps this entirely because the porous peat structure of the pod naturally aerates the root zone through wicking — no gap management needed. This is the single most important mechanical difference between the two systems.
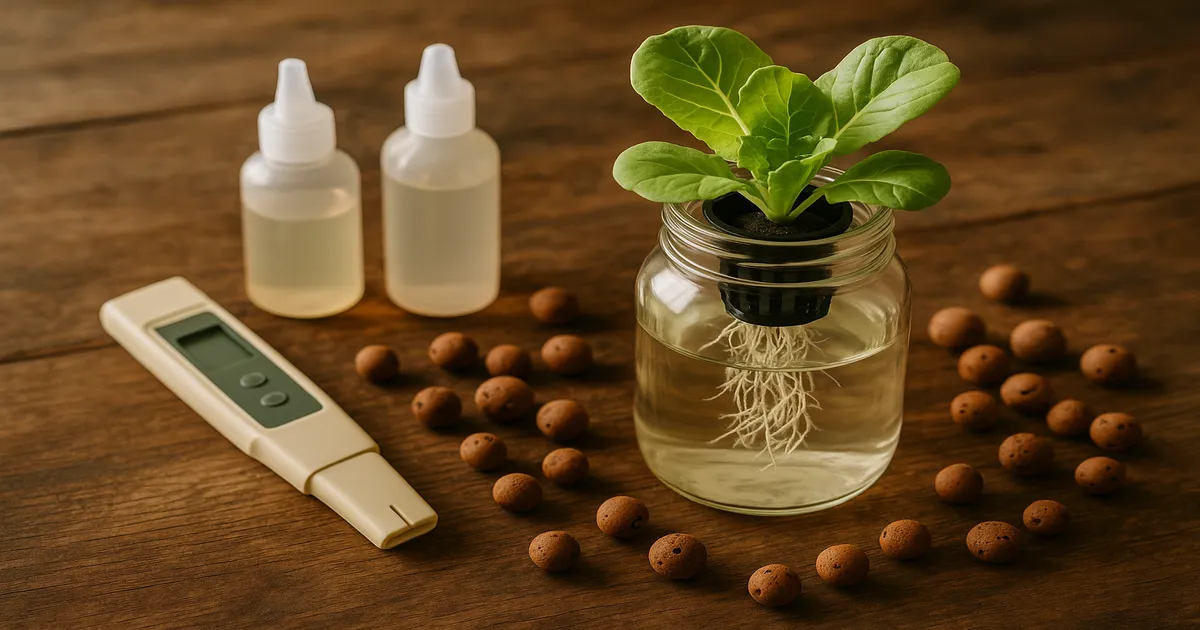
Kratky System Variations
- Single-jar Kratky — A mason jar or wide-mouth quart/half-gallon jar; ideal for herbs and one lettuce head
- Tote/bin Kratky — A 5–27 gallon storage tote; supports larger plants like tomatoes, peppers, and cucumbers
- Multi-site Kratky — PVC pipes or troughs with multiple net cup holes; great for high-yield lettuce production
- Hybrid Kratky — Adds an intermittent air pump for larger plants or warm climates where dissolved oxygen drops
Setting Up Each System
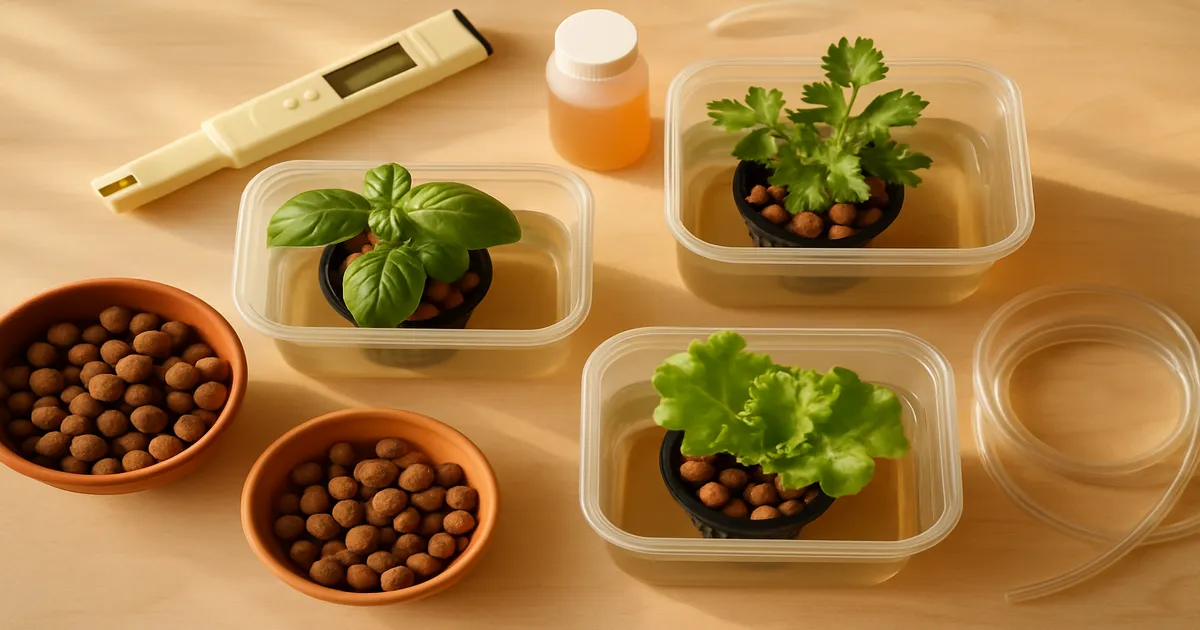
What You Need for a Kratky Setup
The materials list is short and inexpensive:
- Dark-colored container (to block light and prevent algae)
- Net cups (2-inch for herbs and lettuce, 3-inch for larger plants)
- Growing medium — rockwool cubes or hydroton clay pebbles
- Hydroponic nutrient solution
- Digital pH meter (Apera PH20)
- Digital TDS/EC meter
Total startup cost for a single-jar Kratky: under $30 if you already have mason jars.
Setting Up Click and Grow Out of the Box
Click and Grow is about as plug-and-play as growing gets. Drop the pre-seeded pod into its slot, fill the reservoir to the marked line with tap water, plug it in, and the built-in LED kicks on automatically. The Smart Garden 9 is the most popular home model. The Smart Garden 27 suits classrooms or serious herb production, and the Wall Farm scales up to 51 pods in a modular vertical panel.
How to Convert a Click and Grow Into a Kratky System
This is the hack many advanced users love. Here’s how to do it:
- Remove the proprietary pod and discard or compost the spent growing medium
- Cut a rockwool cube to fit snugly in the pod slot, or use a small net cup packed with hydroton
- Germinate your seeds in the rockwool as you normally would for Kratky
- Mix a dilute nutrient solution — aim for 400–600 PPM (0.8–1.2 EC) at pH 5.8–6.2
- Fill the Click and Grow reservoir with your nutrient solution instead of plain water
- Monitor pH and EC every 2–3 days initially, then weekly once the plant is established
The Click and Grow reservoir is shallow, so you’ll top off more frequently than with a tote. But it works, and you gain full control over nutrient ratios.
Cost Comparison
A basic single-jar Kratky setup runs $20–40 in startup costs. A multi-site tote setup might reach $80–120 with a decent LED. The Click and Grow Smart Garden 9 retails around $100–130, plus ongoing pod costs of roughly $4–8 per pod. Over time, DIY Kratky is significantly cheaper — especially once you’re buying nutrients in bulk.
Nutrients: Kratky Solution vs Click and Grow Pods
Kratky Nutrient Targets by Growth Stage
Keep your Kratky solution at pH 5.8–6.2 for most crops. EC and PPM targets shift with growth stage:
| Growth Stage | PPM | EC |
|---|---|---|
| Seedling | 100–350 | 0.2–0.7 |
| Early vegetative | 400–600 | 0.8–1.2 |
| Full vegetative (herbs/lettuce) | 600–900 | 1.2–1.8 |
| Fruiting/flowering | 900–1,400 | 1.8–2.8 |
| Heavy fruiting (tomatoes) | 1,200–1,600 | 2.4–3.2 |
Best Nutrients for the Kratky Method
- GH Flora Series (3-part) — Most flexible; dial in exact ratios for each growth stage. Vegetative mix: 5 mL/gal Micro + 5 mL/gal Grow + 2 mL/gal Bloom.
- GH MaxiGro / MaxiBloom — Dry concentrate, beginner-friendly, budget-conscious. MaxiGro at 7–10 g/gal hits roughly 700–900 PPM (1.4–1.8 EC).
- MasterBlend 4-18-38 (3-part dry) — Professional-grade and extremely cost-effective. Standard recipe: 2.4 g/gal MasterBlend + 2.4 g/gal Calcium Nitrate + 1.2 g/gal Epsom Salt → roughly 800–900 PPM (1.6–1.8 EC).
- Dyna-Gro Grow — Single-bottle complete formula; great for beginners who want simplicity. Mix at 5–10 mL/gal for 500–900 PPM (1.0–1.8 EC).
How Click and Grow Handles Nutrients
Click and Grow embeds a controlled-release nutrient matrix directly into each pod — nothing to mix, measure, or monitor. The medium also passively buffers pH. For a complete beginner who just wants fresh basil on the kitchen counter, this is genuinely hard to beat.
The trade-off is control. You can’t adjust nitrogen ratios for a heavy-fruiting plant, boost calcium to prevent blossom end rot, or dial back nutrients if you notice tip burn. You’re locked into what the pod manufacturer decided your plant needs. For casual herb growing, that’s fine. For serious production, it’s a real ceiling.
pH and EC Management
Monitoring a Kratky Reservoir
Check your reservoir every 2–3 days during the first week, then weekly once the plant is established. Always recheck within 24 hours after any top-off or nutrient addition.
One common beginner mistake: plants consume water faster than nutrients, so EC gradually climbs over time. If EC rises more than 0.3–0.5 above your target, dilute with pH-adjusted plain water. If it climbs above 1.5× your target, do a 50% reservoir change with fresh solution.
Common pH Problems and Fixes
| Situation | Effect on pH | Fix |
|---|---|---|
| Active plant growth | Rises (nitrate uptake) | Add small dose of pH Down |
| Low reservoir level | Swings either direction | Top off with pH-adjusted water |
| Algae growth | Rises sharply | Block all light from reservoir |
| High-alkalinity tap water | Drifts upward | Use RO or filtered water |
| Warm water temps (above 72°F) | Instability increases | Keep solution below 72°F (22°C) |
Always adjust nutrients first, then pH. Adding nutrients after you’ve set pH will shift it again.
Do You Need to Monitor pH in a Click and Grow?
For standard pod use, no — the Smart Soil handles it. If you’ve converted your unit to a Kratky-style setup with liquid nutrients, follow the same monitoring schedule as a regular Kratky system.
Lighting
Kratky Lighting Options
A south-facing window with 4–6 hours of direct sun can work for herbs and lettuce, but you’ll get leggier, slower plants compared to a dedicated grow light. A full-spectrum LED is the single upgrade that makes the biggest difference in yield.
PPFD and photoperiod targets for common crops:
| Crop | PPFD (µmol/m²/s) | Photoperiod |
|---|---|---|
| Microgreens | 100–200 | 18 hrs on |
| Lettuce/spinach | 150–250 | 16–18 hrs on |
| Herbs (basil, mint) | 200–400 | 16–18 hrs on |
| Fruiting (tomatoes, peppers) | 400–600+ | 12–16 hrs on |
Recommended grow lights for Kratky:
- Spider Farmer SF-1000 (~$100) — Solid choice for a 2×2 ft countertop setup
- Mars Hydro TS-1000 (~$100) — Similar coverage, popular with beginners
- HLG 100 V2 (~$150) — Quantum board design, excellent uniformity, runs cool
- Barrina T5 LED strips (~$30–50) — Perfect for mason jar Kratky on a countertop
Click and Grow Built-In LED Performance
The Smart Garden 3 and 9 each run roughly 10W per lamp arm, delivering approximately 200–300 PPFD at pod level. The default photoperiod is 16 hours on / 8 hours off (fixed on standard models; adjustable via app on the 9 PRO). You can’t raise the light bar for taller plants or swap in a brighter fixture.
For leafy greens, the built-in light is adequate. For fruiting crops, it simply isn’t enough — a DIY Kratky setup with a proper grow light will outperform it significantly.
Best Plants for Each System
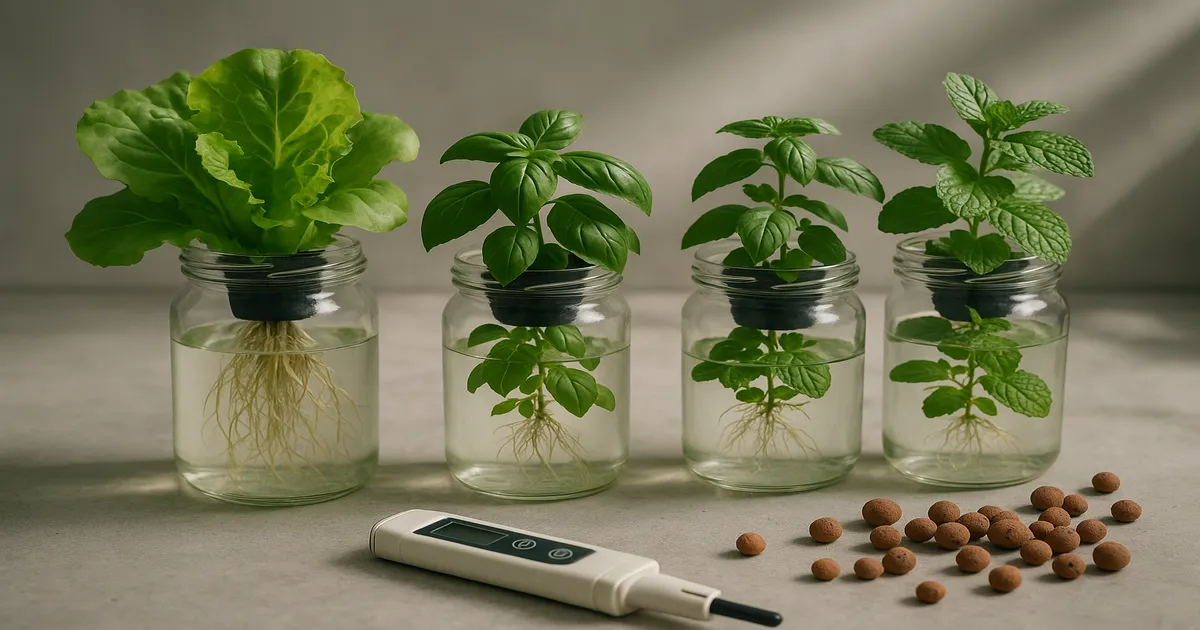
Top Kratky Crops
Kratky shines with leafy greens. Butterhead lettuce is the classic starter crop — harvest in 30–45 days at pH 5.8–6.2 and 600–800 PPM (1.2–1.6 EC). Loose-leaf varieties like Red Sails or Black Seeded Simpson are ready in 25–35 days and support cut-and-come-again harvesting.
Other reliable performers:
- Spinach — 30–40 days; prefers cooler temps, 60–70°F (15–21°C)
- Arugula — 25–35 days; fast and punchy
- Kale — 40–60 days; pH 5.8–6.5, 800–1,200 PPM (1.6–2.4 EC)
- Bok choy — 30–45 days; excellent results in tote setups
- Basil — 3–4 weeks to first harvest; needs warmth and strong light
- Mint — nearly foolproof; give it its own container or it will take over
Tomatoes, peppers, and cucumbers are all achievable in Kratky, but they need a larger setup. Use a 5-gallon minimum (10–27 gallon preferred) dark tote, bump nutrients to 900–1,600 PPM (1.8–3.2 EC), and provide 400–600+ PPFD of light. A hybrid Kratky with an intermittent air pump helps maintain dissolved oxygen at higher temperatures.
What Can You Grow in Click and Grow?
Click and Grow’s pod catalog covers herbs (basil, mint, thyme, cilantro), lettuce varieties, edible flowers, and mini tomatoes. The range is decent, but you’re limited to what pods are available for purchase. You can’t decide to grow bok choy or a pepper variety that isn’t in their catalog.
Basil, butterhead lettuce, mint, and most common herbs perform well in both systems. These crops have modest light and nutrient demands that either setup can meet comfortably.
Troubleshooting Common Problems
Root Rot in Kratky
Root rot is almost always caused by warm reservoir temperatures. Keep your nutrient solution below 72°F (22°C) — above 75°F (24°C), dissolved oxygen drops sharply and Pythium thrives. Use a dark-colored container to block light, and add Hydroguard (Bacillus amyloliquefaciens) to the reservoir as a biological defense. In warm climates, a small aquarium chiller is worth the investment.
Algae in the Reservoir
Green slime means light is getting in. Cover every inch of the container with black tape, paint, or an opaque lid. Dark-colored storage totes prevent the problem from the start. Algae competes with your plants for nutrients and drives pH upward — it’s much easier to prevent than to fix.
Tip Burn on Lettuce
Tip burn is a calcium deficiency caused by poor airflow around the leaves, not a lack of calcium in the solution. Improve air circulation with a small fan, and avoid letting humidity stagnate around the canopy. In Click and Grow, tip burn is harder to address because you can’t adjust the nutrient profile.
Click and Grow Pod Not Germinating
If a pod fails to sprout within 2 weeks, the most common causes are low temperature (below 65°F/18°C) or insufficient light reaching the pod surface. Move the unit to a warmer spot and ensure the LED arm is properly seated. Click and Grow offers replacement pods for germination failures — check their support page.
FAQ: Kratky Method and Click and Grow
Can I use Click and Grow pods in a Kratky setup? Not directly. Click and Grow pods are designed to wick water upward through peat medium — they aren’t built to suspend over a nutrient reservoir. You can, however, remove the pod medium and replace it with rockwool or hydroton to run a true Kratky setup in the Click and Grow housing, as described in the conversion steps above.
Is the Kratky method really completely passive? Yes, for small crops like lettuce and herbs. You fill the reservoir once, and the plant manages its own air gap as it drinks. Larger plants — tomatoes, cucumbers — may need a top-off or two, and a hybrid Kratky with an occasional air pump helps in warm conditions. But for a countertop herb garden, it’s genuinely set-and-forget.
Which system is cheaper long-term? DIY Kratky wins easily. Once you’ve bought a pH meter, TDS meter, and a bag of nutrients, the per-harvest cost drops to almost nothing. Click and Grow pods run $4–8 each and must be repurchased every harvest. Over a year of growing, the cost difference is substantial.
Can you grow fruiting vegetables in Click and Grow? Click and Grow sells mini tomato and pepper pods, and they do produce fruit — but yields are modest. The built-in light doesn’t deliver enough PPFD for heavy fruiting, and you can’t boost nutrients to support a large plant. For serious fruiting crops, a DIY Kratky setup with a proper grow light is a much better choice.
What’s the biggest mistake beginners make with the Kratky method? Not keeping the reservoir dark. Any light penetrating the container will trigger algae growth, which competes for nutrients and destabilizes pH. Use a solid black or opaque container from day one, and tape over any gaps around net cups. It’s the simplest fix and the one most beginners skip.