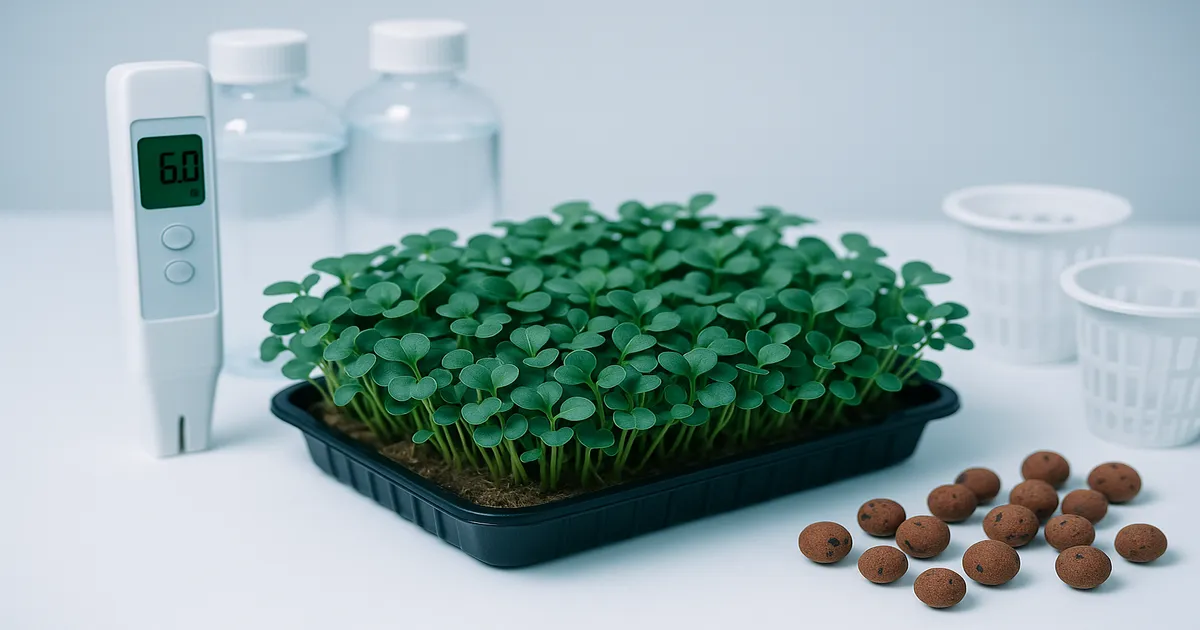
Quick Answer: Broccoli microgreens grow hydroponically in just 7–14 days using a shallow tray with a wicking mat — no soil required. Maintain pH 5.8–6.2, keep EC between 0–150 PPM during germination and 500–800 PPM at the cotyledon stage, and harvest when cotyledons are fully open to capture peak sulforaphane levels — up to 100x higher than mature broccoli.
If you want to grow broccoli microgreens hydroponically, you’re looking at one of the fastest and most nutritionally rewarding crops you can produce indoors. The setup is minimal: a pair of 10×20-inch trays, a grow mat, and a dilute nutrient solution are all you really need. This guide walks you through every step — from choosing your system and seeds to dialing in pH, EC, lighting, and harvest timing.
How to Grow Broccoli Microgreens Hydroponically: Key Parameters
What Are Broccoli Microgreens?
Broccoli microgreens (Brassica oleracea var. italica) are harvested at the cotyledon or first true-leaf stage, typically 7–14 days after germination. Research published in the Journal of Agricultural and Food Chemistry confirmed they contain 10–100x more sulforaphane than mature broccoli heads. Sulforaphane — a potent antioxidant — peaks right at the cotyledon stage, so harvesting early is both practical and nutritionally optimal.
Hydroponics offers real advantages here. There’s no soil contamination on roots or leaves, which restaurants and retailers strongly prefer. Germination is faster because roots access water and dissolved oxygen more efficiently. Stacking trays vertically is also much easier without a growing medium to manage.
Key Numbers at a Glance
| Parameter | Target Range |
|---|---|
| pH | 5.8–6.2 |
| EC (germination) | 0–0.3 EC (0–150 PPM) |
| EC (cotyledon stage) | 1.0–1.6 EC (500–800 PPM) |
| Solution temperature | 65–72°F (18–22°C) |
| Light hours per day | 12–16 hours |
| Harvest window | Day 7–14 (cotyledon stage) |
Choosing the Right Hydroponic System
Shallow Tray with Grow Mat: The Industry Standard
Most commercial microgreen operations use this method. A solid-bottom tray holds the nutrient solution; a mesh or perforated tray sits inside it holding the grow mat and seeds. Roots grow downward through the mesh into the solution below — a passive bottom-watering system that keeps the canopy dry and dramatically reduces mold risk.
The standard setup uses 10×20-inch trays, often called “1020 trays.” You’ll need one solid tray and one mesh insert per grow. Bootstrap Farmer makes durable versions that hold up through hundreds of cycles without warping.
Kratky Method: Best for Beginners
The Kratky method uses a sealed reservoir with a small air gap between the solution surface and the net pot or mat. It requires zero pumps or timers. Fill the reservoir once, let the roots reach down as the solution level drops, and harvest before you ever need to refill. It’s the lowest-barrier entry point for anyone new to hydroponics.
Flood and Drain: Scaling Up
If you’re running dozens of trays, an ebb-and-flow table automates the watering cycle and keeps every tray consistently fed. A pump fills the table to a set depth on a timer, then drains back into the reservoir. More infrastructure upfront, but the consistency pays off at scale.
Systems to Avoid
NFT channels deliver a thin film of nutrient solution along a sloped surface — fine for lettuce and herbs, but they offer no support for a flat grow mat. Aeroponics mists bare roots, which is overkill for microgreens: the roots are shallow and dry out quickly without a medium to anchor them. Save those systems for larger crops.
Equipment and Supplies
Trays and Grow Mats
The 10×20-inch tray pair is the building block of any microgreen operation. You need one solid-bottom tray (the reservoir) and one mesh or perforated tray (the seed bed). Heavy-duty versions are worth the slight premium — thin trays warp, which creates uneven bottom-watering and inconsistent results.
For the grow mat itself, skip loose media like perlite or clay pellets. The best options for hydroponic broccoli microgreens are:
- Jute fiber mat — biodegradable, affordable, excellent wicking
- Hemp mat — similar to jute, slightly more durable, food-safe
- BioStrate felt — premium option used by many commercial growers; holds moisture evenly
- Coco coir pad — pre-cut pads that fit 10×20 trays; pH-neutral and rehydrates quickly
All are pH-neutral and food-safe, which matters since the mat is in direct contact with your edible crop. (Bootstrap Farmer BioStrate Felt Grow Mats)
Seeds
Use untreated, non-pelleted broccoli seeds. Pelleted seeds have a coating that can interfere with germination in hydroponic systems. A typical seeding density for a 10×20 tray is 1–1.5 oz (28–42g). Higher density can increase yield but also raises mold risk if airflow is poor.
Source seeds from suppliers who sell microgreen-grade stock with germination rates above 90%. True Leaf Market, Johnny’s Selected Seeds, and Mumm’s Sprouting Seeds are all reliable.
Monitoring Tools
Three tools are non-negotiable for consistent results:
- pH meter: The Apera PH20 or Bluelab pH Pen are accurate, easy to calibrate, and durable. Avoid pH strips — their ±0.5 accuracy isn’t tight enough.
- EC/TDS meter: The Apera EC60 or HM Digital COM-100 give reliable readings in the range you need.
- Thermometer: A simple aquarium thermometer clipped to your reservoir works perfectly.
Growers running multiple trays may prefer a combination meter like the Apera PC60, which measures pH, EC, and temperature simultaneously.
Step-by-Step: How to Grow Broccoli Microgreens Hydroponically
Step 1 — Pre-Soak Seeds (Optional but Beneficial)
Soak broccoli seeds in plain water for 4–8 hours before seeding. This softens the seed coat, speeds germination by 12–24 hours, and improves uniformity. Drain and rinse before spreading — seeds sitting in standing water will rot.
Step 2 — Prepare Your Tray and Mat
Cut your grow mat to fit the perforated tray insert. Moisten it thoroughly with plain water or a very dilute solution (no more than 150 PPM). The mat should be damp throughout but not dripping — squeeze it if needed. Place it in the mesh tray and add about ½ inch of plain water to the solid bottom tray.
Step 3 — Seed and Begin the Blackout Phase (Days 1–4)
Spread seeds evenly across the mat surface. A single layer is ideal — seeds touching is fine, but large clumps cause uneven germination and mold. Mist lightly, then place an empty solid tray on top and weight it down with something heavy (a full water jug or a brick works well).
The weight creates resistance that encourages strong stem development. Seedlings push against it and come out stocky rather than spindly. Keep the setup in darkness at 65–72°F (18–22°C) for 3–4 days. Check the bottom tray daily and top off with plain water if it runs dry.
Step 4 — Introduce Light (Days 4–7)
Once seeds have germinated and are lifting the weight tray, uncover them. Most broccoli microgreens will be 1–2 inches tall with pale yellow cotyledons at this point. Move the tray under your grow lights and they’ll green up within 24–48 hours as chlorophyll production kicks in. Continue bottom-watering with plain water for the first day or two — roots are just reaching the solution and seeds still have endosperm reserves.
Step 5 — Active Growth and Nutrient Introduction (Days 5–14)
From day 5 onward, switch to a dilute nutrient solution at 300–500 PPM (0.6–1.0 EC). Replenish the bottom tray when it runs low. As cotyledons fully expand (days 8–14), you can bump EC to 500–800 PPM (1.0–1.6 EC) if growth looks slow or pale. Check pH every 1–2 days and keep solution temperature at 65–72°F.
Step 6 — Harvest at Peak Sulforaphane Content
Harvest when cotyledons are fully open and the first true leaves are just beginning to show — typically day 7–14 depending on temperature and light. This is when sulforaphane content is highest, per Johns Hopkins research on glucosinolate accumulation.
Cut just above the mat with clean scissors or a sharp knife. Rinse gently if needed, spin dry, and refrigerate. Fresh broccoli microgreens keep 5–7 days at 34–38°F (1–3°C).
Nutrient Solutions
Why Less Is More
Seeds contain stored nutrients in the endosperm that fuel the first 4–6 days of growth. During germination and the blackout phase, plain water is all you need. Adding nutrients too early — or at too high a concentration — is one of the most common beginner mistakes, leading to tip burn, bitter flavor, and stunted growth.
Recommended Nutrient Solutions and Mixing Ratios
| Product | Mix Rate | Target PPM / EC |
|---|---|---|
| GH Flora Series | 2.5 mL/gal FloraMicro + 2.5 mL/gal FloraGro + 1.25 mL/gal FloraBloom | ~500–600 PPM / 1.0–1.2 EC |
| GH MaxiGro | 3–4g per gallon | ~500 PPM / 1.0 EC |
| Botanicare Pure Blend Pro Grow | 5 mL/gal | ~400–500 PPM / 0.8–1.0 EC |
| Masterblend 4-18-38 system | 1.2g Masterblend + 0.6g calcium nitrate + 0.6g Epsom salt per gallon (use at 0.5–0.75x for microgreens) | ~600 PPM / 1.2 EC |
For a simple DIY option, many commercial growers use a 3-salt formula: 0.5g/gal calcium nitrate + 0.3g/gal potassium nitrate + 0.2g/gal magnesium sulfate. This hits roughly 400–500 PPM (0.8–1.0 EC) with the right N-P-K-Ca-Mg ratios for short-cycle crops.
Boosting Sulforaphane with Sulfur
Sulfur is the direct precursor to glucosinolates, which your body converts to sulforaphane. Research from the University of Illinois (2019) showed that sulfate-enriched nutrient solutions significantly increase glucosinolate content in broccoli microgreens. The practical takeaway: add 0.5–1.0g/gal of Epsom salt to your nutrient solution during the final 3–4 days before harvest for a meaningful nutritional boost.
Managing pH and EC
Target pH and Why It Matters
At pH 5.8–6.2, nitrogen, phosphorus, potassium, calcium, and iron are all maximally available. Drift above 6.5 and you’ll see iron and manganese lockout — the interveinal yellowing that looks like a deficiency but is really a chemistry problem. Drop below 5.5 and calcium and magnesium become unavailable, stressing root tips.
To adjust, add pH Up (potassium hydroxide) or pH Down (phosphoric acid) in 0.5–1 mL increments per gallon, stir thoroughly, wait 5 minutes, and retest. Always mix your full nutrient volume first, then wait 5–10 minutes before testing — pH shifts naturally after nutrients dissolve. Target pH 6.0 as your set point; this leaves room for natural drift in either direction.
EC by Growth Stage
| Growth Stage | Days | PPM | EC |
|---|---|---|---|
| Germination / Blackout | 1–4 | 0–150 | 0–0.3 |
| Early Cotyledon | 5–7 | 300–500 | 0.6–1.0 |
| Full Cotyledon | 8–14 | 500–800 | 1.0–1.6 |
Never exceed 1,200 PPM (2.4 EC) with broccoli microgreens. Osmotic stress at high EC causes tip burn and bitter flavor faster than almost any other problem.
Water Quality and Solution Management
Start with RO or filtered water below 150 PPM baseline — high-mineral tap water can push your EC above target before you’ve added a single nutrient. Do a complete solution change every 5–7 days rather than just topping off; continuous top-offs allow mineral imbalances to accumulate. Keep solution temperature at 65–72°F (18–22°C). Above 75°F (24°C), dissolved oxygen drops and microbial activity spikes, destabilizing pH and risking root rot.
Lighting
The Blackout Phase
During days 1–4, your microgreens need no light at all. Darkness combined with the weighted tray encourages seedlings to push upward against resistance, building strong stems before they ever see a photon. Introducing light too early results in weaker, leggier plants.
Spectrum, Intensity, and Duration
Once uncovered, broccoli microgreens benefit from blue light (400–500 nm) for chlorophyll synthesis and compact cotyledon expansion, and red light (600–700 nm) for biomass accumulation. A full-spectrum white LED covers both ranges without needing separate fixtures.
Intensity-wise, 200–400 PPFD at canopy level is sufficient. A 12–16 hour photoperiod provides more than enough daily light integral for rapid cotyledon development. Running lights longer than 16 hours per day doesn’t meaningfully increase growth and wastes electricity.
For fixtures, full-spectrum LED panels are energy-efficient and ideal for stacked vertical grows — position them 6–12 inches above the canopy depending on wattage. (Spider Farmer SF-1000 LED Grow Light) T5 fluorescents are a proven, affordable alternative; position them 2–4 inches above the canopy. Avoid HPS and MH fixtures — they produce far too much heat for close-range use with shallow trays and offer no efficiency advantage at this scale.
Frequently Asked Questions
Do broccoli microgreens need nutrients to grow hydroponically? Not right away. Seeds contain enough stored energy to fuel the first 4–6 days of growth. Start with plain water during germination and the blackout phase, then introduce a dilute nutrient solution (300–500 PPM) once cotyledons begin to develop.
What’s the best grow mat for hydroponic broccoli microgreens? BioStrate felt and hemp mats are the top choices for consistent moisture retention and food safety. Jute mats are a more affordable option that also performs well. Avoid loose media like perlite — they don’t wick effectively in shallow trays.
Why are my broccoli microgreens turning yellow? Yellowing during the blackout phase is normal — cotyledons are pale until they’re exposed to light. If yellowing continues after 24–48 hours under lights, check your pH first (iron lockout above pH 6.5 is the most common cause), then verify your EC isn’t too low.
Can I reuse my grow mat or tray after harvest? Trays can be sanitized with a 3% hydrogen peroxide solution and reused many times. Grow mats are generally single-use — roots embed deeply into the fibers, making cleaning impractical and increasing contamination risk.
How do I increase sulforaphane content in my microgreens? Harvest at the cotyledon stage before the first true leaves fully develop. Add 0.5–1.0g/gal of Epsom salt to your nutrient solution during the final 3–4 days before harvest to boost sulfur availability, which directly supports glucosinolate synthesis.